
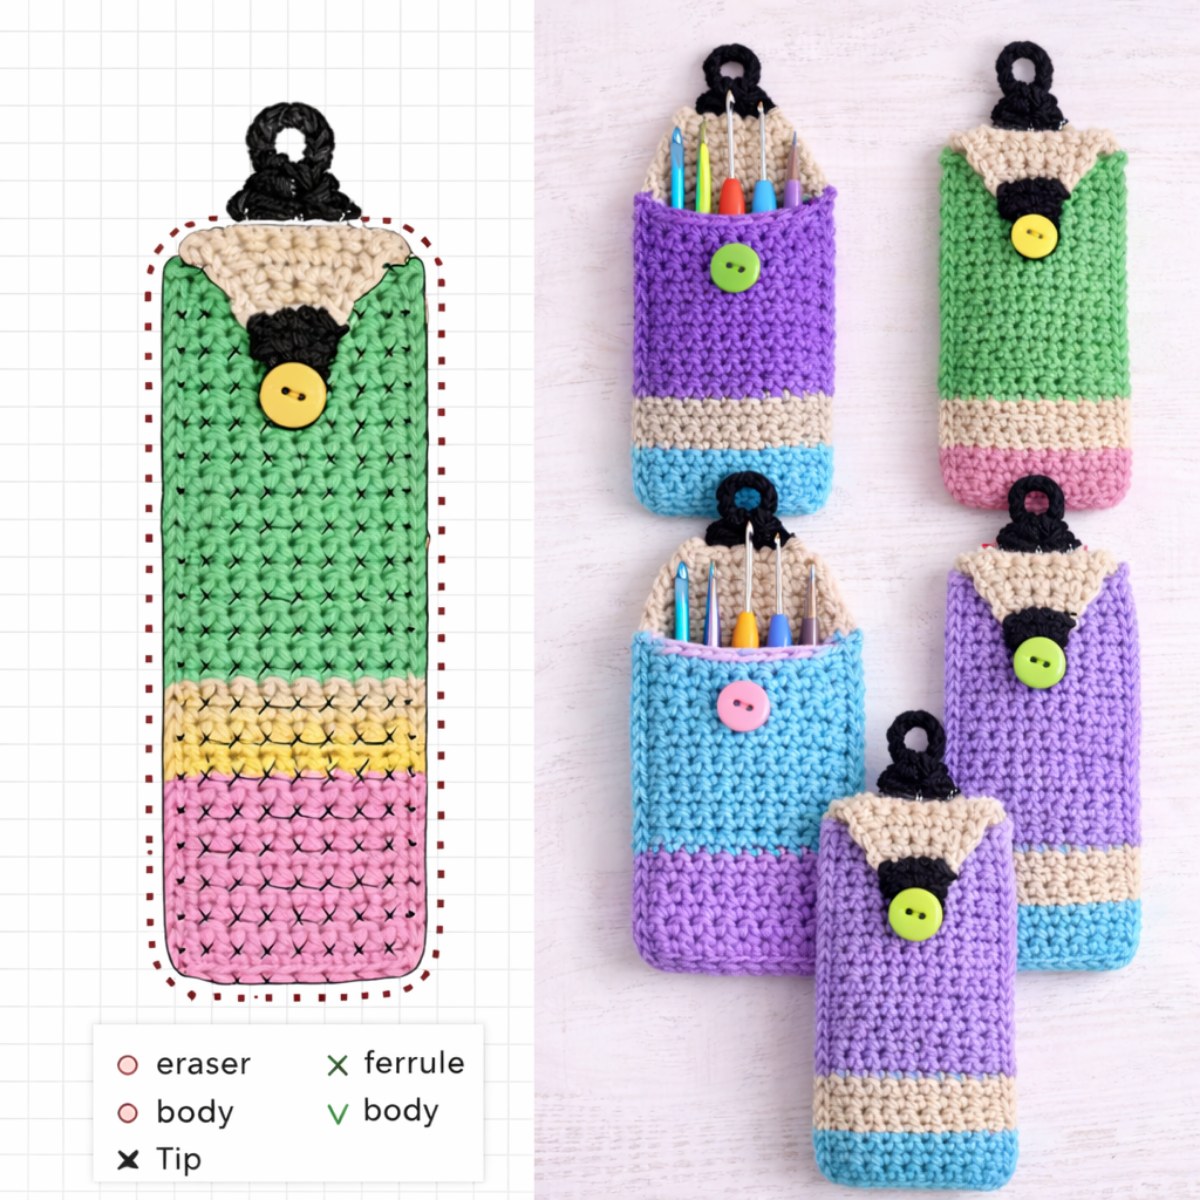
Overview & Inspiration
Welcome, fellow yarn lovers! There is nothing quite as satisfying as whipping up a project that is equal parts gorgeous and practical, and our newest design hits that sweet spot effortlessly.
Whether you are looking to tidy up your desk, gift a handmade treasure to a teacher, or simply craving a quick and rewarding stash-busting project, this little case is going to steal your heart.
Materials & Supplies Needed
- Yarn: Sport to light DK weight, approximately 50-70 yards. Cotton yarn is recommended for its firmness and durability, though acrylic yarn can be used for a softer, more flexible pouch.
- Colors: Main Color (MC) and contrasting scraps for embellishments if desired.
- Crochet Hook: 3.5 mm (US Size E/4) to ensure proper stitch definition and shape retention.
- Tapestry Needle for weaving in ends.
- Stitch Markers to keep track of rounds.
- Sharp Scissors.
- Optional: A small zipper, button, or drawstring for the closure.
Stitches & Abbreviations
- ch = chain
- sl st = slip stitch
- sc = single crochet
- hdc = half double crochet
- st(s) = stitch(es)
- rep = repeat
- RS = right side
Step-by-Step Pattern Instructions
We will begin working in the round to create a seamless, sturdy tube-like structure that keeps all your pens and pencils securely tucked inside.
Foundation: Begin with a magic ring or a foundation chain of 36 ch, joined securely with a sl st to form a ring.
Round 1: Ch 1 (does not count as a st here and throughout), work 1 sc in each ch around, join with a sl st to the first sc [36 sts].
Round 2: Ch 1, work 1 hdc in each st around, join with a sl st to the first hdc [36 sts].
Rounds 3 through 20: Repeat Round 2 to build the dense, protective body of the pouch.
Round 21: Ch 1, work 1 sl st in each st around, join with a sl st, fasten off securely and leave a long tail for any final securing.
Assembly & Finishing Touches
Lay your newly crocheted pouch flat and check the alignment. If you worked in the round, your tube is already structurally complete, but you will want to use your tapestry needle to weave in all loose yarn tails neatly along the wrong side.
If you prefer a zipped closure, carefully pin a matching zipper to the top opening and hand-sew it securely using sewing thread and a sharp needle. Alternatively, attach a cute button to one side and use a small chain loop as a fastener, or thread a matching cord through the top edge for a drawstring finish.
Pro Tips for Flawless Results
- Maintain a consistent tension throughout your rows so the fabric remains dense enough to keep small items from slipping through the stitches.
- Choose a hook size that closely matches your yarn weight; a hook that is too large creates unwanted gaps, while one that is too small makes the fabric overly stiff.
- Play around with simple color stripes or textured stitches to give your everyday stationery holder an extra pop of personality.
Frequently Asked Questions
What is a Crochet Pencil Pouch Pattern?
A Crochet Pencil Pouch Pattern is a set of written instructions that guide crocheters in making a small pouch designed to hold pencils, pens, or similar stationery items.
Is a Crochet Pencil Pouch Pattern suitable for beginners?
Yes, absolutely! Because it uses basic stitches like single crochet and half double crochet with a simple tube construction, it is a wonderful confidence-booster for crafters of all skill levels.
How can I customize my finished pencil pouch?
You can easily personalize your pouch by changing yarn colors, adding surface embroidery, attaching unique closures like buttons or zippers, or adjusting the stitch count to fit makeup brushes and art supplies.