
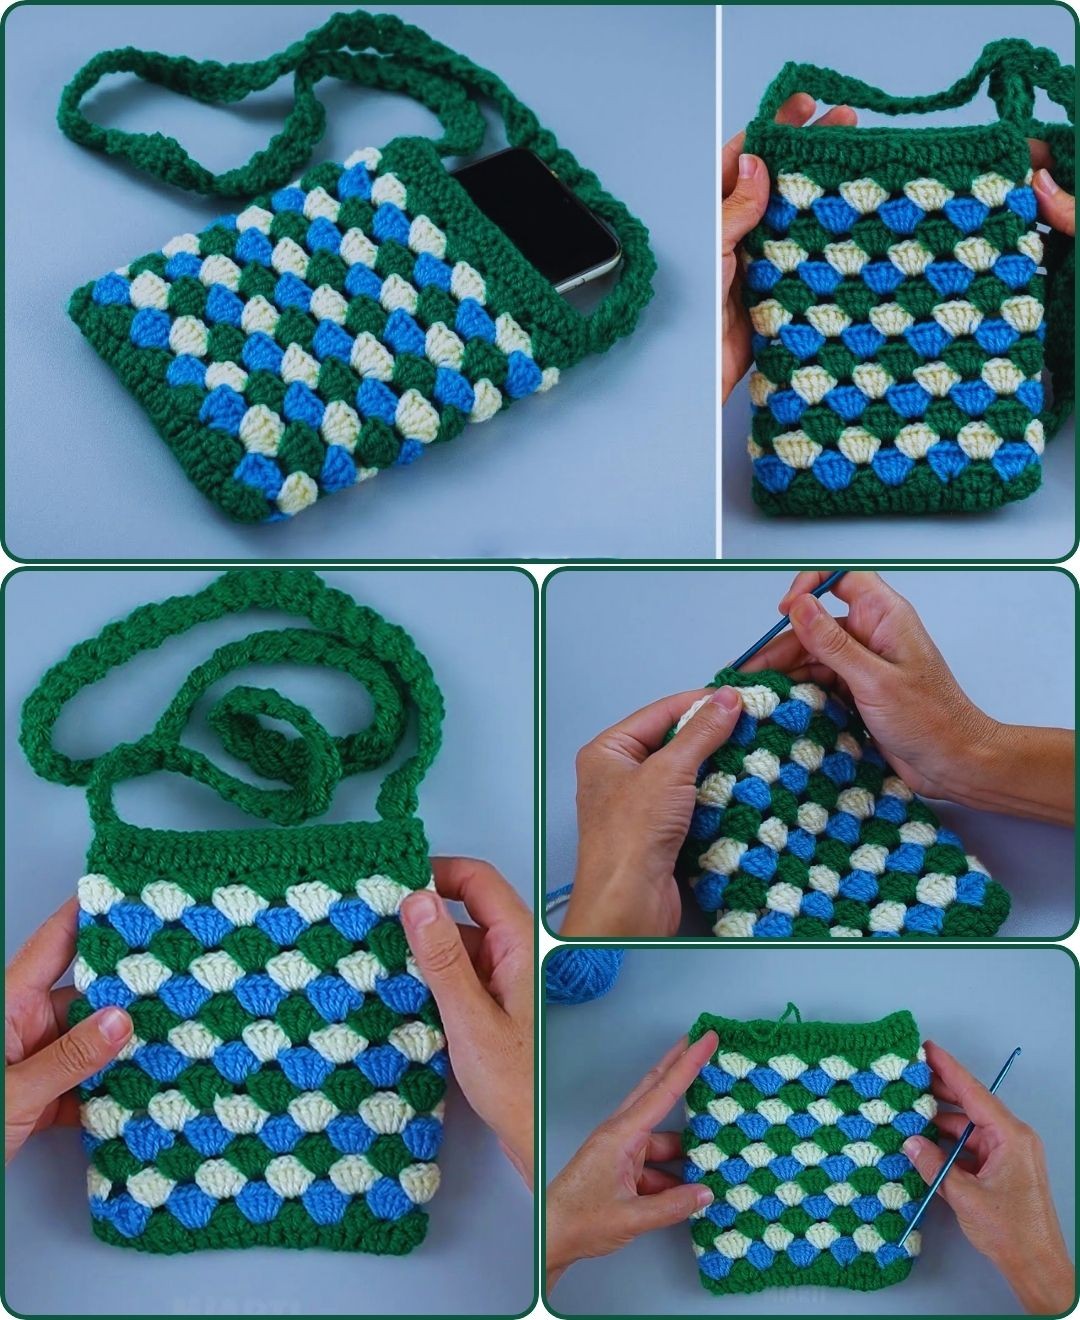
Overview & Inspiration
Welcome, fellow yarn lovers! If you are looking for a project that blends practicality with mindful, relaxing stitching, you are going to fall completely in love with this phone bag design.
In our fast-paced world, keeping your phone safe while staying hands-free is an absolute game-changer. This pattern uses a gorgeous, straightforward stitch that builds a dense, protective fabric without any complicated charts to slow you down.
Materials & Supplies Needed
- Medium-weight (Worsted / #4) yarn: approx. 80-100 yards (Cotton yarn recommended for structure, or Acrylic for soft vibrancy)
- Crochet hook: 4.0 mm (US G/6) to ensure a nice, tight fabric
- Tapestry needle for weaving in ends
- Stitch markers (2)
- Sharp scissors
- Optional: A button, snap, or magnetic closure
Stitches & Abbreviations
- ch: Chain
- st(s): Stitch(es)
- sl st: Slip stitch
- sc: Single crochet
- hdc: Half double crochet
- rep: Repeat
Step-by-Step Pattern Instructions
Before you begin, measure your smartphone to ensure a custom fit. This pattern is easily adjustable by adding or subtracting from your starting chain.
Foundation and Base
Ch 18 loosely to start. Ensure your chain comfortably fits the width of your phone with a little bit of ease.
Round 1: Work 1 sc in the 2nd ch from the hook, 1 sc in each ch across to the last ch. Work 3 sc in the final ch to turn the corner. Working along the opposite side of the foundation chain, work 1 sc in each st across, ending with 2 sc in the very first ch space. Join with a sl st to the first sc. [34 sts]
Body of the Bag
Rounds 2 through 22: Ch 1 (does not count as a st). Work 1 hdc in each st around. Join with a sl st to the top of the first hdc. [34 sts]
Pro tip: Periodically check the height of the bag against your phone as you complete these rows to ensure a snug fit.
After completing Round 22, fasten off securely and leave a long yarn tail if you plan to use it for assembly, or simply weave it in.
The Strap
Row 1: Join yarn to one upper edge of the bag. Ch to your desired strap length (approx. 100 ch for a crossbody fit, or 40 ch for a short shoulder strap).
Row 2: Working back down the chain, work 1 sc in the 2nd ch from the hook and in each ch across. Securely sl st the end of the strap to the opposite upper edge of the bag. Fasten off.
Assembly & Finishing Touches
With your tapestry needle, carefully weave in all remaining loose yarn tails along the inside of the bag to ensure a clean, professional finish.
If you chose to add a button or a snap closure, sew it securely to the center front or inner flap of the bag now. Give your finished bag a gentle steam block if using acrylic, or a light press if using cotton, to set your stitches neatly in place.
Pro Tips for Flawless Results
- Maintain Even Tension: Keep your stitches snug and consistent so your phone screen stays protected without gaps in the fabric.
- Downsize Your Hook: Using a slightly smaller hook than recommended on the yarn label creates a denser, more structured fabric that won’t stretch out too much.
- Customize Your Colors: Play around with fun striped rows or variegated yarns to make your accessory truly one-of-a-kind.
Frequently Asked Questions
What skill level is required to crochet this phone bag?
This project is wonderfully suited for beginners! It utilizes basic stitches and a repetitive, soothing pattern that is very easy to follow.
How long does it take to complete?
Depending on your personal crochet speed and experience, you can easily finish this entire bag in just a few hours, making it a fantastic weekend project.
Can I adjust the size of the bag for larger phone models?
Yes, absolutely! Simply add or reduce stitches in multiples of two along your foundation chain to accommodate your specific device.
Watch the Full Step-by-Step Video Tutorial
Prefer visual guidance? Follow along with the complete video tutorial below at your own pace: