
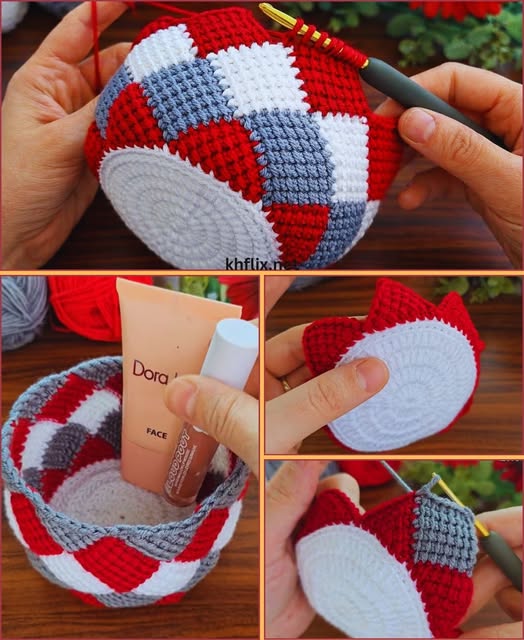
Overview & Inspiration
Welcome back, fellow yarn lovers! If you are looking for a satisfying project that transforms simple yarn into a gorgeous, durable home essential, you are going to adore this Crochet Basket Organizer Box Pattern.
Whether you want to corral craft supplies, tidy up bathroom essentials, or create a thoughtful handmade gift, this pattern balances beauty and functionality. Let’s grab our hooks and stitch up some cozy organization together!
Materials & Supplies Needed
- Yarn: Medium to bulky weight yarn (cotton yarn is strongly recommended for structure, durability, and easy washing). Optionally, hold two strands together for extra firmness.
- Hook Size: 5.5 mm (US I-9) crochet hook, or a hook slightly smaller than typically recommended for your yarn to create tighter, sturdier stitches.
- Tapestry Needle for weaving in ends.
- Stitch Markers to keep track of your rounds and corners.
- Scissors.
- Optional: Fabric liners, leather labels, or handles for a customized finish.
Stitches & Abbreviations
- ch = chain
- st = stitch
- sts = stitches
- sl st = slip stitch
- sc = single crochet
- hdc = half double crochet
- blo = back loop only
- rnd = round
- rep = repeat
Step-by-Step Pattern Instructions
This box-style organizer starts with a solid, flat base to ensure stability, followed by working into the back loops only to create crisp, structured corners for the walls.
The Base (Square or Rectangular)
Rnd 1: Ch 12, working in the back bumps of the chain, 2 sc in 2nd ch from hook, sc in next 9 chs, 4 sc in last ch. Working along the opposite side of the foundation chain, sc in next 9 chs, 2 sc in the last ch (same space as the very first 2 sc). Join with a sl st to the first sc. [26 sts]
Rnd 2: Ch 1, 2 sc in each of the first 2 sts, sc in next 9 sts, 2 sc in each of the next 4 sts, sc in next 9 sts, 2 sc in each of the last 2 sts. Join with a sl st. [34 sts]
Rnd 3: Ch 1, (1 sc in next st, 2 sc in next st) twice, sc in next 9 sts, (1 sc in next st, 2 sc in next st) 4 times, sc in next 9 sts, (1 sc in next st, 2 sc in next st) twice. Join with a sl st. [42 sts]
Building the Sides
Rnd 4: Ch 1, working in **blo** for this round only, work 1 sc in each st around. Join with a sl st. [42 sts]
Rnds 5 to 12: Ch 1, working in **both loops**, work 1 sc in each st around. Join with a sl st. [42 sts per round]
Rnd 13: Ch 1, work 1 hdc in each st around for a decorative top edge. Join with a sl st, fasten off, and leave a long tail for weaving. [42 sts]
Assembly & Finishing Touches
Once your final round is complete, secure your yarn and use a tapestry needle to weave in all loose tails neatly along the inside stitches.
To help your organizer box maintain its crisp, boxy form, gently block the basket by misting it with water, shaping it firmly around a rigid box or form, and allowing it to dry completely.
Pro Tips for Flawless Results
- Maintain consistent tension throughout the body of the basket to ensure the walls remain straight and do not flare out or taper inward.
- Use stitch markers at the start of each round to avoid losing your place, especially when working continuous rows of dense stitches.
- Choose cotton yarn and a smaller hook size than recommended to instantly boost the rigidity and longevity of your organizer.
Frequently Asked Questions
What skill level is required for this pattern?
Most designs of this pattern are suitable for adventurous beginners with basic knowledge of crochet stitches, though intermediate skills help with achieving a tighter, more structured finish.
Can I resize the organizer box?
Yes, absolutely! You can easily adjust the base dimensions by starting with a longer or shorter chain, and then continue working the sides upward to your desired height.
Are these crochet baskets washable?
Yes, when made with cotton yarn, these organizer boxes are completely washable. We recommend gentle hand washing and reshaping while damp to help the basket maintain its structure.
Watch the Full Step-by-Step Video Tutorial
Prefer visual guidance? Follow along with the complete video tutorial below at your own pace: