
Overview & Design Inspiration
Welcome, my wonderful crafty friends, to a truly special space on the blog today! There is something profoundly peaceful and deeply rewarding about pouring your love, patience, and creativity into a handmade religious keepsake.
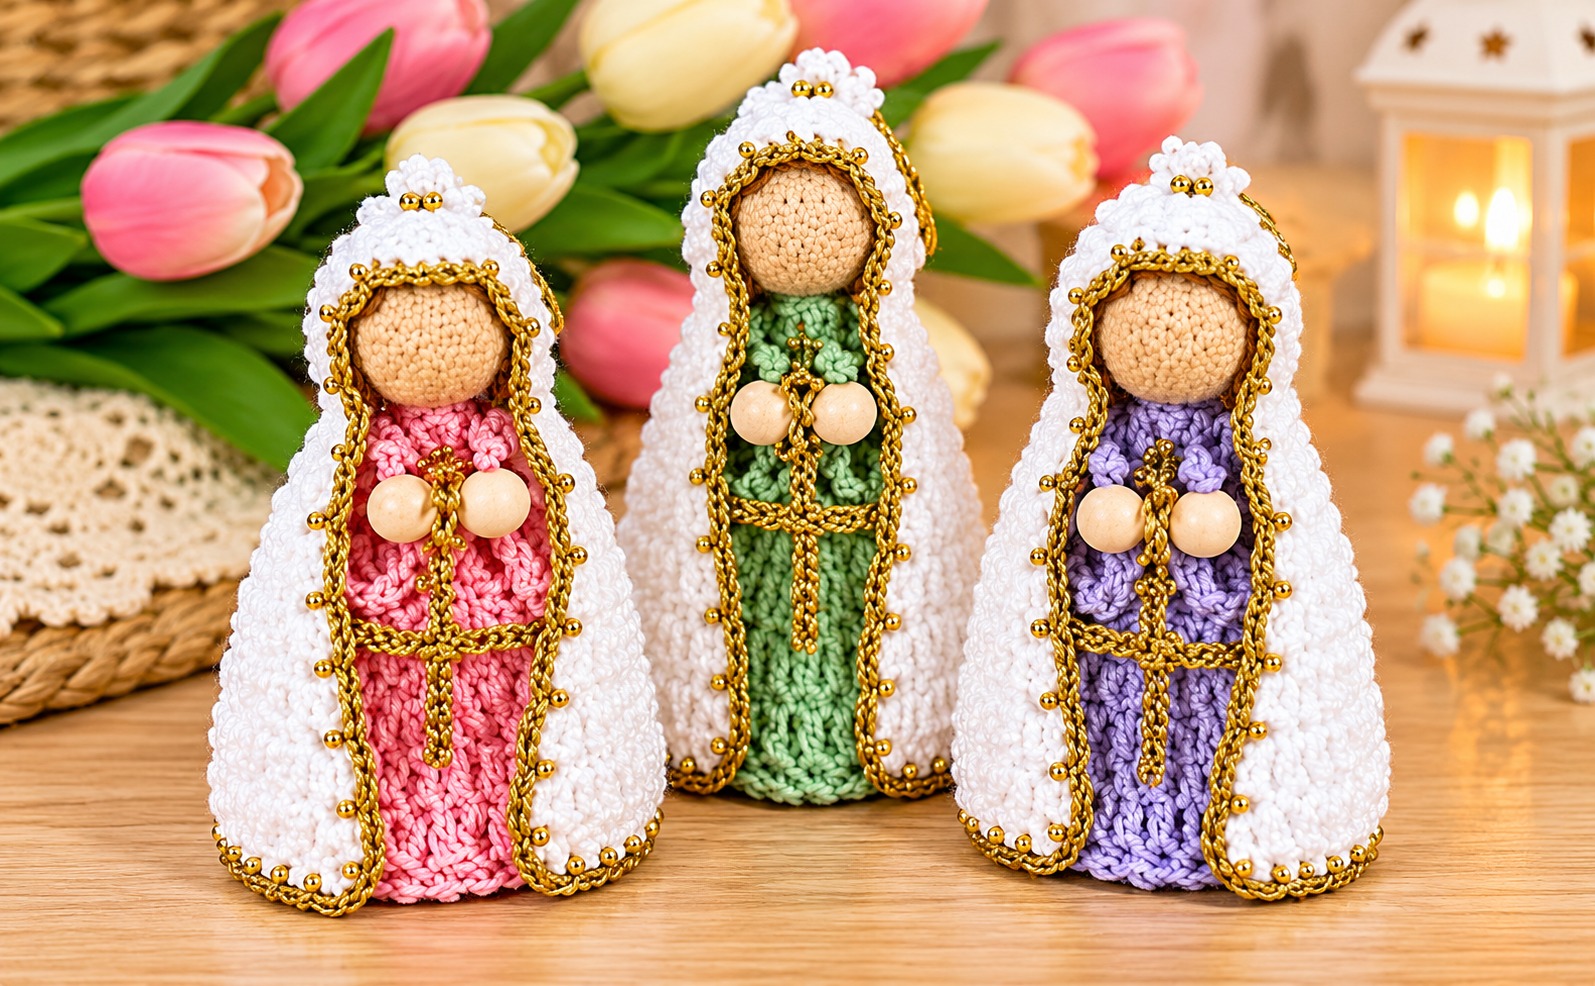
Whether you want to craft a treasured seasonal decoration or a meaningful gift for someone dear, this charming amigurumi project brings comfort and elegance into your stitching routine. The delightful combination of soft cotton yarn, a flowing mantle, and delicate golden touches results in a timeless piece that radiates warmth and devotion.
Materials & Recommended Supplies
Before casting on your first stitch, gathering the right supplies makes all the difference in achieving that polished, professional look. Here is everything you will need to bring your handmade figure to life:
- Yarn: Lightweight cotton yarn or a smooth sport-weight fiber in your choice of dress color, white for the mantle, and peach or beige for the skin tones.
- Metallic Thread: Gold metallic yarn or cord for the exquisite ornamental borders.
- Crochet Hook: 2.5 mm to 3 mm hook (US C/2 or D/3) to ensure your stitches are snug and secure.
- Notions: Stitch markers, sharp scissors, a yarn needle for seamless assembly, and polyester fiberfill for stuffing.
- Embellishments: Optional small decorative beads to add a touch of extra elegance.
Essential Techniques & Stitch Highlights
Creating this lovely figure allows you to practice several fundamental crochet techniques that elevate your amigurumi skills. You will rely heavily on the magic ring technique to kickstart the rounded head and hands without leaving an unsightly hole in the center.
Working in continuous spirals helps eliminate visible seams, creating smooth, organic curves for the dress and facial features. Additionally, incorporating back-loop-only (BLO) rounds creates crisp angles that help the base stand firmly upright while allowing the garment to taper gracefully into a lovely silhouette.
Construction & Assembly Highlights
The magic of this project lies in how easily manageable sections come together to form a cohesive, beautiful figure. You will begin by crocheting a flat circular base for the dress before working upward into a gently tapered cone, ensuring your piece has a stable foundation.
Next comes the rounded head and delicate hands, stuffed just enough to keep their charming shape without looking overfilled. Finally, the textured white mantle drapes smoothly over the structure, framing the face and bringing the entire design together before you add those glorious golden trims.
Customization & Styling Ideas
One of the absolute joys of crafting this design is how easily you can customize it to fit your personal aesthetic or a special occasion. While traditional palettes feature soft pastels like lavender, mint green, and pale pink alongside a classic white mantle, you can experiment with royal blue, cream, or ivory.
Adding tiny metallic embroidered details or delicate pearl beads to the edges elevates the piece into a stunning heirloom ornament. It makes a breathtaking mantle display, a thoughtful confirmation gift, or a peaceful centerpiece for your home sanctuary.
Pro Tips for Flawless Results
- Manage Your Tension: Keep your stitches nice and firm on the structural pieces to prevent the fiberfill stuffing from peeking through the gaps.
- Embrace Stitch Markers: Because you will work in continuous rounds for the head and body, always use a stitch marker to keep track of your starting points.
- Take Your Time Stuffing: Add your polyester fiberfill gradually as you go, using the eraser end of a pencil to poke filling neatly into tight corners.
- Secure Metallic Threads: Attach your gold cord or metallic yarn during the final embellishment stage using invisible stitches for a clean, professional finish.
Frequently Asked Questions
Is this project suitable for confident beginners?
Absolutely! While the finished doll looks wonderfully intricate, the construction is broken down into simple foundational shapes like spheres and cones that any adventurous beginner can master.
Can I use acrylic yarn instead of cotton?
Yes, you can certainly use a smooth acrylic yarn, though lightweight cotton yarn is recommended for amigurumi because it offers fantastic stitch definition and a crisp, clean finish.
How do I access the full step-by-step instructions?
You can easily download the complete printable PDF pattern and follow along with our comprehensive video tutorial linked at the bottom of this page!
Watch the Full Step-by-Step Video Tutorial
Prefer visual guidance? Follow along with the complete video tutorial below at your own pace: