
Overview & Design Inspiration
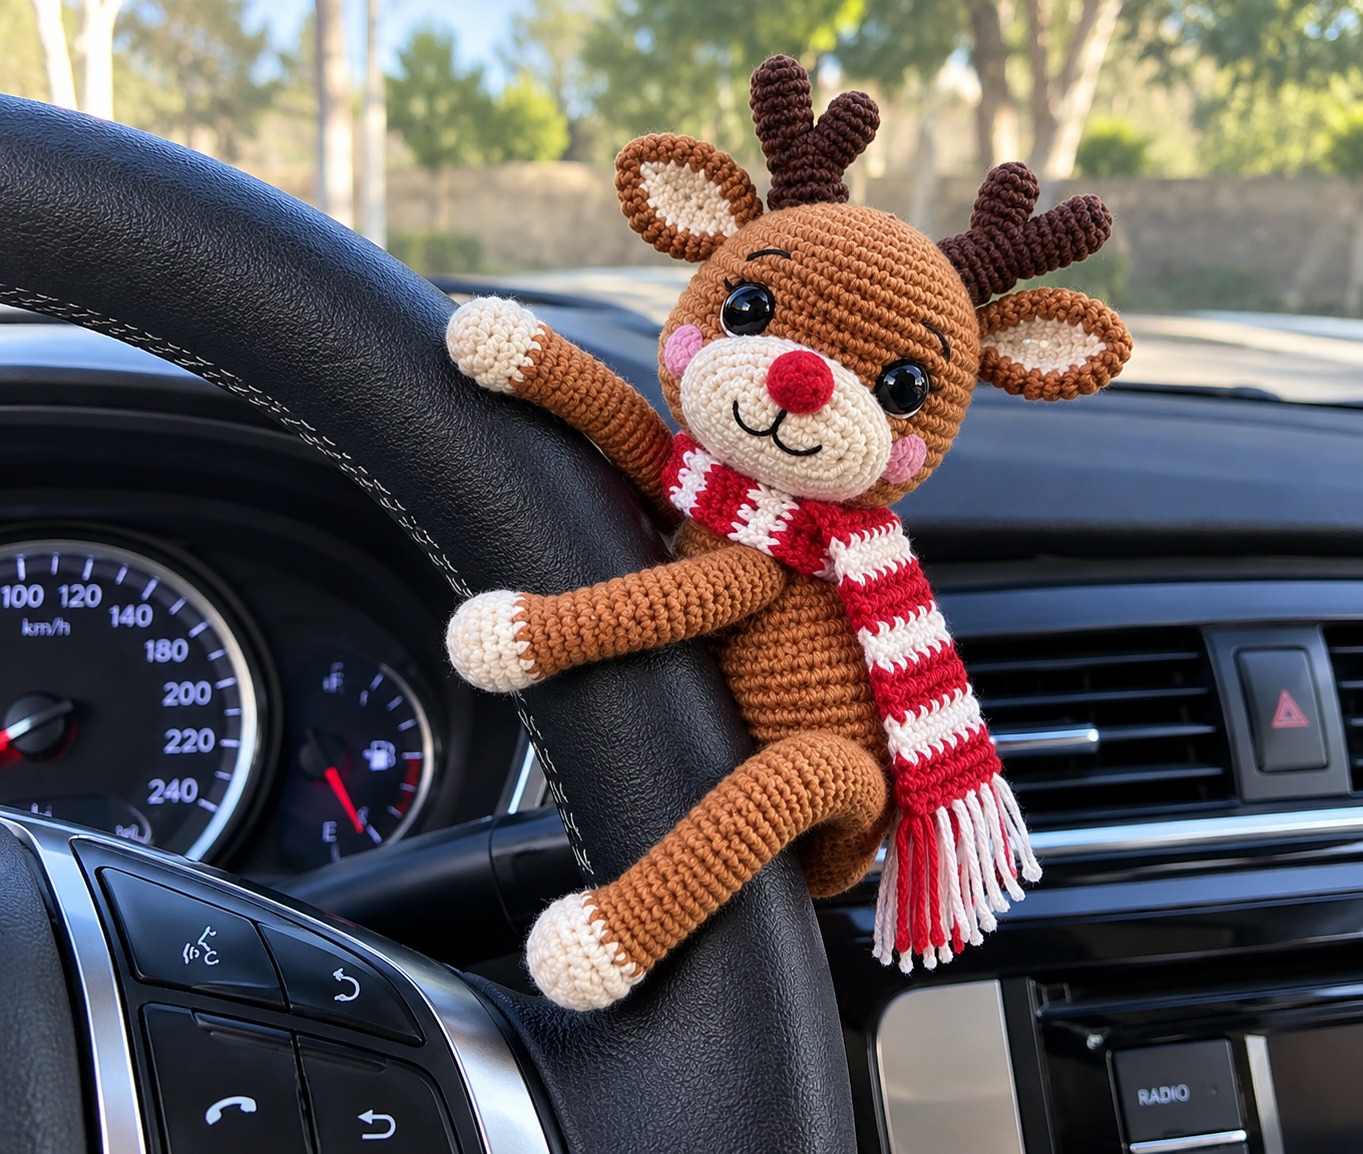
Few things capture holiday nostalgia quite like a handmade companion waiting beneath the tree. This sweet crochet amigurumi reindeer blends timeless rustic charm with modern whimsical design, featuring a rich caramel coat, an iconic bright red nose, and a cozy striped winter scarf. Its endearing, handcrafted personality makes it an instant holiday heirloom that family members will look forward to unboxing year after year.
What makes this festive friend truly irresistible is its playful, floppy silhouette. Designed with elongated, flexible limbs, this reindeer can casually lounge on your fireplace mantel, perch on a holiday bookshelf, or hug wrapped presents. It is a wonderfully relaxing project that invites crafters of all skill levels to sit by the fire with a warm beverage and stitch pure Christmas cheer.
Materials & Recommended Supplies
- Yarn: Medium-weight (worsted or DK) smooth cotton or cotton-acrylic blend in caramel brown (approx. 80–110g), dark chocolate brown (approx. 15–25g), and smaller amounts of cream, cherry red, soft pink, and crisp white.
- Crochet Hooks: 2.75 mm (US C/2) or 3.0 mm (US D/3) to maintain a dense, tight gauge that keeps stuffing completely hidden.
- Notions: High-loft polyester fiberfill, locking stitch markers, bent-tip tapestry needle, and embroidery scissors.
- Facial Details: One pair of 8–10 mm black safety eyes (or black cotton embroidery thread for a child-friendly embroidered finish).
- Optional Extras: Pearl-head positioning pins for precise piece placement and a tiny jingle bell for the scarf trim.
Essential Techniques & Stitch Highlights
Working this reindeer relies on fundamental amigurumi mechanics, starting with the classic adjustable magic ring to create seamless, tight centers. The entire project is worked primarily in continuous spiral rounds without joining slip stitches, which produces a clean, uninterrupted fabric across the curved head and body. Keeping a trusty stitch marker in the first stitch of every round ensures you never lose your place as the shaping evolves.
To achieve that polished, store-bought silhouette without gaps, the invisible single crochet decrease is an essential technique here. By working single crochet decreases through the front loops only, your decreases melt into the surrounding stitches without bumps or holes. Crisp color changes between the red and white stripes of the scarf provide a fun pop of holiday contrast against the earthy brown body.
Construction & Assembly Highlights
The project begins with the foundation pieces: a beautifully rounded head and an egg-shaped torso worked from the bottom up. While the head requires firm, supportive stuffing to hold the weight of the antlers and ears, the body is stuffed with a slightly softer touch to maintain a lovable, cuddly squeeze.
The distinctive facial features give this reindeer its gentle personality. A dimensional cream-colored muzzle is topped with a plump, cherry-red nose, framed by rosy pink circular cheeks and an embroidered smile. Once the sculpted ears and branched dark chocolate antlers are anchored securely to the crown, the character’s festive spirit immediately comes alive.
Finally, the arms and legs are attached to create that signature relaxed posture. By lightly stuffing the lower paws while leaving the upper portions hollow, the limbs remain supple and posable. Once everything is secured with invisible whip stitches, wrapping the fringed red-and-white scarf around the neck adds the quintessential cozy winter finish.
Customization & Styling Ideas
Amigurumi invites endless personalization, and this reindeer is a wonderful canvas for your personal holiday palette. Consider trading the classic cherry red for woodland forest green, icy peppermint blue, or an elegant Scandinavian monochrome scheme using oatmeal, taupe, and charcoal yarns. You can even stitch a small sprig of holly with red beads to rest beside one of the antlers.
Beyond resting on a shelf, this flexible reindeer loves to interact with your holiday decor. Pose its long arms around a mason jar filled with homemade hot cocoa mix for an unforgettable hostess gift, or tuck its hands into the branches of your Christmas tree as an eye-catching focal ornament. It also makes a sweet centerpiece nested inside a rustic tabletop evergreen wreath.
Pro Tips for Flawless Results
- Size Down Your Hook: Always choose a hook size 1 to 2 sizes smaller than the yarn label recommends to keep your stitches compact and prevent white polyfill from peeking through.
- Master the Posable Limbs: Fill the bottom hooves firmly, but leave the upper third of the arms and legs completely unstuffed so they hang flat and drape naturally against the body.
- Pin Before You Sew: Facial symmetry can make or break an amigurumi character; use sewing pins to test the positioning of the muzzle, ears, and antlers before making any permanent stitches.
- Tuck Long Tails Inside: Leave extra-long yarn tails on every small part when fastening off, using the tails for attachment and weaving the excess back into the center of the body.
Frequently Asked Questions
What size will the finished reindeer be?
When crocheted using recommended medium-weight yarn and a 2.75 mm hook, the finished reindeer stands approximately 22 to 28 cm (8.7 to 11 inches) tall from hooves to antler tips. Your final dimensions may vary slightly depending on your natural crochet tension.
How can I make this reindeer safe for toddlers and babies?
To make the toy completely child-safe, skip plastic safety eyes and instead embroider sleepy curved eyes using black cotton embroidery floss. Ensure all limbs, antlers, and the muzzle are double-stitched securely, and weave in or securely anchor scarf fringe so there are no loose choking hazards.
Why are my amigurumi limbs sticking straight out instead of draping?
Stiff limbs are almost always the result of overstuffing near the shoulder and hip joints. Keep the top two inches of the arms and legs empty of fiberfill, pinch the opening flat, and sew straight across the seam flush against the body.
Watch the Full Step-by-Step Video Tutorial
Prefer visual guidance? Follow along with the complete video tutorial below at your own pace: