
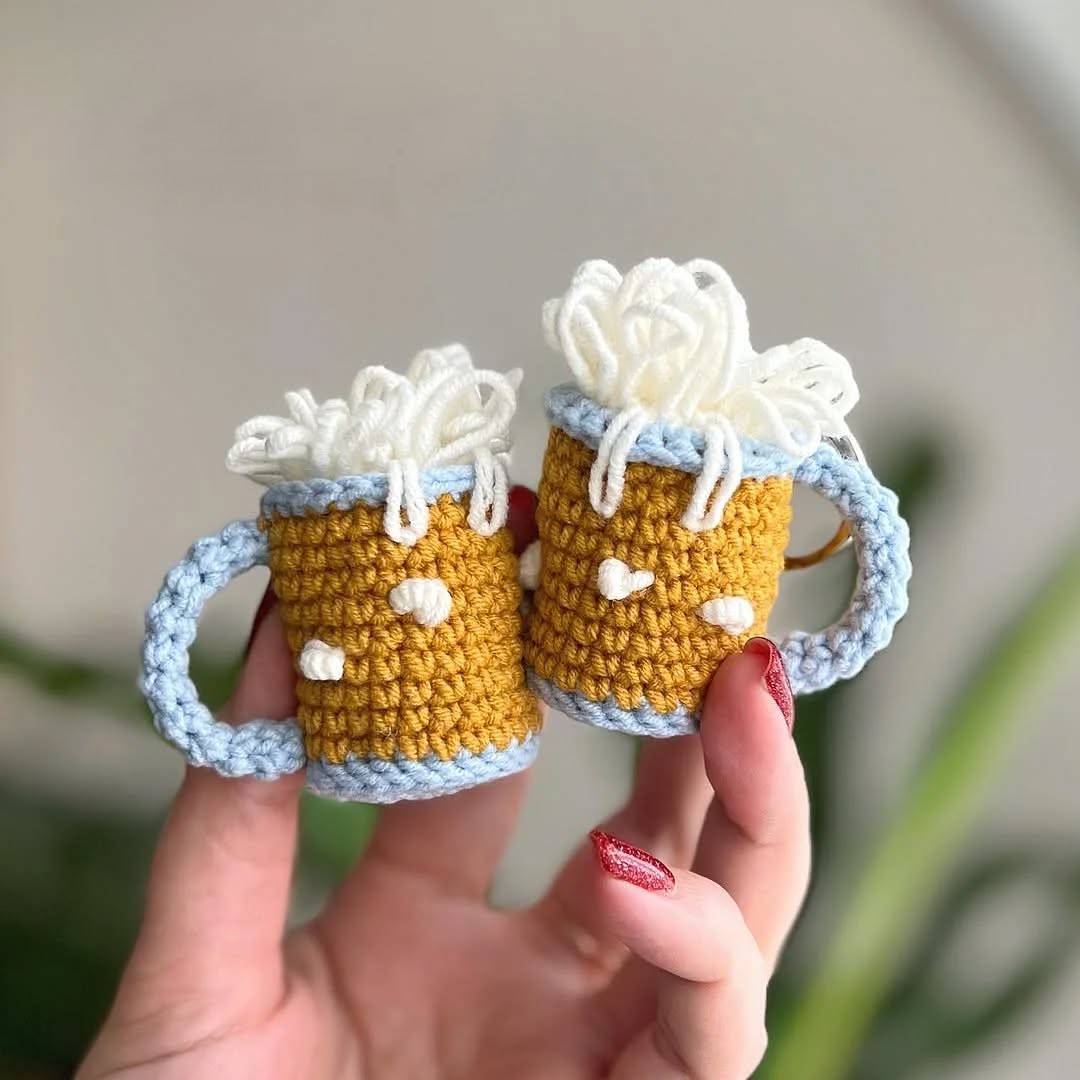
Overview & Design Inspiration
Welcome back, fiber friends! If you are looking for a quick, utterly charming project that brings an instant smile to your face, you are going to fall head over heels for our newest obsession. The crochet beer mug keychain pattern combines absolute practicality with miniature charm, making it a fast favorite for anyone who loves bite-sized makes.
Whether you are a beginner eager to practice your amigurumi skills or an experienced crafter searching for a fun stash-buster, this little mug delivers. It is wonderfully versatile—perfect for hanging on your keys, dangling from a favorite tote bag, or gifting as a playful surprise to your best friend.
Materials & Recommended Supplies
Gathering your supplies is half the fun! Before you jump into stitching, let us make sure you have everything you need for success:
- Yarn: Lightweight DK or sport weight cotton/acrylic yarn in golden yellow (or amber) for the brew, white or cream for the foamy top, and the main mug color.
- Crochet Hook: A smaller hook size, typically a 2.5mm (US C/2) or 3.0mm (US D/3), to ensure your stitches stay nice and tight.
- Stuffing: A small handful of polyester fiberfill to give your mug a lovely, three-dimensional shape.
- Hardware: A sturdy keychain ring or clasp with a small jump ring or yarn loop.
- Notions: A trusty yarn needle, sharp scissors, and a stitch marker to keep your rounds on track.
Essential Techniques & Stitch Highlights
This project is a fantastic playground for practicing fundamental amigurumi techniques without feeling overwhelmed. You will rely primarily on basic stitches like single crochets, slip stitches, and chain stitches, making it wonderfully accessible.
Working in continuous rounds from a magic ring creates a seamless, professional finish for the cylindrical body of the mug. Maintaining a consistent, firm tension is key to preventing the fiberfill from peeking through your stitches and ensures your miniature masterpiece holds its shape brilliantly over time.
Construction & Assembly Highlights
Bringing your tiny beer mug to life is an absolute breeze. You will kick things off by establishing a sturdy base using a magic ring, then evenly increasing before working straight rounds upward to build the classic mug silhouette.
Next up is the best part: switching to your cream-colored yarn to craft that delightfully frothy foam top! Finally, you will crochet and attach a charming little handle to the side, secure your hardware, and weave in your ends for a pristine finish.
Customization & Styling Ideas
The beauty of this pattern lies in its incredible adaptability. Swap out your golden yellow yarn for a deep espresso brown to create a rich stout, or play with playful pastel shades for a completely whimsical look.
Want to turn it into an adorable character? Add a couple of embroidered French knots for eyes and a cheeky little stitched smile. You can even experiment with bulkier yarn and a larger hook if you want a chunkier bag charm!
Pro Tips for Flawless Results
- Keep your tension firm: Tight stitches are your best friend here, as they prevent your stuffing from showing and keep the mug looking crisp and structured.
- Don’t overstuff: Use just enough polyester fiberfill to give the mug dimension without stretching out your stitches or distorting its shape.
- Secure your handle: Make sure the handle is anchored securely to both the top and bottom of the body so it withstands daily use on your keyring.
- Weave as you go: Secure and hide your tail ends immediately before closing up the final components to keep your workspace tidy and your finish seamless.
Frequently Asked Questions
What skill level is required for this crochet beer mug keychain?
This project is very beginner-friendly! It uses basic stitches like single crochet and simple shaping techniques, making it an ideal weekend project for crafters of all experience levels.
How long does it take to make one keychain?
Most makers can easily whip up one of these adorable keychains in just one to three hours, depending on their crochet speed and familiarity with working in the round.
Can I use leftover yarn scraps from my stash?
Absolutely! Because this is a miniature project, it is an ultimate stash-buster that requires very little yarn, making it both economical and eco-friendly.
Watch the Full Step-by-Step Video Tutorial
Prefer visual guidance? Follow along with the complete video tutorial below at your own pace: