
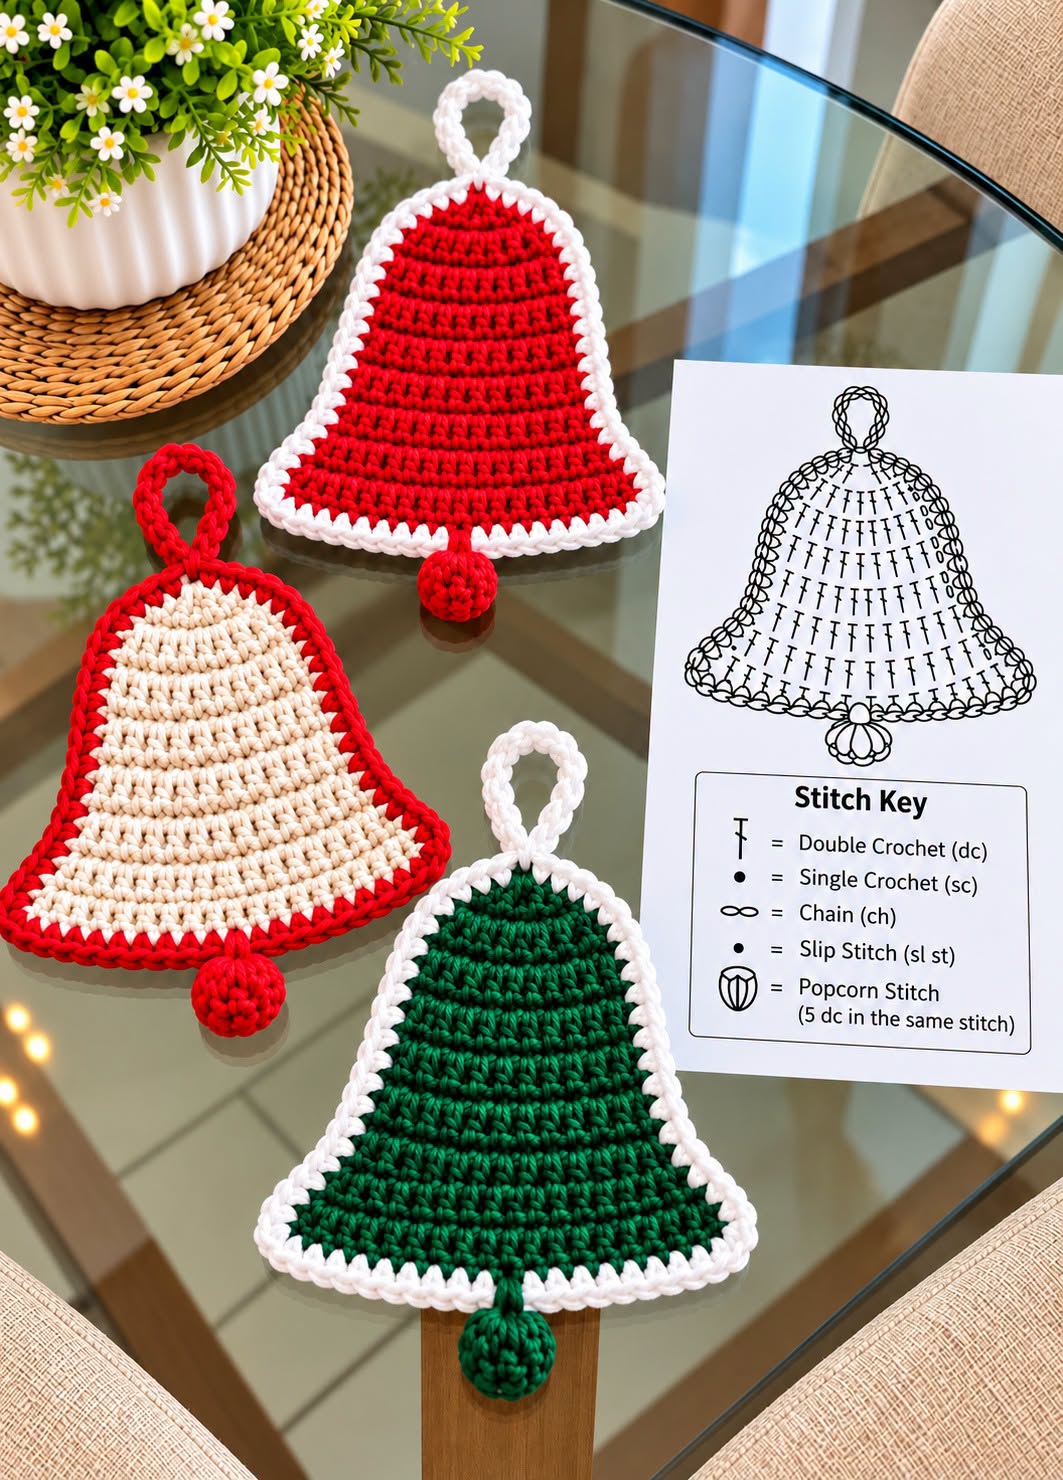
Overview & Design Inspiration
Welcome, my crafty friends, to one of the most charming holiday projects of the season! There is nothing quite like dressing up a Christmas tree with handmade touches that carry memories, and the Crochet Bel Christmas Ornament is an absolute joy to stitch.
Combining a classic bell silhouette with sweet contrasting borders and a playful 3D clapper, this design brings timeless holiday magic straight to your crochet hook. Whether you lean toward traditional red and white, cozy cream and red, or forest green, these little ornaments are destined to become heirlooms you will cherish year after year.
Materials & Recommended Supplies
- Yarn: Medium-weight (Worsted/Aran) cotton or acrylic yarn. Cotton offers crisp stitch definition, while acrylic provides a soft, beginner-friendly touch.
- Colors: One main color for the bell body and a contrasting color for the striking border and hanging loop.
- Crochet Hook: 3.5 mm to 4.5 mm (US E/4 to 7), chosen to create a firm fabric that holds its shape beautifully.
- Notions: Yarn needle, scissors, and a small amount of washable stuffing for a wonderfully plump clapper.
Essential Techniques & Stitch Highlights
This delightful project relies on friendly, everyday US crochet terminology, making it wonderfully approachable for adventurous beginners and a relaxing treat for seasoned makers. You will primarily work with foundational chains, neat slip stitches, versatile single crochets, and tall, quick-growing double crochets.
Using single crochet around the outer edge creates a wonderfully compact, defined finish that hugs the bell silhouette. Meanwhile, you can choose between single crochet for a dense, textured fabric or double crochet for a lighter, faster-working bell body.
Construction & Assembly Highlights
The magic of this bell begins at the narrow upper section, working outward and downward with carefully planned increases to create its signature flared shape. Rather than struggling with a complicated three-dimensional pattern, you craft a wonderfully lightweight flat ornament that keeps its crisp silhouette effortlessly.
Once your main body is complete, you will frame the curves with a crisp contrasting border, anchor a sturdy chain loop at the top for easy hanging, and attach a cute little popcorn or ball clapper at the base to bring the whole design to life.
Customization & Styling Ideas
One of the best parts of this project is how easily you can customize it to match your holiday aesthetic. Play with metallic yarns, rich burgundies, classic forest greens, or sparkling silvers to fit your unique seasonal palette.
Beyond the Christmas tree, try tying these little bells onto holiday wreaths, festive garlands, doorknobs, or even as charming gift toppers for your most cherished packages.
Pro Tips for Flawless Results
- Maintain Even Tension: Keep your stitches relatively firm so the ornament retains its lovely bell shape without sagging.
- Check Your Symmetry: Lay your work flat and count your stitches during shaping rows to ensure both sides flare evenly.
- Distribute Edging Carefully: When working the contrasting border along row ends, space your stitches evenly to prevent ruffling or puckering.
Frequently Asked Questions
Is this project suitable for beginners?
Absolutely! Because the main bell is worked in flat rows with simple increases, it is a wonderful way for confident beginners to practice shaping and neat edging.
Can I use yarn scraps for these ornaments?
Yes, indeed! This pattern is a fantastic stash-buster that easily uses up small leftover amounts of medium-weight yarn from your stash.
How do I make the ornament stiffer if needed?
If you prefer a crisper ornament, you can use cotton yarn, work with a slightly smaller hook size, or apply a light fabric stiffener once finished.
Watch the Full Step-by-Step Video Tutorial
Prefer visual guidance? Follow along with the complete video tutorial below at your own pace: