
Overview & Design Inspiration
Oh, my dears, get ready to fall in love with a project that embodies elegance, simplicity, and endless creative possibilities! Our “Crochet Bow Pattern” is more than just a handmade accessory; it’s a tiny masterpiece that brings a touch of charming sophistication to anything it adorns. This versatile design has quickly become a beloved favorite in our crafting community, proving that a few stitches can truly transform the ordinary into something extraordinary.
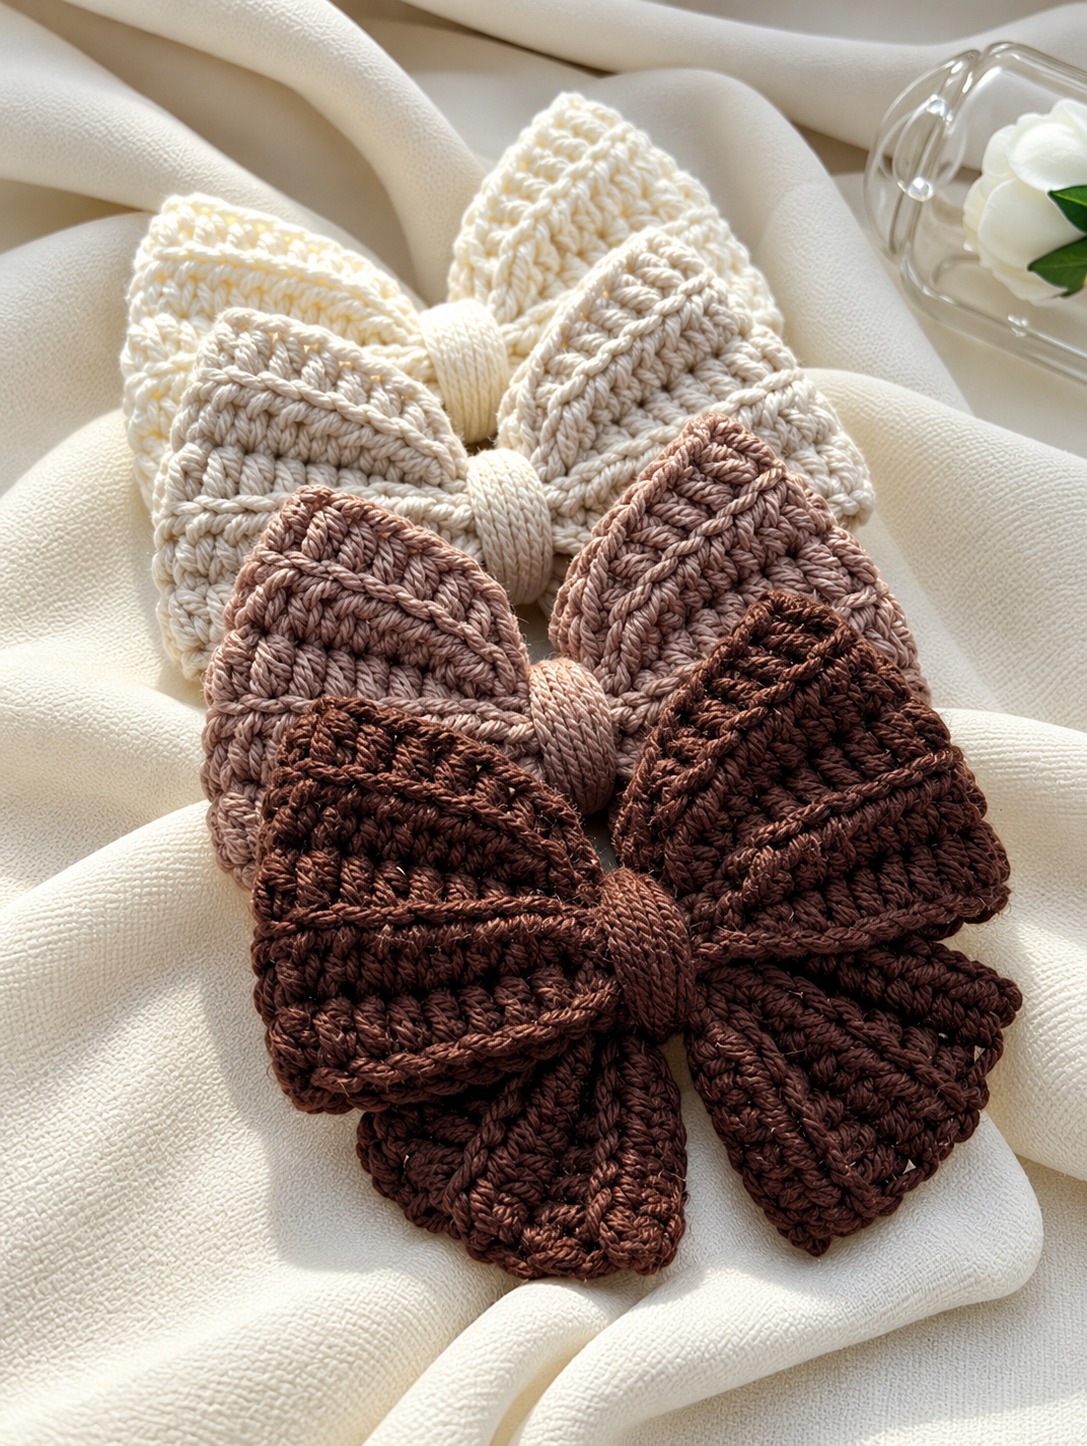
Imagine delicate hair accessories, personalized gifts, or even charming embellishments for your home – all brought to life with your own hands. This pattern features beautiful textured bows with a lovely structured appearance, showcasing softly pointed loops, decorative raised lines, and a perfectly wrapped center. Its classic design shines beautifully in serene neutral shades like ivory, cream, beige, or dusty rose, making it a joy for both beginners and seasoned crocheters to create.
Materials & Recommended Supplies
Gathering the right materials is key to crafting a bow with beautiful stitch definition and a lovely shape. Here’s what you’ll need to embark on this delightful project:
- **Yarn:** Approximately 20-35 yards (18-32 meters) of DK-weight (light worsted) yarn. Smooth cotton or a cotton blend is highly recommended for its clear stitch definition and ability to hold shape.
- **Crochet Hook:** A 3.5 mm or 4.0 mm (US E/4 or G/6) crochet hook, chosen to complement your yarn and tension.
- **Scissors:** For trimming your yarn tails.
- **Yarn Needle:** Essential for weaving in ends and assembling your bow neatly.
- **Stitch Markers (Optional):** Helpful for marking stitches, especially for beginners or when taking breaks.
- **Measuring Tape:** To ensure your bow achieves your desired dimensions.
- **Optional Attachments:** Hair clips, elastic bands, headbands, or a small fabric backing for specific applications.
Essential Techniques & Stitch Highlights
This lovely bow project is a fantastic opportunity to build foundational crochet skills while creating something truly beautiful. You’ll be working with essential techniques that form the backbone of many crochet patterns. Our bow relies heavily on strong double crochet stitches to create its structured body and defined texture.
Beyond the basics, you’ll learn how to execute simple shaping techniques through increases, creating the elegant outward flare of the bow’s loops. We’ll also add delightful visual interest with surface crochet details, which contribute to the bow’s unique raised lines and sophisticated finish. Finally, you’ll master the art of neat finishing, ensuring your handmade accessory looks polished and professional, ready for any occasion.
Construction & Assembly Highlights
The magic of this crochet bow lies in its clever construction, resulting in that perfectly symmetrical and dimensional look. You’ll begin by crocheting two identical shaped panels, each forming one side of the finished bow. These panels start narrow at what will become the center, gradually increasing in width to create that characteristic outward flare and softly pointed loops.
Once both panels are complete, they are embellished with subtle surface crochet details that create the beautiful raised lines you see in the design. Then, the two panels are carefully joined and gathered at the center, naturally forming the classic bow shape. A separate, small crocheted band is then wrapped snugly around the gathered middle, securing everything in place and adding a polished, refined touch. The careful layering and gathering give the bow its soft yet defined shape, making it truly stand out.
Customization & Styling Ideas
The versatility of this crochet bow pattern is truly inspiring! You can easily customize its size by simply adjusting your yarn weight and hook size – imagine tiny bows for baby headbands, medium ones for hair clips, or larger decorative accents for gift wrapping or home décor. Play with color to match any mood or season.
Soft cream and ivory shades offer a timeless, delicate aesthetic, perfect for bridal showers or baby gifts. Embrace romance with warm beige or dusty rose, or add sophistication with a rich chocolate brown. Don’t shy away from playful pastels like lavender or sage green for a whimsical touch. Remember, solid colors beautifully highlight the bow’s textured stitches and raised details! These bows can adorn bags, baskets, seasonal ornaments, or even personalize your favorite garments.
Pro Tips for Flawless Results
- **Maintain Consistent Tension:** Aim for a comfortable, slightly firm tension. This helps the stitches remain defined and ensures the bow holds its beautiful, structured shape without becoming too stiff or floppy.
- **Swatching is Your Friend:** Always crochet a small sample with your chosen yarn and hook. This helps you gauge tension and ensures the fabric has the desired flexibility and appearance before you begin the main project.
- **Embrace Solid Colors:** For this textured design, solid-colored yarns allow the beautiful stitch work and raised details to truly shine without competition from busy color changes.
- **Neat Finishing is Key:** Take your time with weaving in ends and assembling the center band. A tidy finish elevates the entire project, making your handmade bow look professionally crafted.
Frequently Asked Questions
Which yarn type works best for achieving the textured look?
For the best results and a beautiful textured appearance, a smooth cotton or cotton-blend yarn in DK-weight is highly recommended. Cotton fibers provide excellent stitch definition, allowing the raised lines and individual crochet stitches to stand out clearly and helping the bow maintain its elegant shape.
Is this project suitable for beginners?
Absolutely! This crochet bow pattern is designed to be very beginner-friendly. It primarily uses basic crochet stitches like chain stitches and double crochet, along with simple shaping techniques. It’s a fantastic project to practice essential skills while creating something attractive and useful relatively quickly.
How can I adjust the size of my crochet bow?
Adjusting the size is wonderfully simple! You can create smaller or larger bows by changing your yarn weight and corresponding hook size. Using a finer yarn (e.g., fingering weight) with a smaller hook will yield a more delicate bow, while a bulkier yarn (e.g., worsted weight) with a larger hook will produce a more substantial one, all without altering the fundamental pattern construction.
Watch the Full Step-by-Step Video Tutorial
Prefer visual guidance? Follow along with the complete video tutorial below at your own pace: