
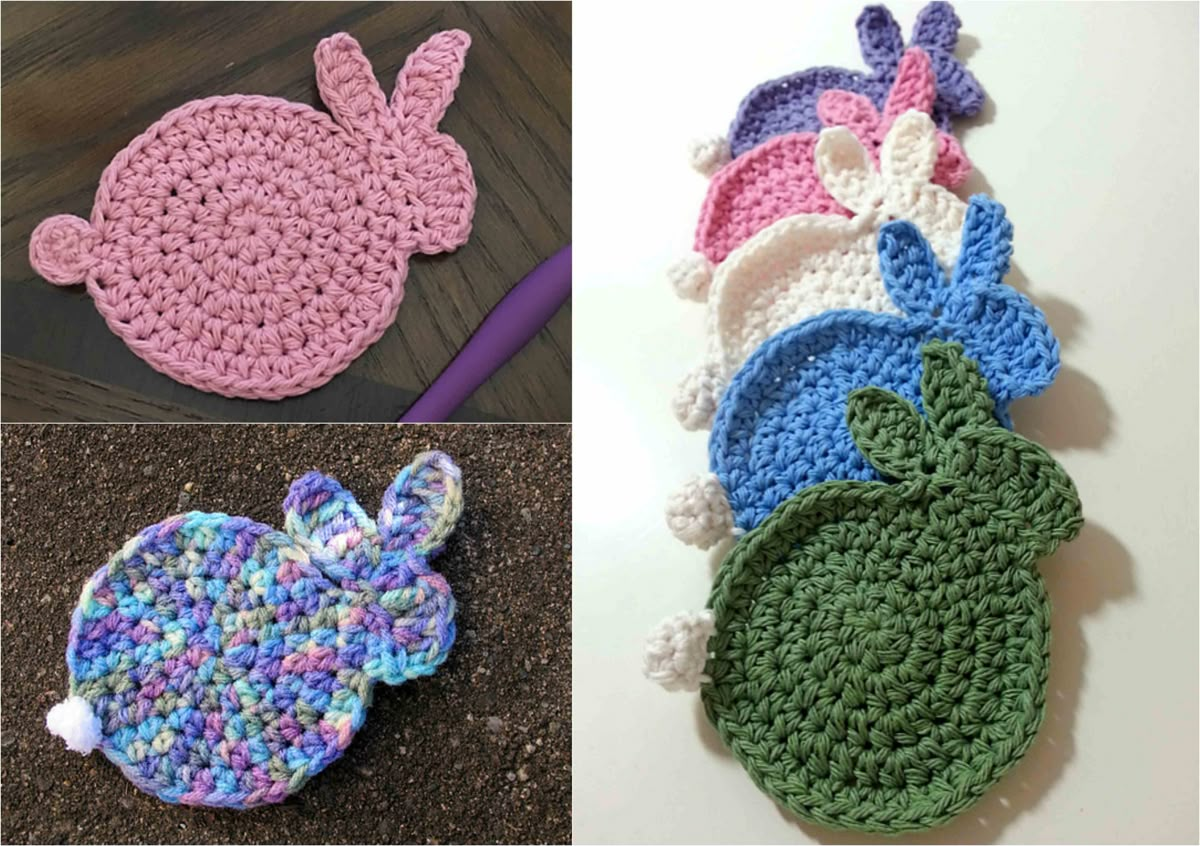
Overview & Inspiration
Welcome, fellow yarn lovers! There is nothing quite like the joy of whipping up a quick, charming project that brings an instant smile to your face and a touch of handmade warmth to your home.
The Crochet Bunny Coaster Pattern combines creative flair with everyday functionality, making it an absolute favorite for spring celebrations, Easter gatherings, or simply brightening up your coffee table year-round. Whether you are a beginner looking to master working in the round or an experienced crafter seeking a fast and delightful giftable project, you are going to adore this cute bunny design!
Materials & Supplies Needed
- Medium-weight (Worsted / Aran) cotton yarn in your choice of main bunny color and pink for the inner ears.
- Crochet hook in size 4.0 mm (US G/6) to ensure a nice, dense fabric that protects your surfaces.
- Tapestry needle / yarn needle for weaving in ends and sewing pieces.
- Stitch markers to keep track of your rounds.
- Scissors for clean trimming.
Stitches & Abbreviations
- ch = chain
- st/sts = stitch/stitches
- sl st = slip stitch
- sc = single crochet
- hdc = half double crochet
- dc = double crochet
- inc = increase (work 2 sc in the same st)
- FO = fasten off
Step-by-Step Pattern Instructions
Coaster Base
We will start with a magic ring to create a seamless, adjustable center for our flat, functional coaster base.
- Round 1: Start with a magic ring, ch 1, work 8 sc into the ring. Join with a sl st to the first sc. [8 sts]
- Round 2: Ch 1, work 2 sc in each st around. Join with a sl st to the first sc. [16 sts]
- Round 3: Ch 1, *1 sc in next st, inc in next st; repeat from * around. Join with a sl st. [24 sts]
- Round 4: Ch 1, *1 sc in each of the next 2 sts, inc in next st; repeat from * around. Join with a sl st. [32 sts]
- Round 5: Ch 1, working a final polished edging, work 1 sc in each st around, maintaining even tension to prevent curling. Join with a sl st, then FO and leave a tail for weaving. [32 sts]
Bunny Ears (Make 2)
The ears are crocheted separately using simple rows to achieve a cute, perky shape.
- Row 1: Using your main yarn color, ch 6, working in the 2nd ch from hook, work 1 sc, 1 hdc in next 3 chs, 3 sc in last ch. Working down the opposite side of the chain, work 1 hdc in next 3 chs, 1 sc in last ch. Join with a sl st and FO, leaving a long tail for sewing. [12 sts]
Assembly & Finishing Touches
Position the two bunny ears securely at the top edge of your coaster base, pinning them in place to check symmetry.
Use your tapestry needle and the long yarn tails to whip-stitch the ears firmly to the back of the coaster base. Weave in all loose yarn ends securely.
Give your finished bunny coaster a light steam blocking if needed to flatten the piece, refine its circular shape, and give it a truly professional finish.
Pro Tips for Flawless Results
- Maintain a tight and even yarn tension while working your rounds to ensure the coaster remains completely flat and sturdy against heat and moisture.
- Opt for 100% cotton yarn because it provides superior heat resistance and absorbency compared to synthetic acrylic fibers.
- Experiment with contrasting pastel shades for the inner ears to give your bunny coasters an extra dash of playful personality!
Frequently Asked Questions
What skill level is required for this pattern?
Most crochet bunny coaster designs are wonderfully beginner-friendly, requiring only basic stitches like single crochet, half double crochet, and simple shaping techniques.
Can I wash my crochet bunny coasters?
Yes, absolutely! Because they are made with durable cotton yarn, you can gently hand-wash them and lay them flat to dry so they maintain their lovely shape.
How long does it take to make one coaster?
Depending on your personal crochet speed and experience level, a single bunny coaster can easily be completed in under an hour, making it a fantastic quick-make project.
Watch the Full Step-by-Step Video Tutorial
Prefer visual guidance? Follow along with the complete video tutorial below at your own pace: