
Overview & Design Inspiration
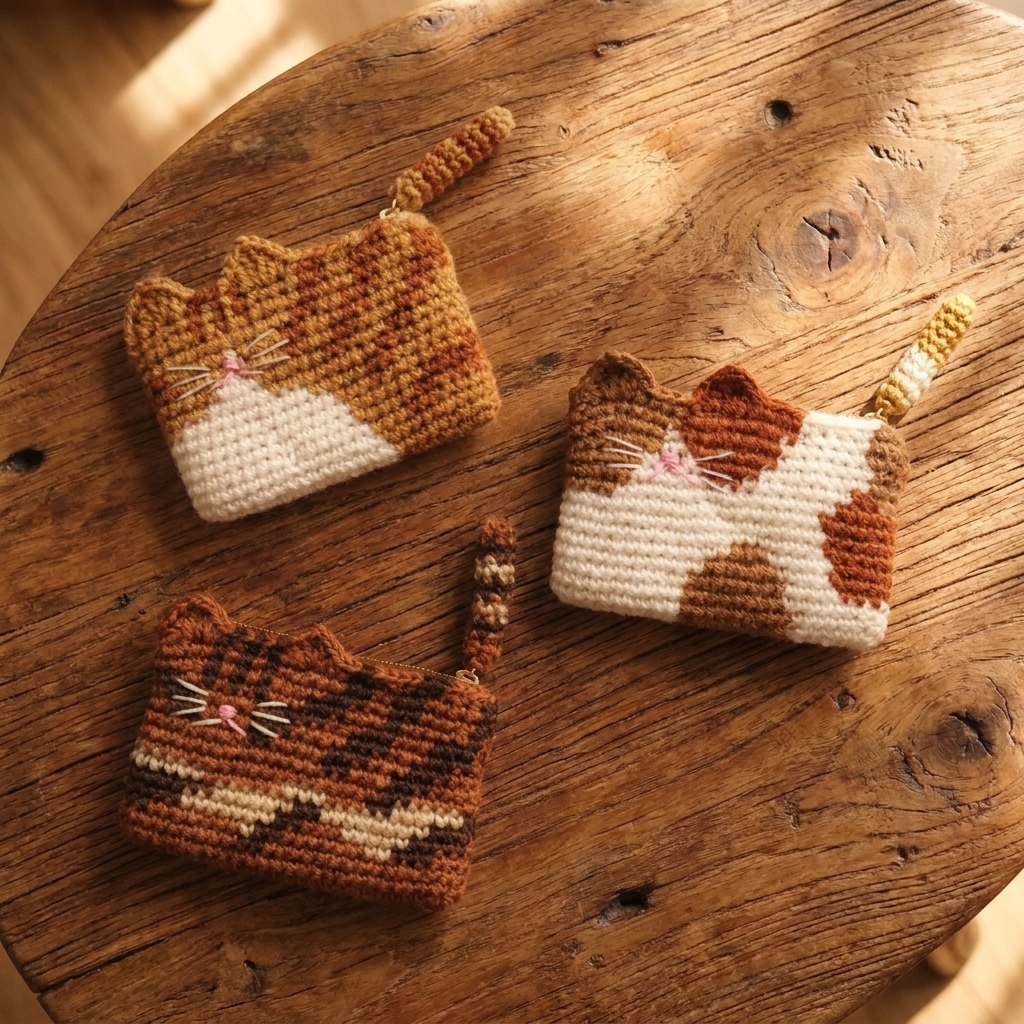
Welcome back, fellow yarn lovers! If you are looking for a quick, charming project that combines practicality with pure handmade joy, you are going to fall completely in love with our newest community favorite: the Crochet Cat-shaped Pouch Pattern.
Inspired by playful feline silhouettes, this compact little project is as delightful to make as it is useful. Whether you need a secure home for your stitch markers, loose change, earbuds, or tiny treasures, this charming pouch brings a smile to your face every time you reach into your bag.
Materials & Recommended Supplies
Gathering your supplies is half the fun! To achieve a sturdy pouch with crisp definition, you will want to choose the right fibers and notions before casting on.
- Yarn: Medium-weight (Worsted/Aran) cotton or cotton-blend yarn. Cotton provides a firm structure, while acrylic offers a softer, squishier feel.
- Main Color & Scraps: One primary ball of yarn, plus small leftover scraps in contrasting shades for tabby stripes, calico patches, or a distinct little belly.
- Crochet Hook: 3.5 mm to 4.5 mm (US E/4 to 7). Using a slightly smaller hook than recommended for the yarn creates a dense fabric that keeps small items secure inside.
- Notions: Yarn needle, scissors, stitch markers, and optionally a small zipper, snap, or button for closure.
- Embroidery Details: Pink yarn or embroidery floss for the nose, and dark thread or yarn for whiskers and facial features.
Essential Techniques & Stitch Highlights
The beauty of this design lies in its simplicity. Because the structure relies primarily on foundational stitches, it is wonderfully approachable while still offering fantastic opportunities to practice essential crochet skills.
Working in rows of standard single crochet creates the dense, sturdy surface needed for a functional pouch. You will also practice seamless color-changing techniques to mimic ginger tabbies or calico patches, alongside basic shaping methods like decreases to form the signature pointed cat ears.
Construction & Assembly Highlights
The magic of this pouch happens through simple geometric construction and thoughtful detailing. The body is built from two identical rectangular panels that form the sturdy foundation of the pouch.
Once your panels are complete, the playful cat silhouette comes to life right at the upper edge where the ears are shaped using gentle decreases. Surface embroidery ties the whole personality together, allowing you to stitch sweet sleepy eyes, a tiny pink nose, and delicate whiskers before seaming the panels together.
Customization & Styling Ideas
One of the absolute best parts of this pattern is how easily you can make each pouch completely unique. You can whip up a warm ginger-and-cream kitty, a classic dark-striped tabby, or a multi-colored calico.
Feel free to experiment with surface embroidery or switch up the color changes during the body construction. They make incredible, thoughtful gifts for the cat lovers in your life—though you will probably want to keep a few for yourself!
Pro Tips for Flawless Results
- Maintain Consistent Tension: Because your pouch is built from two panels that need to align, keeping an even gauge is more important than matching one exact measurement.
- Use Stitch Markers: Place locking stitch markers in the first and last stitches of your rows to prevent accidental decreases and keep your edges wonderfully straight.
- Embrace Imperfection: Real cats have quirky markings, so do not stress over mathematically symmetrical color patches—slight variations add wonderful handmade charm!
- Choose a Dense Fabric: If you notice large gaps between your single crochets, drop down a hook size to ensure your tiny treasures won’t slip through.
Frequently Asked Questions
Is this pattern beginner-friendly?
Yes, absolutely! If you are comfortable with basic chains, single crochets, and turning your work, you have all the skills needed to create this adorable pouch.
Can I add a zipper or lining to the pouch?
You certainly can. A fabric lining and a small zipper can be easily hand-sewn into the opening for an extra polished, professional finish.
How do I get my cat ears to look even?
Simply count your stitches from the outer edges inward to ensure both ears start at the same distance from the corners, and don’t worry if they have a tiny bit of asymmetric charm!
Watch the Full Step-by-Step Video Tutorial
Prefer visual guidance? Follow along with the complete video tutorial below at your own pace: