
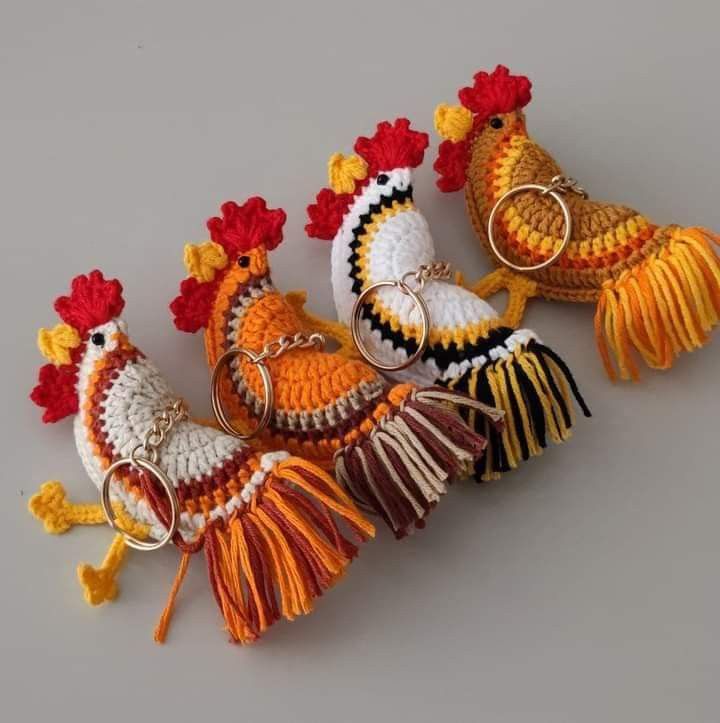
Overview & Inspiration
Hello, fellow yarn lovers! Welcome to your new favorite quick-make project: the Crochet Cute Rooster Keychain Pattern. This delightful design combines creativity, charm, and everyday practicality into one irresistible amigurumi make.
Whether you are a beginner looking to practice your shaping skills or an experienced crocheter wanting a fast, profitable item for craft fairs, this little rooster delivers. With minimal materials and endless customization possibilities, you will want to stitch a whole flock of them!
Materials & Supplies Needed
- Lightweight yarn (sport or DK weight) in cotton or acrylic. Colors needed: main body color, red for comb, yellow for beak, and contrasting colors for tail feathers.
- Crochet hook: 2.5mm to 3.5mm (US size C/2 to E/4).
- Polyfill stuffing material.
- Yarn needle (tapestry needle).
- Stitch markers.
- Keychain ring attachment.
- Scissors.
Stitches & Abbreviations
- MR: Magic Ring
- ch: chain
- sc: single crochet
- inc: single crochet increase (work 2 sc in the same stitch)
- dec: single crochet invisible decrease
- sl st: slip stitch
- st(s): stitch(es)
- Rnd: round
Step-by-Step Pattern Instructions
Body
Working in continuous rounds without joining, use your main body color and a 2.5mm – 3.5mm crochet hook.
- Rnd 1: Start 6 sc in a MR [6 sts]
- Rnd 2: [inc] around [12 sts]
- Rnd 3: [sc in next st, inc] around [18 sts]
- Rnds 4 to 8: sc in each st around [18 sts]
- Rnd 9: [sc in next st, dec] around [12 sts]. Stuff the body lightly with polyfill.
- Rnd 10: [dec] around [6 sts]. Fasten off, leaving a tail to close the gap and weave in ends securely.
Comb
Using red yarn, attach to the top of the head.
- Row 1: Ch 3, starting in 2nd ch from hook work sl st, work a small curved shape across the top of the head using sc and sl st, then fasten off and weave in ends.
Beak
Using yellow yarn, form a tiny triangle shape.
- Row 1: Ch 2, work 1 sc in 2nd ch from hook, fasten off and leave a tail for sewing. Attach neatly to the front of the body.
Wings & Tail Feathers
Using contrasting colors for the wings and slightly longer chains with slip stitches for the tail feathers to create a playful, feathery texture.
Assembly & Finishing Touches
Sew the comb, beak, wings, and tail feathers securely onto the main body using your yarn needle. Double-check that all pieces are tightly fastened so your keychain can withstand everyday use.
Embroider simple eyes using black thread for a safe, minimalist expression. Finally, attach your sturdy keyring securely to the top of the rooster.
Pro Tips for Flawless Results
- Maintain tight and even stitch tension so the polyfill stuffing never pokes through your amigurumi stitches.
- Always use a stitch marker when working in continuous rounds to keep track of your progress and maintain proper symmetry.
- Weave in your yarn tails cleanly and securely inside the body to ensure long-term durability.
Frequently Asked Questions
What skill level is required for the Crochet Cute Rooster Keychain Pattern?
The pattern is beginner-friendly and requires only basic knowledge of single crochet, increases, and decreases. With a little patience, new crocheters can easily complete it.
How long does it take to complete one keychain?
On average, it takes between one to two hours depending on your experience level and crochet speed.
Can I wash the finished rooster keychain?
Yes, if you use washable yarn and secure attachments. Hand washing gently in cold water is recommended to keep your keychain looking fresh.
Watch the Full Step-by-Step Video Tutorial
Prefer visual guidance? Follow along with the complete video tutorial below at your own pace: