
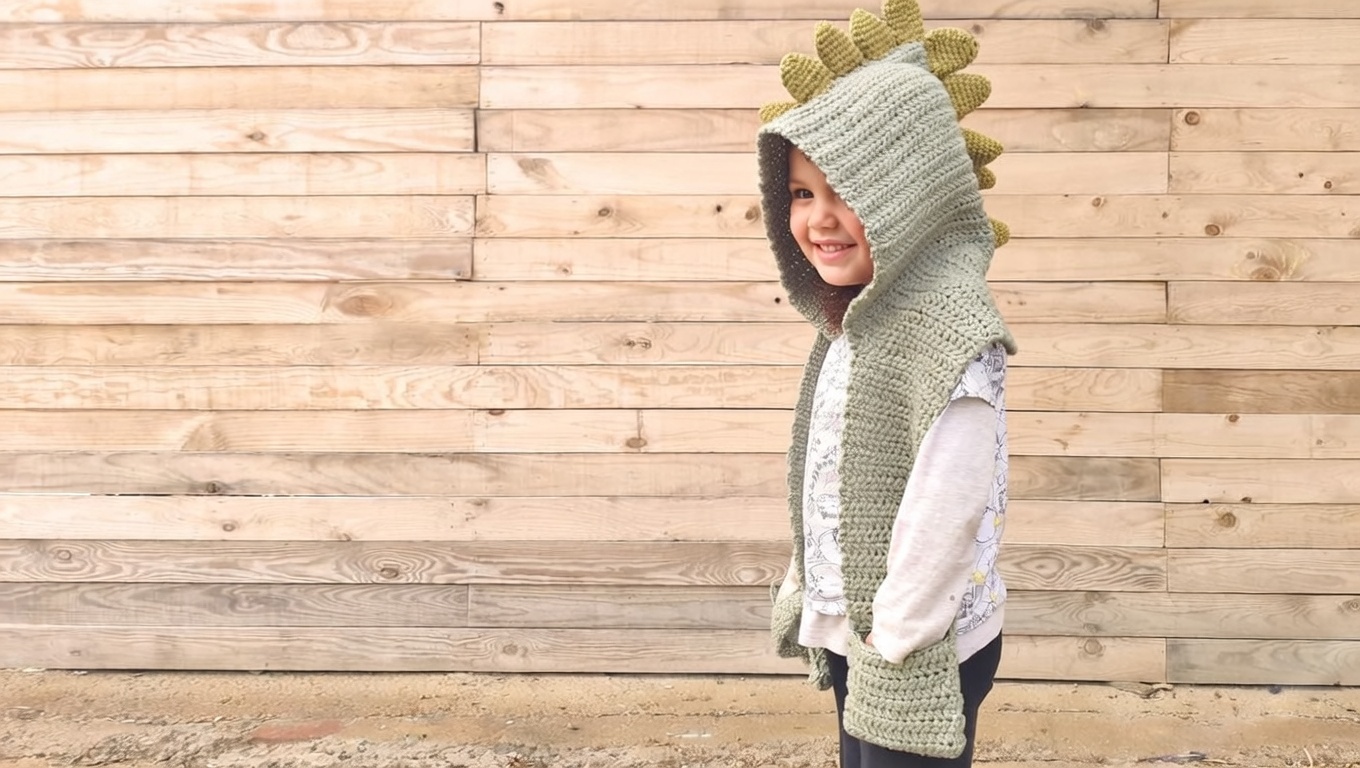
Overview & Inspiration
Welcome, fellow yarn lovers, to one of the most delightful and whimsical projects you will hook up this season! The Crochet Dinosaur Hooded Scarf Pattern combines cozy, practical warmth with a heavy dose of prehistoric fun, making it an absolute favorite for makers of all skill levels.
Whether you are crafting a roaring surprise for a dinosaur-obsessed kiddo or making a playful statement piece for a teen or adult, this design strikes the ultimate balance between functionality and personality. Grab your hook, pick your favorite prehistoric shades, and let’s dive into making a masterpiece!
Materials & Supplies Needed
- Yarn: Medium-weight (Worsted / Category 4) yarn in your choice of dinosaur colors (approx. 500-700 yards total depending on size).
- Fiber: 100% Acrylic or an acrylic-wool blend for durability, warmth, and easy care.
- Hook: 5.5 mm (US Size I-9) crochet hook.
- Notions: Tapestry needle for weaving in ends, locking stitch markers, and sharp scissors.
- Stuffing: A small handful of polyester fiberfill (optional, for stuffing larger spikes).
Stitches & Abbreviations
- ch – Chain
- sl st – Slip stitch
- sc – Single crochet
- hdc – Half double crochet
- dc – Double crochet
- inc – Increase (work 2 sts in the same st)
- dec – Decrease (work 2 sts together)
- st(s) – Stitch(es)
- FO – Fasten off
Step-by-Step Pattern Instructions
Part 1: The Scarf Foundation
We will begin by working the long scarf portion, which provides both cozy neck warmth and the foundation for our hood.
- Row 1: Ch 16, working in the back bumps of the ch, hdc in 3rd ch from hook and in each ch across, turn. [14 sts]
- Rows 2 – 60: Ch 2 (does not count as st here and throughout), hdc in each st across, turn. [14 sts]
- Do not fasten off. Leave the scarf attached so we can build the hood directly onto the center edge.
Part 2: The Hood Construction
Now we will work the hood section seamlessly right out of the center back of our finished scarf foundation.
- Row 1: Locate the center 20 stitches along one long edge of the scarf. Join yarn and work hdc in each of those 20 sts, turn. [20 sts]
- Rows 2 – 25: Ch 2, hdc in each st across, turn. [20 sts]
- Fold the hood rectangle in half matching the top edges, and seaming or sl st across the top to close the crown of the hood. FO.
Part 3: Dinosaur Spikes & Scales
No dinosaur accessory is complete without a fierce row of back spikes! Make 6 to 8 spikes depending on your preferred look.
- Round 1: Using a contrasting color, ch 4, working in the 2nd ch from hook, sc in next 2 ch, 3 sc in last ch, working down the opposite side of the ch, sc in next 2 sts, turn. [7 sts]
- Round 2: Ch 1, inc in first st, sc in next 3 sts, inc in last 2 sts, sl st to join. FO leaving a long tail for sewing. [10 sts]
- Repeat to create your desired number of spikes.
Assembly & Finishing Touches
Lay your hooded scarf out flat on a clean surface and arrange your crocheted spikes evenly along the center seam of the hood and down the back of the scarf.
Use your tapestry needle and the long yarn tails to securely whipstitch each spike into place, ensuring they stand upright and proud.
Carefully weave in all loose yarn ends using your tapestry needle. Give your finished dinosaur hooded scarf a light steam blocking if desired to relax the stitches and smooth out the edges.
Pro Tips for Flawless Results
- Maintain a consistent yarn tension throughout your rows so the hood fits comfortably and doesn’t warp.
- Use locking stitch markers to pin your dinosaur spikes in place before sewing to guarantee even spacing.
- Choose smooth, medium-weight acrylic yarn to let the texture of your spikes and stitches pop brilliantly.
Frequently Asked Questions
Can I adjust this pattern to fit an adult?
Yes, absolutely! You can easily lengthen the scarf rows and add a few extra rows to the hood height to comfortably fit older teens and adults.
Are plastic safety eyes safe to use for this project?
If you are gifting this to a young child, it is best to avoid plastic safety eyes or buttons to prevent choking hazards. Instead, simply embroider friendly eyes using yarn and a tapestry needle!
Do I need to block my finished dinosaur scarf?
Blocking is completely optional, but a gentle steam block can help your hood keep its structured shape and give your handmade stitches a gorgeous, professional finish.
Watch the Full Step-by-Step Video Tutorial
Prefer visual guidance? Follow along with the complete video tutorial below at your own pace: