
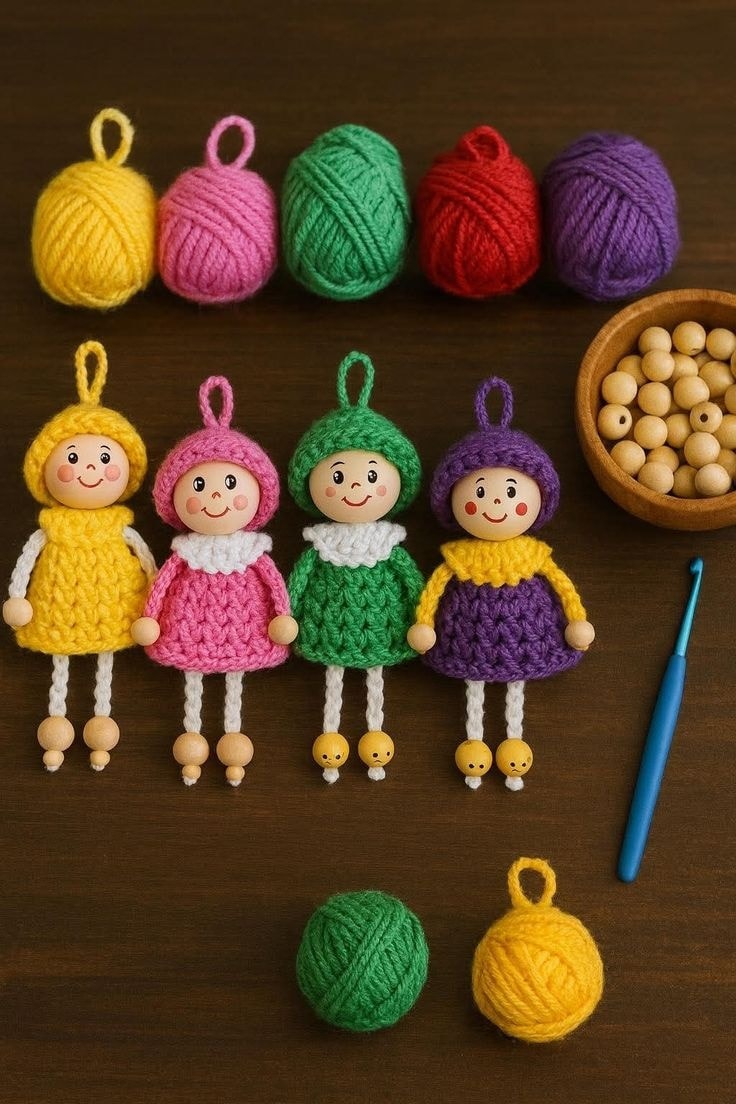
Overview & Inspiration
Welcome, fellow yarn lovers! There is something utterly magical about bringing a tiny, pocket-sized character to life using just a ball of yarn and a crochet hook.
This adorable crochet doll keychain pattern is the ultimate stash-busting project that lets you practice amigurumi shaping while creating a charming accessory for backpacks, purses, and keys.
Materials & Supplies Needed
- Sport or DK weight cotton yarn (skin tone, hair color, and outfit colors)
- 2.0 mm to 3.0 mm crochet hook
- Polyester fiberfill stuffing
- Yarn needle for weaving ends and sewing pieces
- Stitch markers
- Scissors
- Sturdy keychain ring or lobster clasp
- Black embroidery floss for facial features
Stitches & Abbreviations
- MR: Magic Ring
- ch: Chain
- sc: Single Crochet
- inc: Increase (work 2 sc in the same stitch)
- dec: Decrease (work 2 sc together)
- sl st: Slip Stitch
- st(s): Stitch(es)
- ( ): Repeat instructions inside parentheses for the indicated number of times
Step-by-Step Pattern Instructions
Head & Body
Using your skin tone yarn, start by making the head in continuous rounds.
- Round 1: 6 sc in MR [6 sts]
- Round 2: (inc) around [12 sts]
- Round 3: (sc, inc) around [18 sts]
- Rounds 4-6: sc around [18 sts]
- Round 7: (sc, dec) around [12 sts]
- Round 8: (dec) around [6 sts]. Stuff the head firmly with polyester fiberfill. Fasten off, leaving a long tail to sew.
For the body using your outfit color yarn, repeat Rounds 1 through 3, then work even rounds to create a neat, compact torso.
Arms and Legs
Using skin tone yarn, make two arms and two legs.
- Round 1: 4 sc in MR [4 sts]
- Rounds 2-3: sc around [4 sts]. Fasten off and leave a tail for attaching to the body.
Assembly & Finishing Touches
Sew the arms and legs securely onto the body using your yarn needle, making sure symmetry is balanced.
Attach the head firmly to the top of the body, weaving through multiple layers to ensure stability for daily keychain use.
Embroider a simple, sweet face using black embroidery floss for the eyes and a French knot or backstitch for details.
Securely attach your sturdy keyring hardware to the top of the doll’s head with reinforced stitching.
Pro Tips for Flawless Results
- Use a slightly smaller hook than recommended for your yarn weight to prevent stuffing from poking through the stitches.
- Maintain consistent tension throughout your continuous rounds for a smooth, professional amigurumi finish.
- Weave in all yarn tails tightly and hide them inside the body before final assembly.
Frequently Asked Questions
What skill level is required for this pattern?
This design is wonderfully beginner-friendly, requiring only basic single crochet stitches, increases, decreases, and simple sewing.
How do I make the keychain durable for everyday use?
Use sturdy cotton yarn and reinforce the attachment point at the top of the head by stitching through multiple layers of yarn multiple times.
Can I wash my crochet doll keychain?
Yes, gentle hand washing is best. Allow the doll to air dry completely to protect the shape and the metal keychain hardware.
Watch the Full Step-by-Step Video Tutorial
Prefer visual guidance? Follow along with the complete video tutorial below at your own pace: