
Overview & Design Inspiration
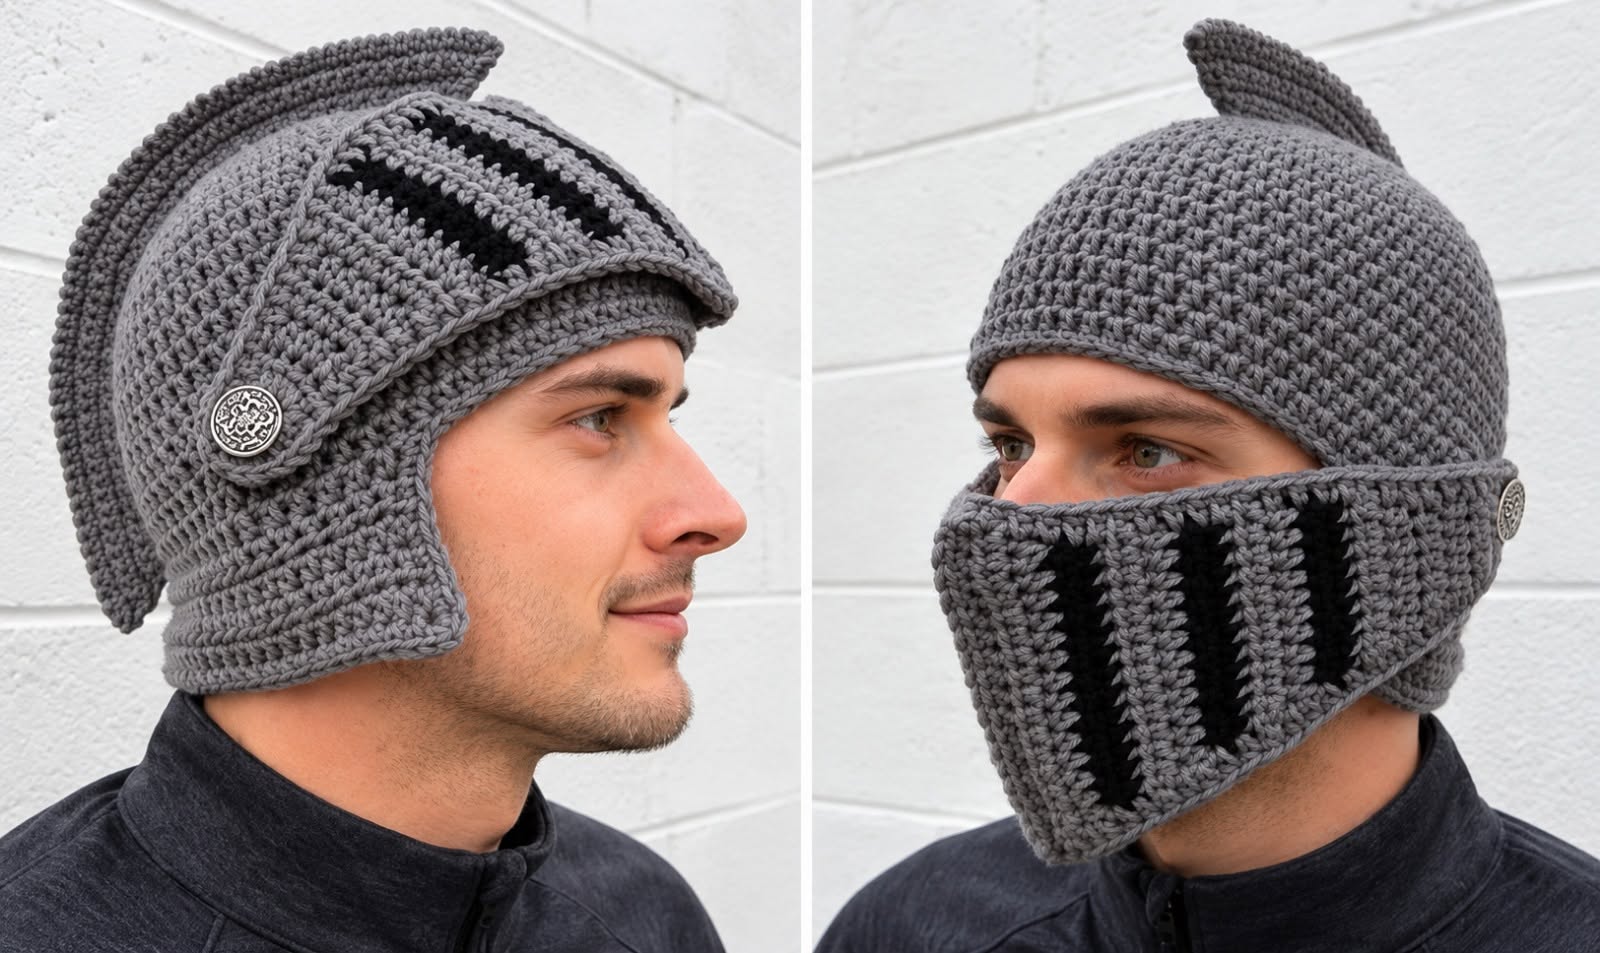
Welcome back, yarn friends! If you are looking for a project that blends playful imagination with clever crochet construction, you are going to adore our latest obsession. Today, we are diving deep into the art of transforming ordinary yarn into legendary armor with the Crochet Gladiator Knight Hat Pattern.
Inspired by ancient warrior helmets, this wearable piece combines a cozy, fitted beanie with protective side flaps, a raised crest, and a brilliantly clever movable face guard. It gives you all the dramatic, heroic flair of a medieval helmet while remaining remarkably soft, flexible, and comfortable to wear!
Materials & Recommended Supplies
Gathering your supplies is half the fun, and this project thrives on yarns that give you gorgeous stitch definition. Here is everything you need to arm yourself for your next crochet adventure:
- Yarn: Sturdy worsted or bulky weight yarn in gray, charcoal, pewter, or silver-gray (approximately 200–300 yards depending on size) for that authentic metallic armor look.
- Accent Yarn: A small amount of black yarn for the dark vertical face guard details.
- Crochet Hook: An appropriate hook size (typically US J/10 or K/10.5, measuring 6.0 mm to 6.5 mm) to achieve a dense, supportive fabric.
- Notions: Yarn needle for weaving ends, stitch markers for symmetry, scissors, and two sturdy decorative buttons.
- Safety Note: If making this for a child, ensure all buttons and embellishments are securely attached and avoid small choking hazards.
Essential Techniques & Stitch Highlights
Bringing a structural piece like a knight’s helmet to life relies on a handful of foundational crochet techniques working together. Instead of overly delicate stitches, this design leans into sturdy, reliable building blocks that hold their shape proudly.
You will utilize standard U.S. terminology, starting your journey with a magic ring or a secure chain loop before building density with half double crochets and single crochets. Alternating standard rows with back-loop-only (BLO) rounds creates subtle, handsome horizontal ridges that mimic layered metal plates.
When it comes to the face guard, basic color changes simulate dark vertical iron bars without requiring complex tapestry crochet acrobatics. Decreases like single-crochet-two-together (sc2tog) help taper the panels smoothly, ensuring everything wraps comfortably around the face.
Construction & Assembly Highlights
One of the best things about this pattern is how approachable the construction is when broken down into manageable pieces. Rather than wrestling with one giant, complicated helmet, you will build it modularly for a flawless custom fit.
You begin at the crown of the beanie, working continuous rounds of increases until you match the wearer’s head diameter, then dropping the increases to form the sides down to eyebrow level. Next, the side and cheek guards are worked directly onto the lower edges or crafted separately and seamlessly joined.
Finally, the separate face guard and majestic helmet crest are attached. By using decorative buttons at the temple points as pivot anchors, your face guard can even be flipped up and down—making it the ultimate costume accessory for renaissance fairs, costume parties, or imaginative play!
Customization & Styling Ideas
Half the magic of handmade wearables is putting your own creative spin on the design. You can easily adapt this pattern to match your favorite fantasy worlds, sports teams, or historical periods.
Try swapping the classic gray for a rich bronze, steel blue, or even bright team colors for a spirited game-day hat. Older kids and adults love wearing these to local geek-culture conventions, Halloween events, or chilly winter outdoor festivals where a little extra face coverage is welcome.
If you want to lean further into the medieval aesthetic, consider adding a faux-fur trim along the crest or experimenting with metallic yarn accents to catch the light!
Pro Tips for Flawless Results
- Check Your Tension: Helmet hats need a dense fabric to hold their shape; if your stitches feel loose, drop down a hook size so the hat stands tall and proud.
- Embrace Fit Testing: Always try the hat on the intended wearer or use a hat form during the process. Head sizes and yarn gauges vary wildly, so periodic fittings beat universal stitch counts every time.
- Secure Your Buttons: If you are making the face guard movable, sew your side buttons down with reinforced stitches so they can handle repeated pivoting without pulling away from the hat.
- Weave As You Go: Because you are working with multiple color changes and separate panels, weaving in your yarn tails as you finish each component will save you hours of finishing work at the end.
Frequently Asked Questions
Is this crochet gladiator helmet beginner-friendly?
Yes, absolutely! While it looks complex, the project is broken down into simple flat panels and a basic beanie base. As long as you are comfortable with basic stitches like single crochet and half double crochet, you can totally tackle this project.
Can I wash the finished helmet?
We recommend choosing a washable wool-blend or acrylic worsted-weight yarn so the helmet can be easily cared for. Always check your yarn label for specific washing instructions, and hand wash or use a gentle cycle if buttons or structured visors are attached.
How do I make the face guard actually movable?
You can create small reinforced loop spaces at the upper corners of your finished face guard panel. Attach your decorative buttons securely through these loops directly onto the sides of the helmet, creating a natural hinge that lets the visor swing upward when not in use.
Watch the Full Step-by-Step Video Tutorial
Prefer visual guidance? Follow along with the complete video tutorial below at your own pace: