
Overview & Design Inspiration
Welcome back, fellow yarn lovers! If you are looking for a project that instantly infuses your living space with joy, warmth, and handmade charm, you are going to fall completely in love with our latest crochet obsession.
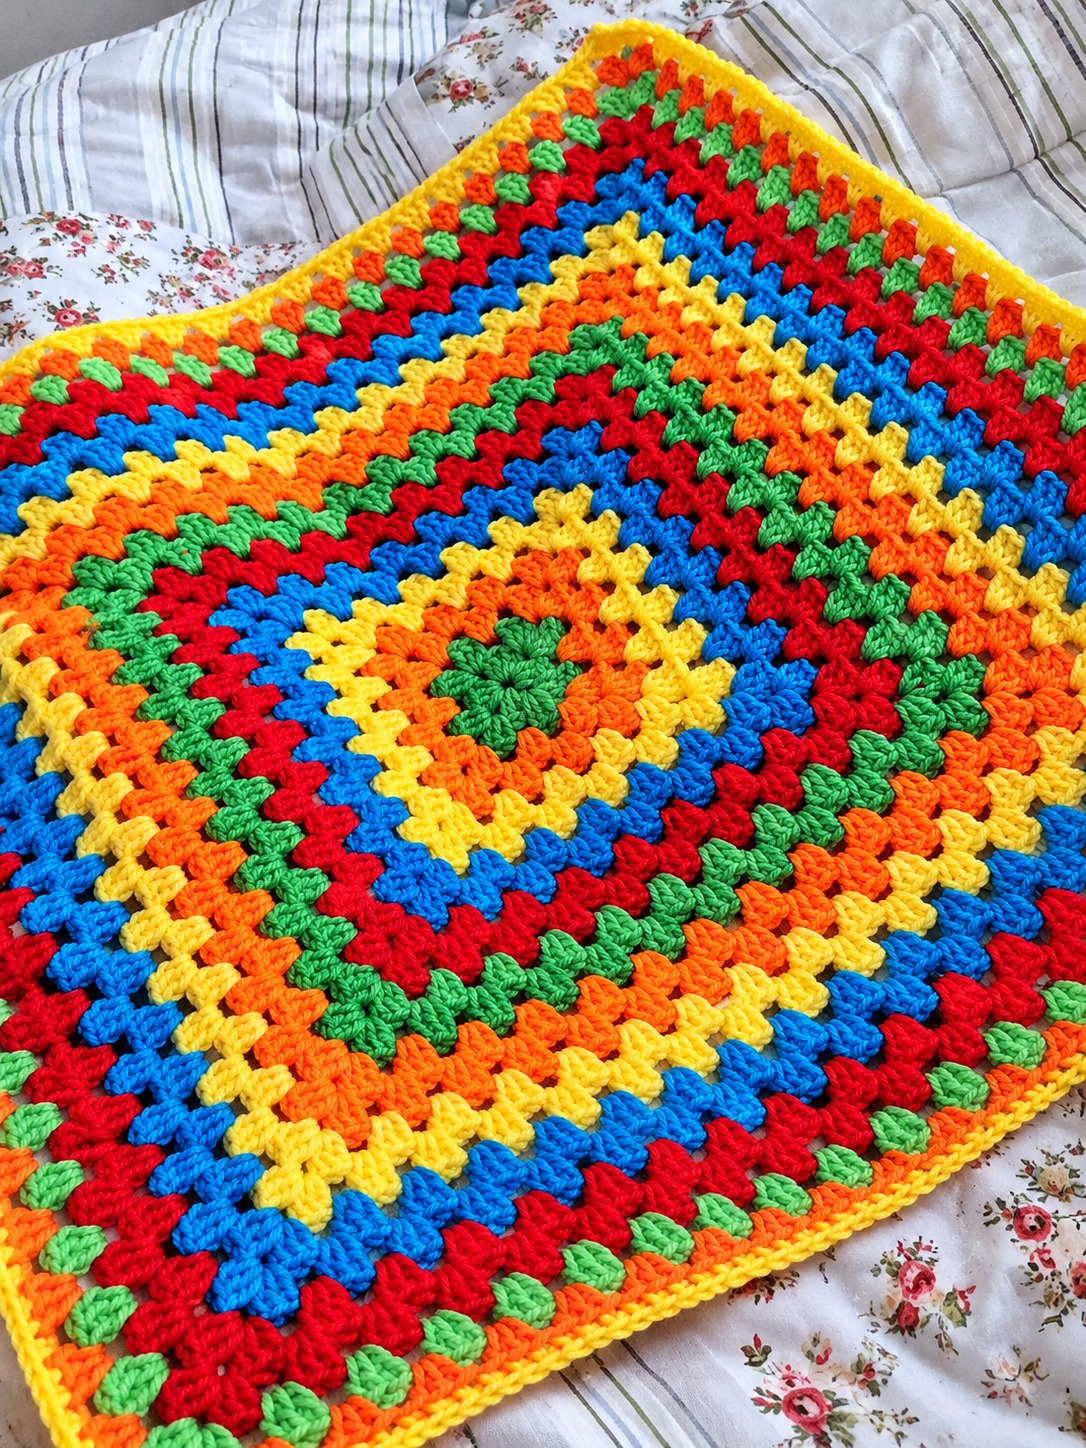
Celebrating a vibrant palette of green, orange, yellow, blue, and red, this design captures everything we adore about classic granny square crochet. Whether you are curling up with a good book or crafting a heartfelt gift, this piece brings a burst of retro-inspired sunshine to any room.
Materials & Recommended Supplies
- Yarn: Medium-weight (worsted) yarn in five main shades—bright green, vivid orange, sunny yellow, royal blue, and vibrant red (approximately 200–300 yards per color for a throw).
- Fiber Choices: Acrylic for easy-care durability, or cotton and cotton-blend yarns for a breathable, lovely drape.
- Crochet Hook: 5.0 mm (H/8) crochet hook (or size needed to match your preferred gauge).
- Notions: Scissors, a yarn needle for weaving in ends, and stitch markers to easily identify your corners.
- Measuring Tape: To check your blanket dimensions as your geometric masterpiece grows.
Essential Techniques & Stitch Highlights
At the heart of this blanket is the iconic cluster stitch construction, featuring groups of double crochet stitches separated by delicate chain spaces. These airy openings give the fabric a wonderful flexibility, preventing the blanket from becoming overly dense or stiff while maintaining that gorgeous traditional look.
Working on this project is also a fantastic way to build your crochet confidence! Beginners will love mastering the magic ring, corner increases, and clean color changes, while seasoned makers can enjoy the meditative, fast-paced rhythm of classic cluster rounds.
Construction & Assembly Highlights
Unlike traditional blankets that require stitching dozens of individual squares together at the end, this gorgeous design uses a continuous granny square construction. You simply begin at the center square and work your rounds outward, watching your vibrant color bands expand symmetrically.
This ingenious method means virtually zero tedious assembly or joining at the finish line! By fastening off at the end of each round and joining your new color cleanly in a corner, you achieve crisp, striking color transitions without any messy yarn carrying across the back.
Customization & Styling Ideas
The true beauty of a continuous granny square blanket is its incredible versatility. You can easily adapt the dimensions to create a sweet, snuggly baby blanket, a sprawling bed cover, or a cozy decorative throw for the back of your favorite sofa.
Feel free to play with the color palette to match your personal interior aesthetic! Swap the bright primary hues for soothing pastel shades, moody jewel tones, or comforting neutrals to give this classic pattern an entirely fresh and modern personality.
Pro Tips for Flawless Results
- Check Your Gauge with a Swatch: Whip up a quick practice square to test your tension and ensure your stitches aren’t too tight or overly loose.
- Maintain Consistent Tension: A relaxed, even grip on your yarn will help your straight edges stay neat and your corners stay beautifully balanced.
- Weave As You Go: Tackling your yarn tails every few rounds prevents a massive, overwhelming mountain of ends at the very end of your project!
Frequently Asked Questions
Is this pattern beginner-friendly?
Yes, absolutely! Because it relies on basic double crochets and chain spaces worked in a continuous round, it is a wonderful confidence-builder for adventurous beginners.
Do I have to sew individual squares together?
Not at all. This design is worked as one continuous, growing square, meaning there is no joining or mattress stitching required at the end.
Can I change the size of the blanket?
You certainly can! Simply continue working more rounds following the established color sequence until your blanket reaches your desired measurements.
Watch the Full Step-by-Step Video Tutorial
Prefer visual guidance? Follow along with the complete video tutorial below at your own pace: