
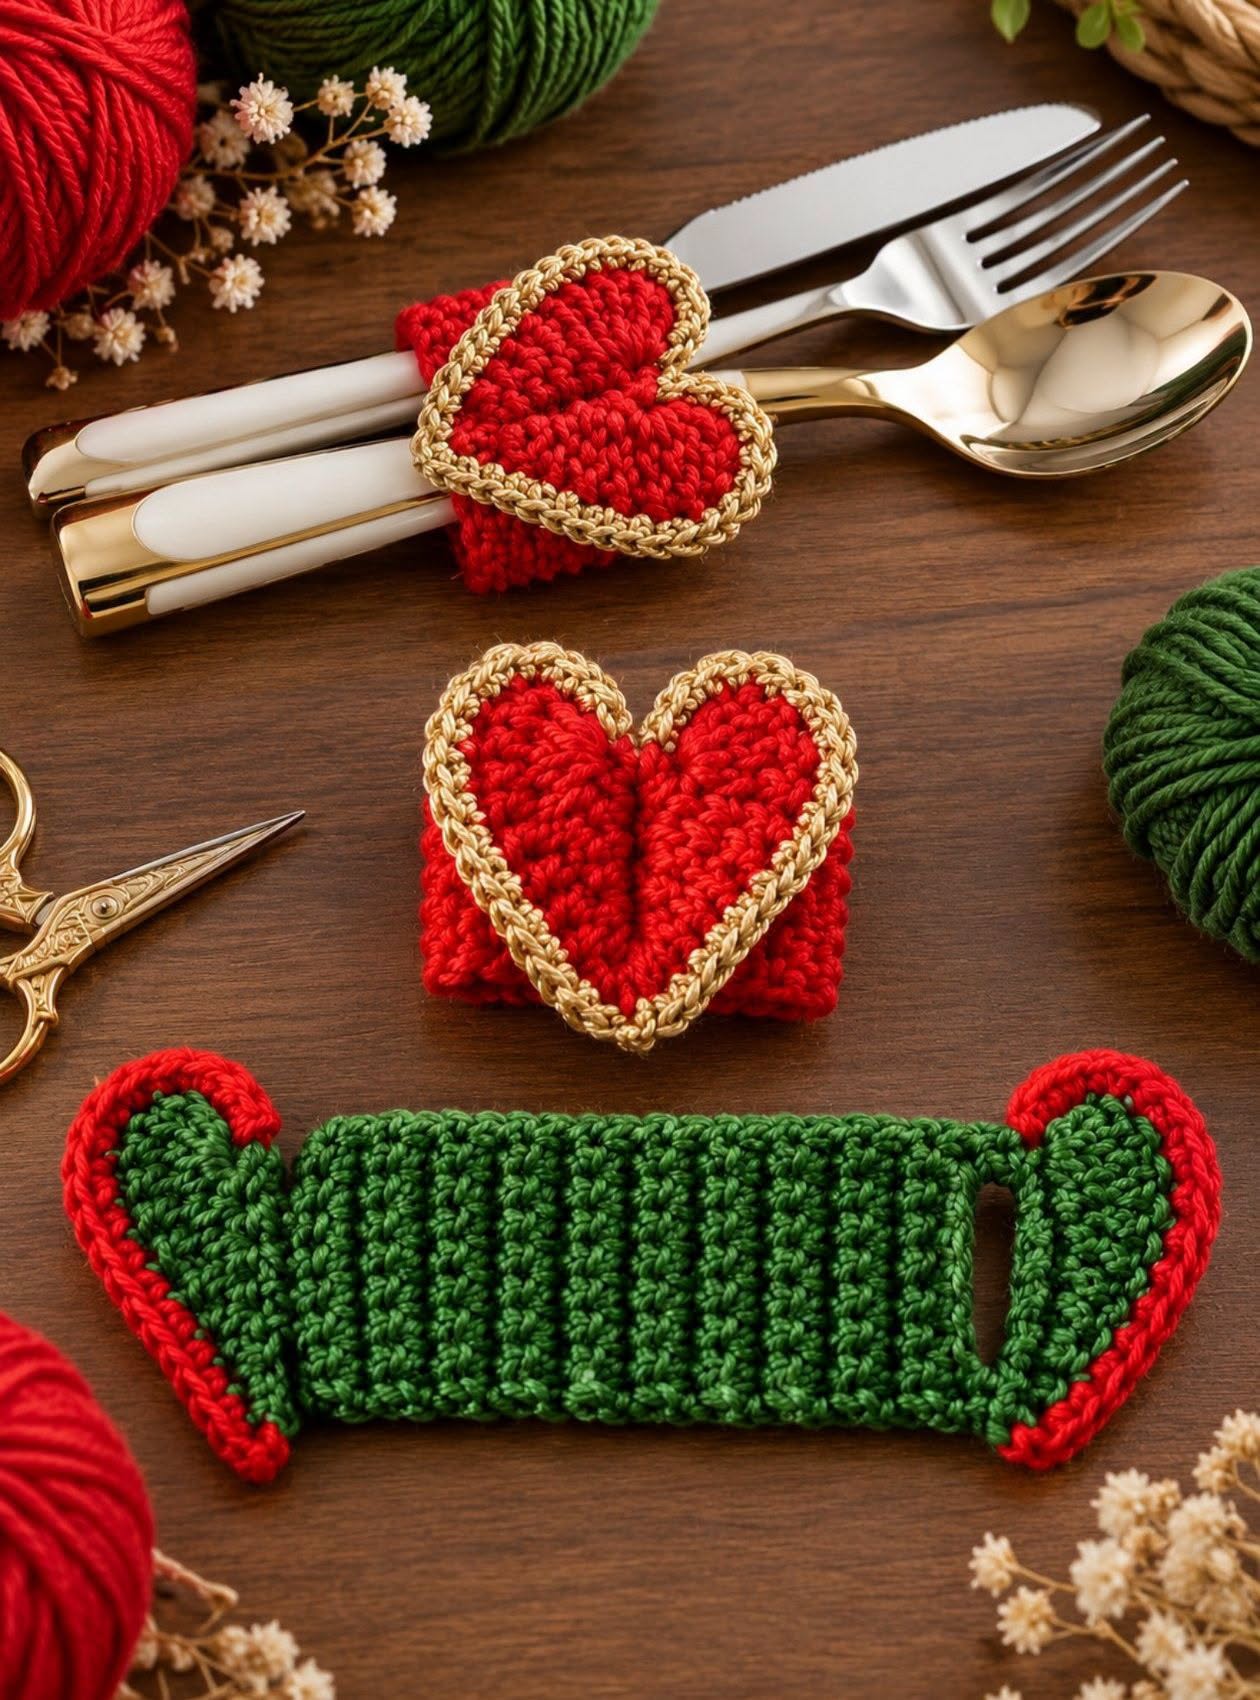
Overview & Design Inspiration
There is something undeniably magical about setting a table with handmade touches. The Crochet Heart Shaped Napkin Rings Pattern is a charming, heartfelt way to transform everyday dining into an unforgettable experience.
Whether you are styling a festive holiday feast, a romantic anniversary dinner, or simply looking to elevate your farmhouse-style kitchen décor, these delightful rings combine practical utility with whimsical charm. Best of all, they work up remarkably fast, making them an absolute joy to stitch!
Materials & Recommended Supplies
- Yarn: Medium-weight (Worsted / Aran) cotton or cotton-blend yarn. Cotton creates crisp, well-defined stitches and a firm fabric that holds its shape.
- Colors Needed: A main color for the band and heart, plus an optional contrasting yarn for a striking decorative border. Perfect for using up yarn scraps!
- Crochet Hook: 3.5 mm to 4.0 mm hook (US E/4 to G/6). Use a slightly smaller hook than recommended on your yarn label to ensure a firm, structured finish.
- Notions: Sharp scissors, a yarn needle for weaving in ends, stitch markers, and a flexible measuring tape.
Essential Techniques & Stitch Highlights
This project relies on accessible US crochet terminology, utilizing foundational stitches like single crochet (sc), half double crochet (hdc), and double crochet (dc). It is a fantastic confidence booster for beginners while offering plenty of creative satisfaction for seasoned makers.
One of the standout techniques in this pattern is working into the back loop only (BLO). This simple adjustment creates gorgeous horizontal ribbing along the band, adding wonderful tactile texture and visual depth without requiring complicated stitch work.
Construction & Assembly Highlights
The construction journey begins with the rectangular band, which is worked in rows of textured single crochet until it comfortably wraps around a rolled napkin with a slight overlap. The short ends are then joined securely to form a sturdy, functional ring foundation.
Next comes the dimensional heart motif. Crafted through simple shaping and increases, the heart can be left flat or gently stuffed for a lovely, puffed appearance. Finally, a neat contrasting border is worked around the edge before the heart is securely stitched over the band’s seam—instantly hiding any joins while putting the gorgeous design front and center.
Customization & Styling Ideas
One of the best things about this pattern is how effortlessly it adapts to different seasons and celebrations. Swap deep greens and reds for a festive Christmas look, or play with blush pinks and crisp whites for a dreamy bridal shower.
For a rustic farmhouse aesthetic, try warm cream and oatmeal tones with a metallic border. Because the yarn requirements are so minimal, you can easily whip up an entire matching dining set in an afternoon!
Pro Tips for Flawless Results
- Maintain Snug Tension: Keep your stitches compact so the napkin ring retains its structural integrity and holds its shape over time.
- Strategic Placement: When attaching the heart to the band, anchor it at multiple points—the bottom point, upper curves, and center—to prevent it from drooping or folding forward.
- Embrace Scrap Yarn: Because each ring uses very small amounts of yarn, raid your stash boxes to create a wonderfully eclectic, multicolored holiday tablescape.
Frequently Asked Questions
Are these napkin rings suitable for absolute beginners?
Absolutely! The pattern uses basic stitches like single crochet and simple shaping. If you know how to chain and make basic stitches, you can easily master this project.
Can I wash these crochet napkin rings?
Yes, especially if you use a quality medium-weight cotton yarn. Cotton items can generally be spot-cleaned or hand-washed gently and laid flat to dry.
Should I make the heart flat or padded?
That is entirely up to your personal style! A flat heart uses less yarn and is easier to store, while a slightly padded heart adds gorgeous dimension and a luxurious, plush feel to your table setting.
Watch the Full Step-by-Step Video Tutorial
Prefer visual guidance? Follow along with the complete video tutorial below at your own pace: