
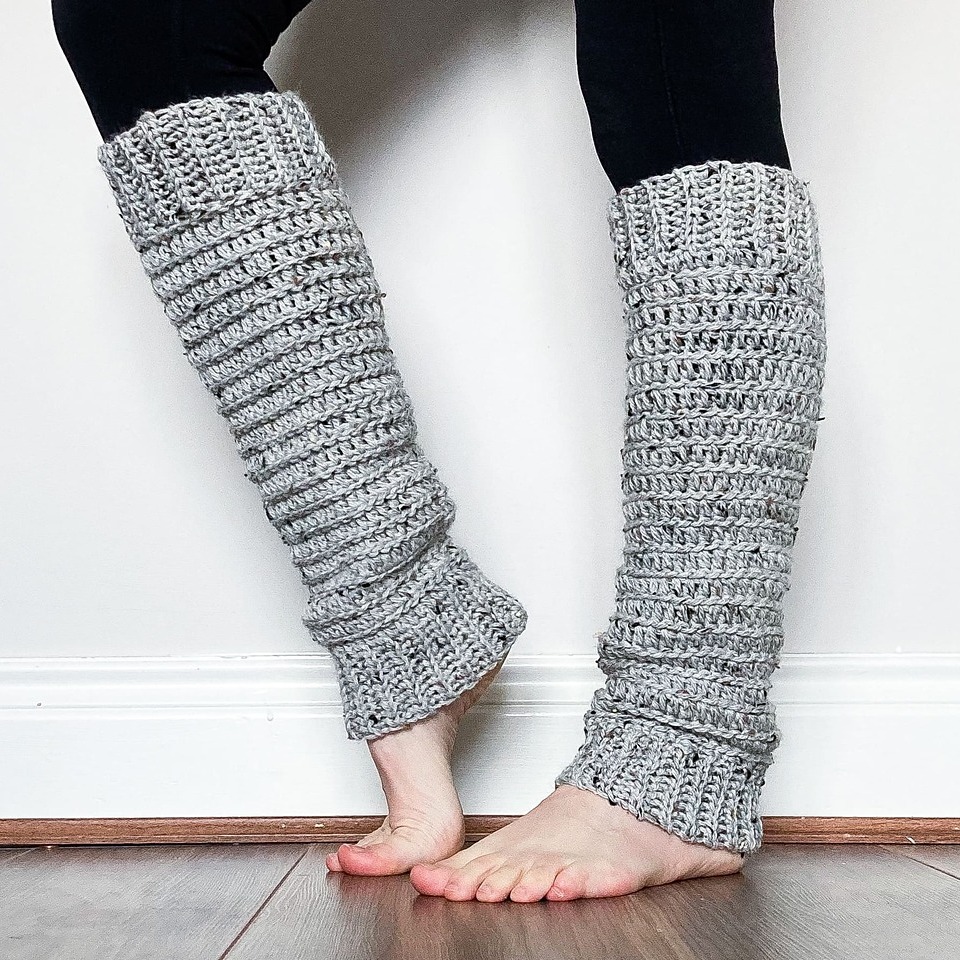
Overview & Inspiration
Welcome, fellow yarn lovers! There is nothing quite like the cozy embrace of a handmade accessory, and our latest project is an absolute dream to work up. Whether you are stepping out on a crisp autumn morning or curling up with a cup of tea, this crochet leg warmers pattern brings instant warmth, comfort, and effortless style to your wardrobe.
Best of all, these leg warmers are delightfully quick to make, serving as the ultimate canvas for exploring gorgeous textures, trying out shaping techniques, and playing with your favorite yarn colors. From total beginners picking up a hook for the first time to seasoned pros looking for a satisfying weekend make, you are going to fall completely in love with this versatile pattern.
Materials & Supplies Needed
- Medium-weight (Worsted / #4) yarn – approx. 200–250 yards. Flexible acrylic blends, wool, or cotton blends work wonderfully for that cozy stretch.
- Choice of vibrant solid colors, neutrals, or a fun variegated yarn.
- Crochet hook in size 5.0 mm (US Size H/8).
- Tapestry needle for weaving in ends.
- Stitch markers (2 to 4 recommended) to keep track of rounds and shaping.
- Sharp scissors.
Stitches & Abbreviations
- ch: chain
- sc: single crochet
- hdc: half double crochet
- dc: double crochet
- sl st: slip stitch
- BLO: back loop only
- FPdc: front post double crochet
- BPdc: back post double crochet
- inc: increase (work 2 stitches in the same space)
- dec: decrease (work 2 stitches together)
- st(s): stitch(es)
Step-by-Step Pattern Instructions
Let’s dive into the core construction of your leg warmers! We will begin at the ankle cuff, work our way up with gorgeous ribbing, and finish with a comfortable, tapered fit.
Step 1: The Foundation Ankle Ribbing
Using your 5.0 mm (US H/8) hook, ch 8. We will work the ribbing in rows to create a stretchy band.
Row 1: Working in the back bump of the chain, sc in 2nd ch from hook and in each ch across, turn. [7 sts]
Row 2 to 28: Ch 1, working in BLO, sc in each st across, turn. [7 sts]
Slip stitch the first and last rows together to form a seamless circular ankle cuff. Do not fasten off; we will now work directly along the edge of the ribbing.
Step 2: The Body of the Leg Warmer
Now we transition into the main body using balanced half double crochets.
Round 1: Ch 1, evenly work 28 hdc around the edge of the ribbed cuff. Join with a sl st to the first hdc. [28 sts]
Round 2: Ch 2 (counts as hdc here and throughout), work [FPdc around the next st, BPdc around the following st] around to create textured ribbing, join with a sl st. [28 sts]
Rounds 3 to 18: Repeat Round 2, maintaining your stitch pattern and consistent tension. [28 sts]
Step 3: Shaping and Calf Expansion
Let’s gently flare the leg warmer to fit comfortably around your calf muscle.
Round 19: Ch 2, [work ribbing pattern over next 6 sts, hdc inc in next st] 4 times, join with a sl st. [32 sts]
Rounds 20 to 24: Continue working in your established stitch pattern around the newly expanded 32-stitch circumference. [32 sts]
Fasten off, leaving a long tail for weaving.
Assembly & Finishing Touches
With your leg warmers freshly crocheted, it is time for the final details! Use your tapestry needle to neatly weave in any remaining yarn tails along the inside of the ribbing.
If you prefer a structured look, lightly steam or block your finished leg warmers according to your yarn’s care instructions. Slip them on over your favorite boots or leggings and admire your gorgeous handmade creation!
Pro Tips for Flawless Results
- Always crochet a quick gauge swatch before starting to ensure your leg warmers fit snugly without sliding down.
- Use stitch markers at the start of your rounds to prevent your stitch count from accidentally drifting.
- Maintain even tension when working post stitches so your ribbed texture stays crisp and elastic.
Frequently Asked Questions
What skill level is required for this crochet leg warmers pattern?
This pattern is fantastic for ambitious beginners and beyond! Basic stitches and simple shaping make it approachable, while the post stitches give experienced makers a fun textural element.
Can I easily resize the pattern for different leg measurements?
Yes, absolutely! You can easily adjust the starting ankle chain in multiples of your stitch repeat and add or subtract rows in the body to fit children, teens, or adults perfectly.
Do these leg warmers stretch out over time?
When made with an elastic yarn blend and paired with textured post-stitch ribbing, your leg warmers will maintain their shape beautifully through wear and washing.
Watch the Full Step-by-Step Video Tutorial
Prefer visual guidance? Follow along with the complete video tutorial below at your own pace: