
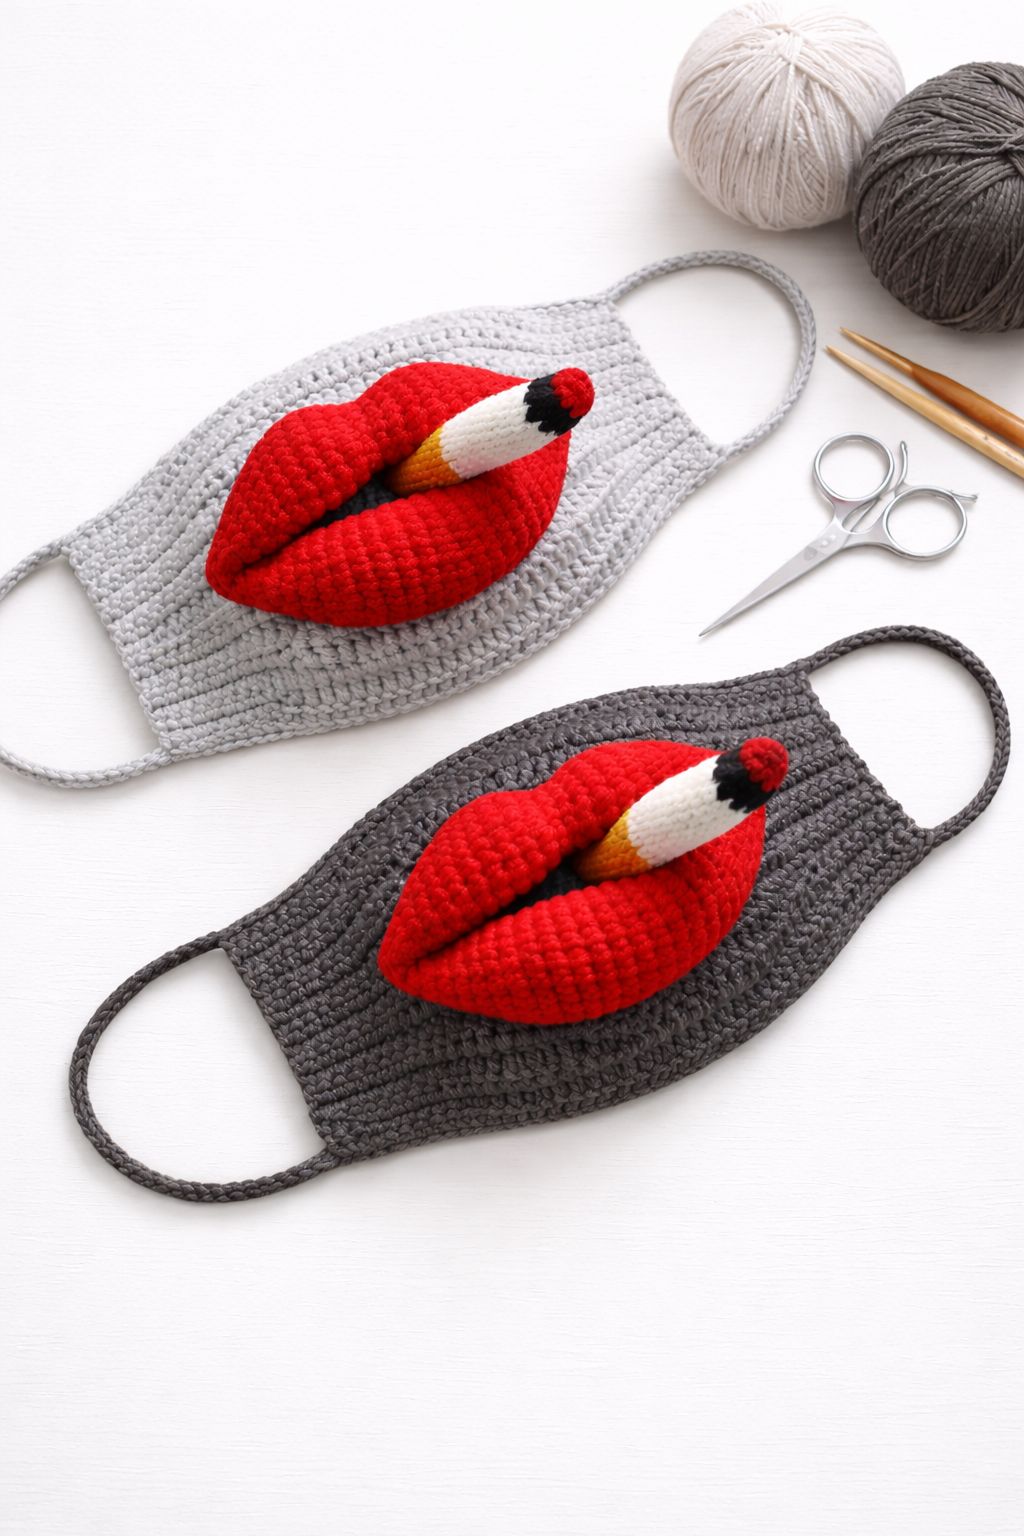
Overview & Inspiration
Welcome, fellow yarn enthusiasts! If you are looking to push the boundaries of contemporary needlework and explore the intersection of fashion and fiber art, you are in the right place.
The Crochet Mask Lips & Cigarette Pattern is a bold, theatrical statement piece that blends sculptural shaping with expressive pop-art symbolism. Let’s dive into your next favorite conversation-worthy project!
Materials & Supplies Needed
- Medium-weight (Worsted / #4) cotton yarn in skin-tone, bold red, white, cream, and a tiny scrap of grey or orange
- Hook size: 3.5 mm (US E/4) to ensure tight, crisp stitches
- Tapestry needle for weaving ends and assembly
- Stitch markers (4)
- Sharp scissors
- Light polyester fiberfill stuffing for the lips and cigarette detail
- Optional: Elastic cord or ribbon for wearable styling
Stitches & Abbreviations
- ch: chain
- sl st: slip stitch
- sc: single crochet
- hdc: half double crochet
- inc: increase (work 2 sc in the same stitch)
- dec: decrease (sc 2 stitches together)
- blo: back loops only
- st(s): stitch(es)
- Rnd / Row: round or row
Step-by-Step Pattern Instructions
1. Mask Base (Worked in Rows)
Using your skin-tone yarn and 3.5 mm hook, start with a foundation chain.
- Row 1: Ch 30, starting in the 2nd ch from hook, sc across. [29 sts]
- Row 2: Ch 1, turn, inc in first st, sc across to last st, inc in last st. [31 sts]
- Rows 3-10: Repeat Row 2, incorporating gradual increases along the cheek and nose shaping areas to contour naturally. [47 sts by Row 10]
- Rows 11-16: Ch 1, turn, sc evenly across without increasing. [47 sts]
- Row 17: Ch 1, turn, sc2tog at each end of the row to taper the chin. Finish off and weave in ends. [45 sts]
2. Sculpted Lips (Worked in the Round & Flat)
Using bold red yarn and your 3.5 mm hook:
- Round 1: Ch 16, join with sl st to form a ring. Work 2 sc in each ch around. [32 sts]
- Round 2: Work in blo for this round to create a sharp edge, sc around. [32 sts]
- Round 3: [Sc 2, dec] around to begin shaping the contours. [24 sts]
- Round 4: Lightly stuff the lip piece with polyester fiberfill, then sc2tog around until closed. Fasten off, leaving a long tail for sewing. [12 sts]
3. Decorative Cigarette Element
Using white yarn and your 3.5 mm hook:
- Round 1: Magic ring, work 6 sc into the ring. [6 sts]
- Rounds 2-6: Sc in each st around in white. [6 sts]
- Round 7: Switch to cream/orange yarn for the filter detail, sc around. [6 sts]
- Round 8: Sc2tog to close, fasten off, leaving a long tail to attach securely to the corner of the lips. [3 sts]
Assembly & Finishing Touches
Position the sculpted red lips centrally onto the lower half of the mask base, using stitch markers to pin them in place. Securely whipstitch around the perimeter of the lips, adding a tiny bit more stuffing if extra dimension is needed.
Attach the decorative cigarette element firmly to the corner of the lips using your tapestry needle and the remaining yarn tails. Ensure all knots are hidden inside or at the back of the work.
Border the entire mask base with a round of slip stitches or crab stitch in a matching or contrasting color to stabilize the edges and give it a polished finish.
Pro Tips for Flawless Results
- Maintain a consistently firm tension so your mask holds its sculptural shape without sagging.
- Always use a hook size slightly smaller than recommended on your yarn label to achieve crisp stitch definition.
- Steam block your finished mask lightly on a flat surface to relax the fibers and straighten out any curled edges.
Frequently Asked Questions
What skill level is required for this pattern?
This pattern is best suited for intermediate crocheters who are comfortable with shaping, working in the round, and basic assembly techniques.
Is the cigarette element functional?
No, the cigarette detail is strictly ornamental and symbolic, designed solely as a pop-art visual element for the mask.
Can I wear this piece as a real mask?
While you can add elastic cord or ribbons to wear it for costume events or art exhibitions, it is primarily intended as a statement decorative art piece.
Watch the Full Step-by-Step Video Tutorial
Prefer visual guidance? Follow along with the complete video tutorial below at your own pace: