
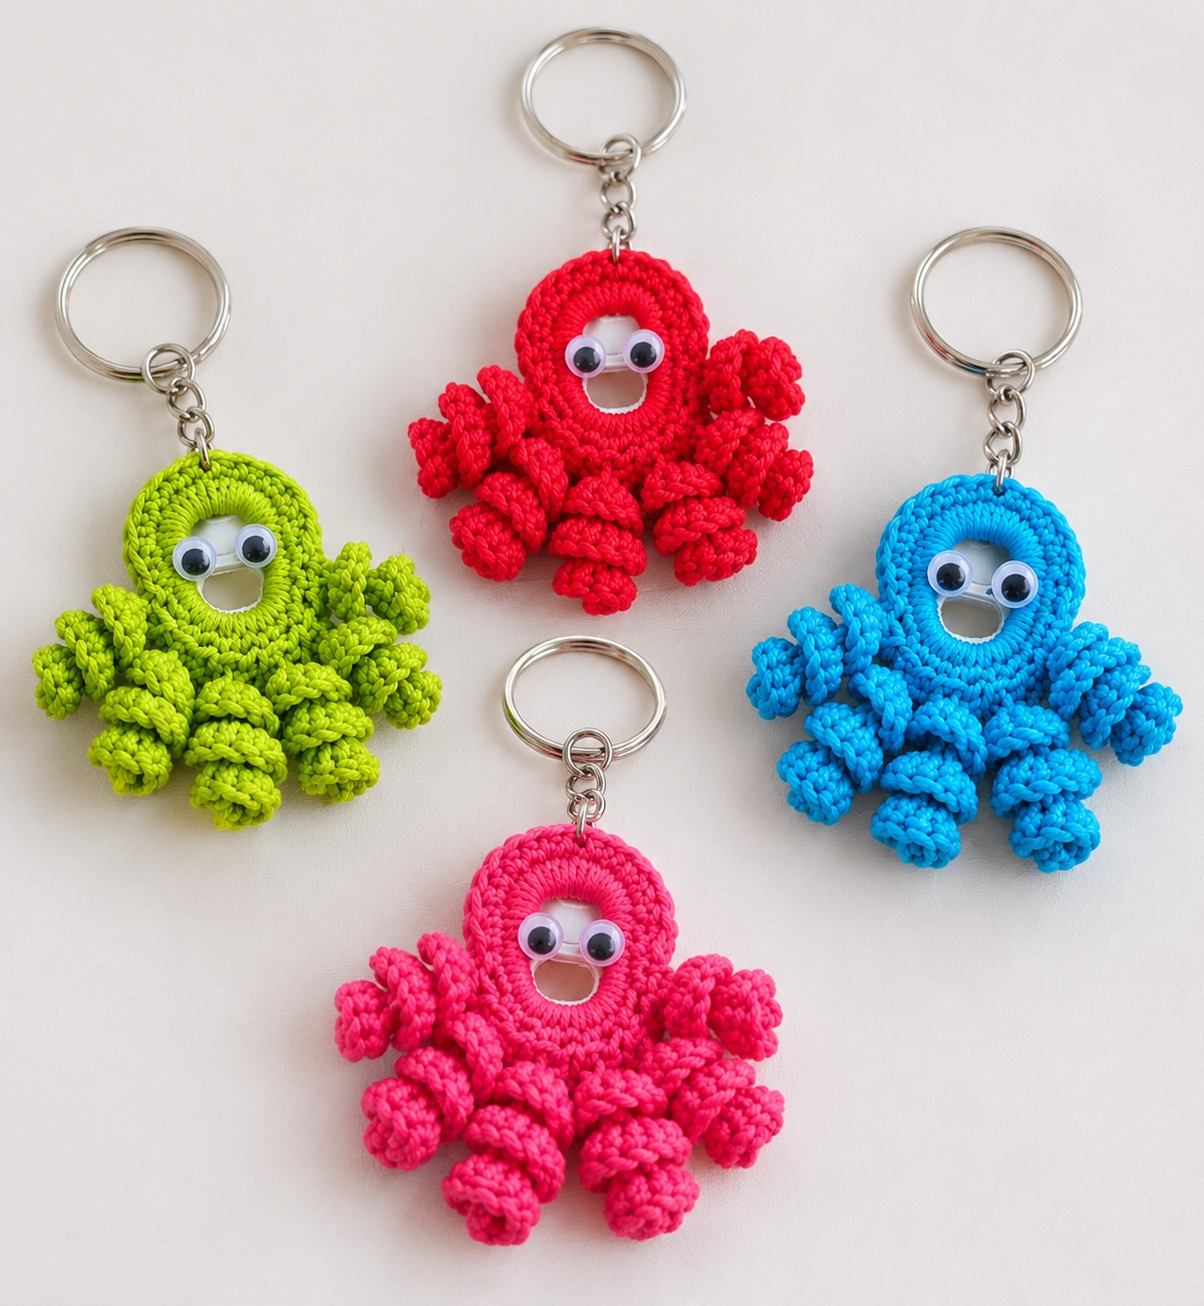
Hello, wonderful makers! We’re absolutely thrilled to share a project that perfectly encapsulates everything we adore about crochet: creativity, sustainability, and pure joy. Today, we’re diving into the delightful world of the “Crochet Octopus Can Tab Keychain Pattern” – a charming little accessory that’s captured our hearts.
Imagine transforming an everyday aluminum can tab into an adorable, vibrant octopus, complete with playful curled tentacles and expressive eyes. This project isn’t just about making something cute; it’s a testament to how simple materials, combined with our beloved craft, can become truly beautiful and practical treasures. Get ready to fall in love with these mini marvels!
Overview & Design Inspiration
The Crochet Octopus Can Tab Keychain is a truly ingenious design, taking something destined for recycling and giving it a brand new, incredibly charming life. Its appeal lies in its playful personality, brought to life by bright yarn colors and those wonderfully whimsical curled tentacles. This project brilliantly showcases how even the simplest materials can be transformed into something both beautiful and useful for everyday life.
What truly makes this octopus stand out is the clever way the aluminum tab integrates into the design, forming the very heart of its body. Instead of hiding the recycled element, the tab’s opening becomes a distinctive facial feature, adding a unique touch that’s full of character. It’s a delightful combination of smart design and sustainable crafting that we know you’ll adore creating.
Materials & Recommended Supplies
Gathering your materials is the first exciting step to bringing your mini octopus to life!
- **Aluminum Can Tab:** One clean, smooth beverage can tab.
- **Yarn:** Small amount of fine cotton yarn (e.g., fingering weight or sport weight) in your chosen vibrant or pastel color. Cotton offers great stitch definition and durability.
- **Crochet Hook:** 2.0 mm to 2.5 mm (US B/1 or C/2) is a practical starting point, but adjust to suit your yarn and tension.
- **Decorative Eyes:** Two small googly eyes for a playful look, or embroidery floss for a softer, child-safe option.
- **Keychain Ring:** One metal keychain ring.
- **Connecting Hardware:** A short connecting chain or a few jump rings to attach the octopus to the keychain ring.
- **Scissors:** For cutting yarn.
- **Yarn Needle:** For weaving in ends.
- **Adhesive:** If using plastic decorative eyes (ensure it’s suitable for fabric and plastic).
Essential Techniques & Stitch Highlights
You’ll be delighted to know that creating these adorable octopuses relies on foundational crochet techniques that many of us already know and love! The pattern primarily uses familiar US crochet abbreviations like chain (ch), single crochet (sc), slip stitch (sl st), and increase (inc).
These basic stitches are perfectly suited for building the compact, rounded head of the octopus and, most excitingly, for forming those wonderfully curly tentacles. By working multiple single crochet stitches into each chain, you’ll discover how effortlessly the yarn twists into charming spirals, giving each octopus its unique, playful character. This project is a fantastic way to reinforce your basic skills while creating something truly special!
Construction & Assembly Highlights
Crafting your crochet octopus begins with covering your prepared aluminum can tab, which forms the core of its body. You’ll attach your yarn and work single crochet stitches precisely around the outer perimeter of the tab, ensuring neat and even coverage that mostly conceals the metal.
Once the tab is covered, you’ll build upon this foundation to create the rounded head of the octopus, strategically adding a few increases to give it that lovely compact, balanced shape. The central opening of the tab remains visible, becoming that distinctive little “face” beneath where the eyes will go. Next comes the fun part: defining several evenly spaced attachment points along the lower section where the tentacles will sprout.
Each tentacle is created by chaining a specific length (like 10 chains), then working three single crochet stitches into each chain back towards the body. This clever technique naturally coaxes the yarn into a delightful spiral! Once all tentacles are formed and secured, you’ll carefully attach your chosen decorative eyes and finally, securely connect your finished octopus to a metal keychain ring, ready for its adventures.
Customization & Styling Ideas
One of the joys of the Octopus Can Tab Keychain is its endless potential for personalization! Play with a spectrum of yarn colors – go for vibrant hues like electric blue, hot pink, or lime green for a truly playful look, or choose softer pastels like mint, lavender, or cream for a more delicate touch. Imagine creating a whole rainbow collection!
These little octopuses are perfect for attaching to keys, backpacks, purses, or even pencil cases, adding a handmade touch to your everyday items. They also make incredibly thoughtful, personalized gifts, either as standalone treasures or as charming accents on a wrapped present. Consider making them in school colors for students, or in themed colors for holidays – a red and green octopus for Christmas, or orange and black for Halloween! The possibilities for making them uniquely yours are limitless.
Pro Tips for Flawless Results
- **Tab Preparation is Key:** Always thoroughly wash and dry your aluminum tab. Carefully inspect it for any sharp edges or damage; discard if unsure, as safety comes first!
- **Mind Your Tension:** Strive for consistent tension when working around the tab. Stitches should be snug enough to cover the metal without being so tight that they distort the tab or make crocheting difficult. Practice a small section if needed!
- **Secure Eye Attachment:** If using plastic googly eyes, use a strong, appropriate adhesive and allow it to cure fully. For peace of mind, especially if the keychain might be around young children, consider embroidering the eyes instead.
- **Embrace the Curl:** The tentacles are designed to naturally spiral. If a tentacle looks too tight after crocheting, gently adjust it with your fingers rather than tugging forcefully on the yarn. Each unique curl adds to its charm!
Frequently Asked Questions
What type of aluminum can tab works best for this project?
For the best results, select a can tab with a smooth, intact surface and an opening large enough to comfortably work your hook through. Tabs with similar dimensions will give you consistent results if you’re making multiple keychains.
Is this project suitable for beginner crocheters?
Absolutely! If you’re comfortable with basic stitches like chain, single crochet, and slip stitch, you’ll find this project very accessible. The techniques are straightforward, making it a fantastic way for beginners to create a satisfying finished item.
How do I ensure my octopus tentacles are perfectly curly?
The magic to the curl lies in working three single crochet stitches into each chain along your foundation chain for the tentacle. This increased stitch count naturally causes the fabric to coil into a spiral. Just let the stitches do their work, and gently adjust with your fingers if needed!
Watch the Full Step-by-Step Video Tutorial
Prefer visual guidance? Follow along with the complete video tutorial below at your own pace: