
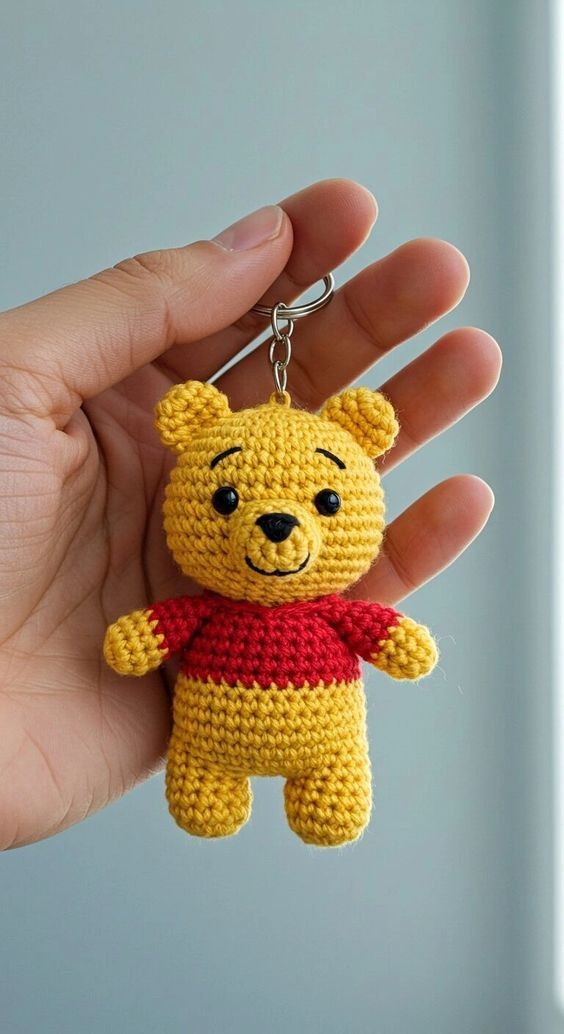
Overview & Design Inspiration
Welcome, fellow yarn lovers, to a wonderfully nostalgic project that will instantly melt your heart! There is something undeniably magical about crafting a beloved childhood character out of simple stitches and a cozy ball of yarn.
Our featured Crochet Winnie the Pooh Amigurumi Pattern captures all the sweet charm of the classic honey-loving bear in a delightful, pocket-sized package. Whether you attach him to your favorite handbag, gift him to a lifelong fan, or display him on your craft desk, this cheerful little bear brings an abundance of warmth and joy to everyday life.
Materials & Recommended Supplies
- Lightweight cotton or acrylic yarn in golden-yellow (for the body) and bright red (for the signature shirt).
- A small amount of yellow yarn for the muzzle and black embroidery thread for facial features.
- Crochet hook: 2.0 mm to 2.5 mm (US Steel Hook sizes B/1 or C/2) for a firm, sturdy fabric.
- Polyester fiberfill stuffing for that perfectly squishable feel.
- Two 5 mm or 6 mm black safety eyes (or black embroidery thread for a child-safe alternative).
- Stitch markers, a tapestry needle, and small scissors.
- A metal keychain ring and connecting chain for easy accessorizing.
Essential Techniques & Stitch Highlights
Bringing a miniature amigurumi character to life is an absolute joy, especially when relying on foundational crochet techniques. Working in continuous spiral rounds with basic single crochets creates a solid, seamless fabric that keeps your polyester fiberfill safely tucked away inside.
Mastering a few key maneuvers—like the magic ring for a closed, neat center and invisible decreases for smooth, professional-looking shaping—elevates your handmade creation. These reliable techniques build confidence while ensuring your finished bear maintains its charming, perfectly rounded proportions from every angle.
Construction & Assembly Highlights
This adorable keychain project comes together through a series of satisfying, bite-sized construction steps. You will begin by shaping the softly rounded golden head and crafting those iconic little bear ears, ensuring everything balances harmoniously before moving on to the limbs and the bright red shirt.
Thoughtful assembly is where the real personality shines through! Once your pieces are firmly stuffed and stitched together, delicate embroidery finishes off the sweet expression, transforming simple yarn loops into a recognizable, deeply nostalgic character ready for your adventures.
Customization & Styling Ideas
One of the greatest joys of handmade amigurumi is making the design entirely your own through creative personal touches. You can easily experiment with softer pastel yarn shades, adjust the overall scale by switching up your hook size, or even craft a tiny pot of honey for your bear to hold.
Beyond functioning as a delightful keychain for backpacks and purses, this little bear makes a wonderful rearview mirror charm or a heartfelt handmade present. Packaged inside a tiny gift box with a jar of honey, it becomes an unforgettable token of friendship for someone special.
Pro Tips for Flawless Results
- Maintain a firm and consistent yarn tension throughout your project to prevent the stuffing from peeking through your stitches.
- Use a stitch marker at the start of every round so you never lose your place in the spiral.
- Stuff your pieces gradually, packing the fiberfill firmly into the curves without over-stretching the individual stitches.
- Take your time with facial placement—pinning your safety eyes and ears in place before sewing lets you audition different expressions!
Frequently Asked Questions
Is this amigurumi pattern suitable for complete beginners?
Absolutely! While amigurumi requires working tightly and keeping track of stitch counts, the construction relies entirely on basic stitches like single crochets, increases, and invisible decreases. Beginners with a firm grasp of the basics will find this a wonderfully rewarding project.
Can I make this project child-safe?
Yes, you can easily adapt the pattern for younger recipients by swapping plastic safety eyes for embroidered French knots or simple black stitches. This eliminates any potential choking hazards while keeping your handmade toy completely safe for cuddles.
How do I attach the keychain hardware securely?
Once your bear is fully assembled, securely anchor your metal keychain ring to the top center of the head or between the ears using several passes of sturdy yarn or a specialized jump ring looped firmly through the secure crochet stitches.
Watch the Full Step-by-Step Video Tutorial
Prefer visual guidance? Follow along with the complete video tutorial below at your own pace: