
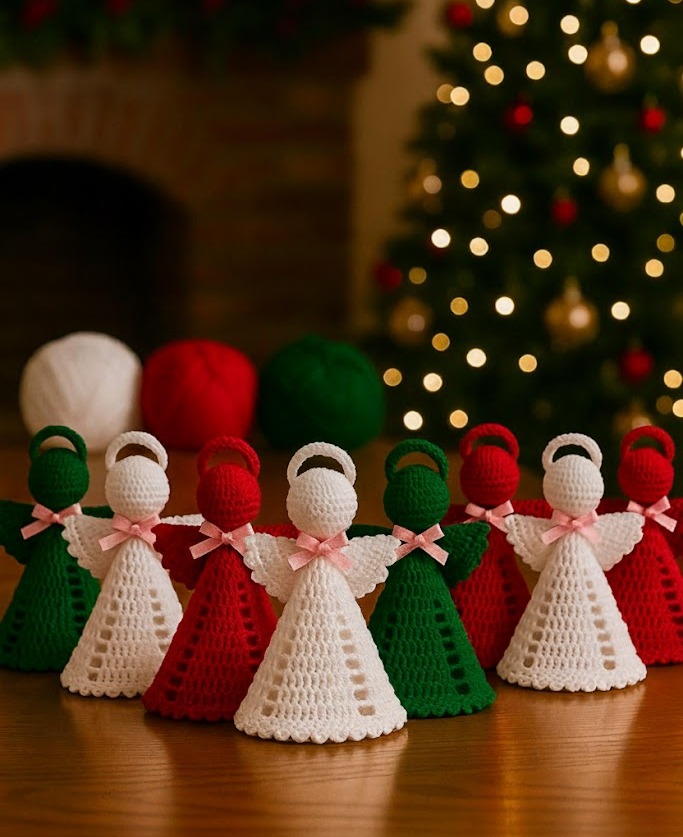
Overview & Inspiration
Welcome, fellow yarn lovers! There is something truly magical about working on a project that carries deep emotional value, and the Small Angel Crochet Pattern is one of the most cherished creations you can hook up. Whether you are crafting a meaningful holiday ornament, a comforting keepsake, or a delicate token of hope, this project brings immense joy to both the maker and the recipient.
Angels represent peace, love, and protection, making them wonderful gifts for memorials, holidays, or special milestones. Best of all, this pattern blends simple stitches with an elegant design, making it approachable for adventurous beginners while remaining delightfully engaging for experienced crocheters.
Materials & Supplies Needed
- Yarn: Fine crochet thread (Size 10) or lightweight sport-weight cotton yarn for a clean, structured finish.
- Yarn Colors: Traditional white, cream, or light gold (plus optional metallic thread for accents).
- Crochet Hook: 1.5 mm to 2.5 mm hook (matching your chosen thread weight).
- Tapestry Needle: For weaving in ends and seaming components.
- Stitch Markers: To keep track of continuous rounds.
- Scissors: For clean cuts.
- Stuffing: A small amount of fiberfill for the head and 3D body options.
- Notions: Fabric stiffener or diluted glue for blocking, plus optional lace, ribbon, or small beads.
Stitches & Abbreviations
- Ch: Chain
- Sl st: Slip stitch
- Sc: Single crochet
- Dc: Double crochet
- Inc: Increase (work 2 sc in the same stitch)
- Rnd / Row: Round or Row
- St(s): Stitch(es)
- FO: Fasten off
Step-by-Step Pattern Instructions
Let’s dive into making your very own crochet angel! We will work from the bottom skirt up to the head, creating the wings separately.
The Skirt & Body
Begin with a magic ring to form the base of your angel’s skirt.
- Rnd 1: Work 6 sc into the magic ring, join with a sl st to the first st [6 sts].
- Rnd 2: Ch 2 (counts as first dc here and throughout), work 1 dc in same st, work 2 dc in each st around, join with sl st [12 sts].
- Rnd 3: Ch 2, *1 dc in next st, 2 dc in next st; repeat from * around, join with sl st [18 sts].
- Rnds 4-5: Ch 2, 1 dc in each st around, join with sl st [18 sts].
- Rnd 6 (Torso): Switch to single crochet. Ch 1, work 1 sc in each st around, join with sl st [18 sts]. Next, work a series of decrease rounds if tapering, or maintain straight sc for 2 more rounds to form a neat upper body. FO and weave in ends.
The Head
Using your main yarn color, work the head in continuous rounds.
- Rnd 1: Work 6 sc into a magic ring [6 sts].
- Rnd 2: Work 2 sc in each st around [12 sts].
- Rnds 3-4: Work 1 sc in each st around [12 sts]. Stuff lightly with fiberfill.
- Rnd 5: Work invdec around to close the small sphere, FO leaving a long tail for sewing [6 sts].
The Wings (Make 2)
Work symmetrical wing pieces using delicate stitches.
- Row 1: Ch 6, work 1 sc in 2nd ch from hook and in each ch across, turn [5 sts].
- Row 2: Ch 1, work 2 sc in first st, sc across to last st, 2 sc in last st, turn [7 sts].
- Row 3: Ch 3, work shell patterns or picots along the outer edge to create a feathered wing effect. FO, leaving a long tail to attach to the back.
Assembly & Finishing Touches
Now that all your pieces are crocheted, it is time to bring your angel to life! Take your tapestry needle and securely sew the head to the top of the torso.
Position the two wing pieces symmetrically on the back of the upper body and whipstitch them firmly into place. Create a delicate halo by chaining a small loop of metallic gold thread and anchoring it directly above the head.
Weave in all remaining yarn tails neatly. Finally, shape your angel and apply a light fabric stiffener or diluted craft glue, pinning it to a foam board until completely dry to ensure it holds a crisp, elegant form.
Pro Tips for Flawless Results
- Maintain Consistent Tension: Keeping your stitches uniform ensures your angel’s skirt and body stay balanced and upright.
- Embrace Blocking: Do not skip the stiffening and blocking step; it transforms a floppy crochet piece into a crisp, professional keepsake.
- Add Sparkle: Holding a fine metallic thread alongside your cotton yarn gives the wings and halo a divine holiday glow.
- Check Proportions: Pause frequently during assembly to make sure the head, wings, and body complement one another harmoniously.
Frequently Asked Questions
Can I make this angel flat instead of 3D?
Yes, absolutely! Many crafters prefer a flat version of this pattern when using the angels as bookmarks, appliques, or flat tree ornaments. Simply omit the fiberfill stuffing.
What is the best yarn weight to use?
Size 10 crochet cotton thread gives the most intricate, lace-like definition. However, if you prefer a softer, easier-to-handle project, lightweight sport or fingering cotton yarn works wonderfully.
How do I stiffen my finished angel?
You can use a commercial fabric stiffener, a half-and-half mixture of white school glue and water, or a stiff sugar-water solution. Pin your angel to shape on a blocking board and let it dry thoroughly.
Watch the Full Step-by-Step Video Tutorial
Prefer visual guidance? Follow along with the complete video tutorial below at your own pace: