
Overview & Design Inspiration
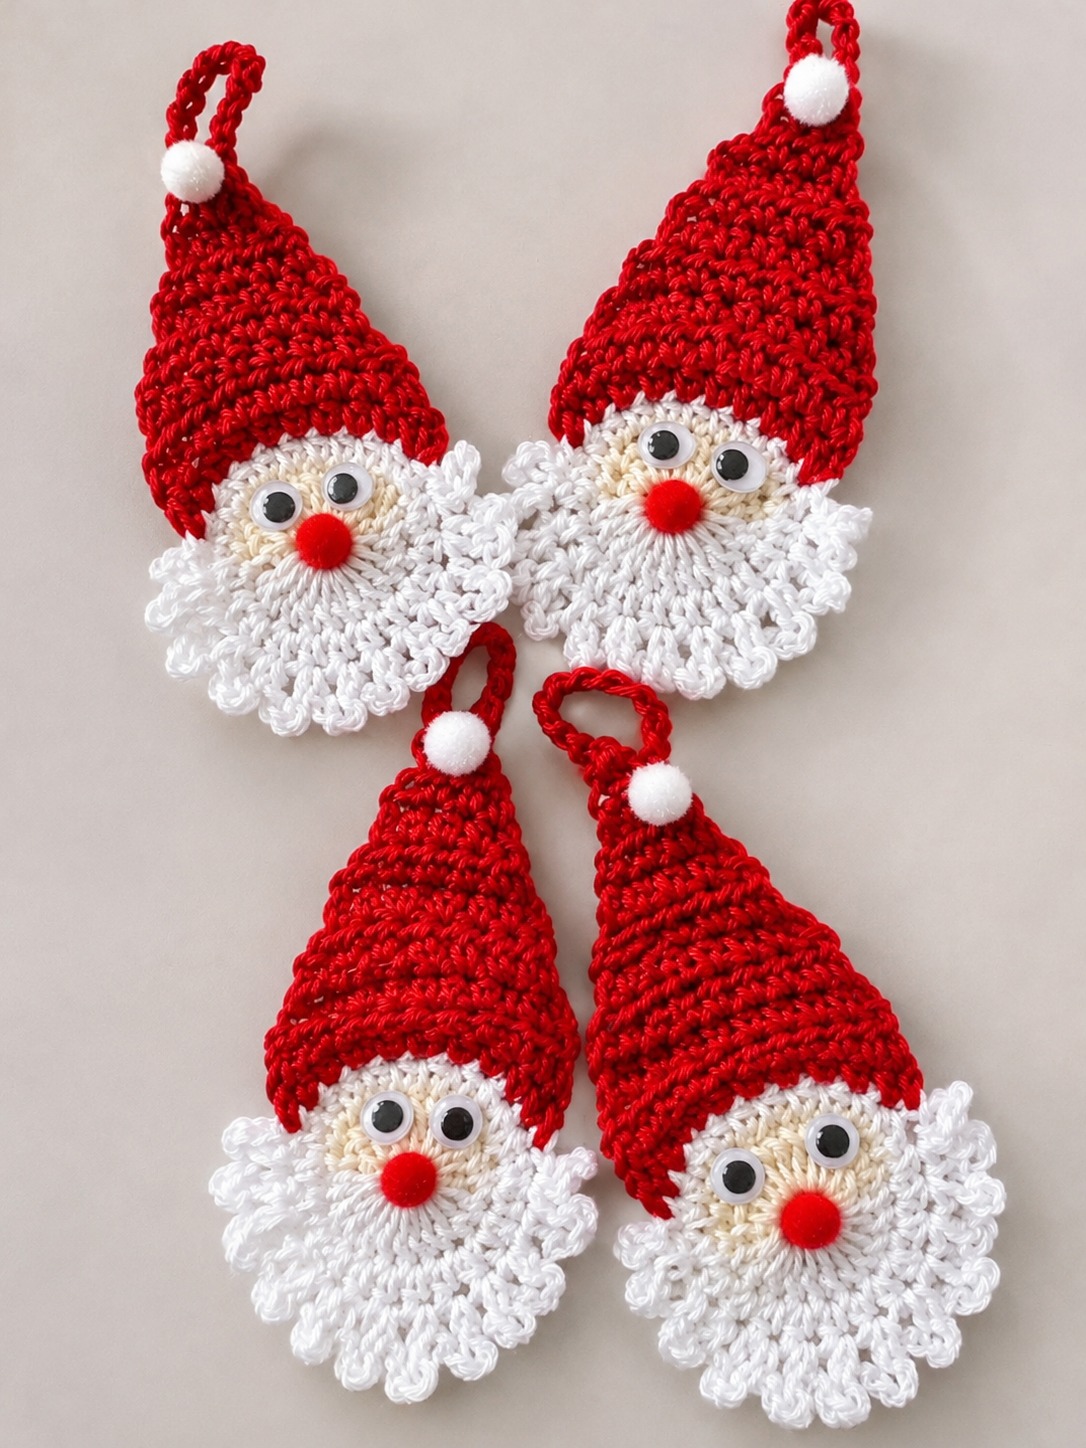
There is nothing quite like opening your box of Christmas decorations and uncovering handmade treasures crafted with love. This delightful crochet Santa ornament captures all the magic of the holiday season with his bright red pointed hat, rosy cheerful nose, and irresistibly fluffy white beard.
Designed as a quick, joy-filled project, this little Santa is perfect for using up leftover yarn scraps from your stash while making meaningful holiday keepsakes. Whether you hang him on your Christmas tree, tuck him into a gift wreath, or tie him onto a wrapped present, he brings instant handmade warmth to any room.
Materials & Recommended Supplies
- Yarn: Lightweight (DK) or worsted weight 100% cotton yarn in bright red, fluffy white, and soft cream/beige.
- Crochet Hook: 3.0 mm to 3.5 mm hook (or a size down from your yarn label recommendation to ensure firm stitches).
- Safety Eyes: 6 mm safety eyes, or dark embroidery floss for stitched eyes.
- Pom-Poms: One small red pom-pom for the nose and one white pom-pom for the hat tip (or crochet alternatives).
- Notions: Yarn needle, sharp scissors, stitch markers, and a thin piece of ribbon or baker’s twine for hanging.
Essential Techniques & Stitch Highlights
Creating Santa’s smooth circular face relies on the foundational magic ring technique. Working in tight single crochet rounds allows the face to lay completely flat while building a sturdy base that keeps its shape for years to come.
The pointed red hat is constructed separately in flat rows, utilizing simple edge increases to create a clean, tapered triangle. This straightforward shaping makes it easy to customize the depth and tilt of Santa’s cozy winter cap before attaching it to the head.
The real star of this project is the textured white beard, achieved through a clever combination of chain loops and decorative stitches. By working alternating loop lengths along the lower edge of the face, you create a playful, dimensional beard without needing complex shaping techniques.
Construction & Assembly Highlights
You will begin this delightful project by crocheting the flat cream-colored circle that serves as Santa’s face foundation. Working tightly ensures the fabric remains dense and neat, providing a smooth canvas for his facial features.
Next, you will shape the iconic red hat in flat rows, expanding from a slender point down to a brim that neatly overlaps the upper third of the face circle. Once the hat is pinned in place, you can attach your textured white beard directly along the remaining lower curve of the face.
Assembly is pure creative fun as Santa’s personality comes to life. Secure his safety eyes or embroider cozy sleeping eyes, attach the bright red nose right where the beard meets the face, and cap off the hat with a fluffy white pom-pom before adding a hanging loop to the top.
Customization & Styling Ideas
Feel free to play with color palettes to suit your personal holiday decorating style! Swap traditional bright red for deep burgundy or soft blush pink for a charming vintage vibe, or use a sparkly metallic yarn for the white beard trim.
These lightweight ornaments are wonderfully versatile beyond the traditional Christmas tree branches. String several together on a red ribbon to create a festive holiday mantle garland, or use them as reusable, eco-friendly gift tags for your holiday present wrapping.
If you are making these ornaments for homes with toddlers or curious pets, opt for embroidered eyes and a crocheted nose instead of plastic safety eyes or glued pom-poms. This small tweak ensures your handmade keepsakes remain safe while maintaining their adorable charm.
Pro Tips for Flawless Results
- Use a Smaller Hook: Select a hook size half a millimeter smaller than usual to produce tight, firm stitches that will not sag over time.
- Opt for Cotton Yarn: 100% cotton yarn provides crisp stitch definition for the beard loops and helps the flat ornament hold its shape without curling.
- Tilt the Hat for Personality: Angle Santa’s hat slightly to one side before sewing it down to give your finished ornament a playful, whimsical character.
- Weave Ends Securely: Weave all yarn tails thoroughly through the back of the face before sewing on decorative elements for a clean, professional finish.
Frequently Asked Questions
Is this Santa ornament pattern suitable for absolute beginners?
Yes, this project is very beginner-friendly because it relies on fundamental stitches like single crochet and basic chains. Working the face and hat separately keeps the construction simple and easy to follow.
Can I use acrylic yarn instead of cotton yarn?
You can certainly use acrylic yarn, but cotton yarn is recommended because its stiffness helps the flat ornament maintain its structure. If using acrylic, consider using a smaller hook to keep the tension nice and tight.
How big does the finished Santa ornament turn out?
When made with DK or worsted yarn and a 3.5 mm hook, the finished ornament measures approximately 4 inches tall. You can easily adjust the size by switching to thicker yarn or a smaller thread hook.
Watch the Full Step-by-Step Video Tutorial
Prefer visual guidance? Follow along with the complete video tutorial below at your own pace: