
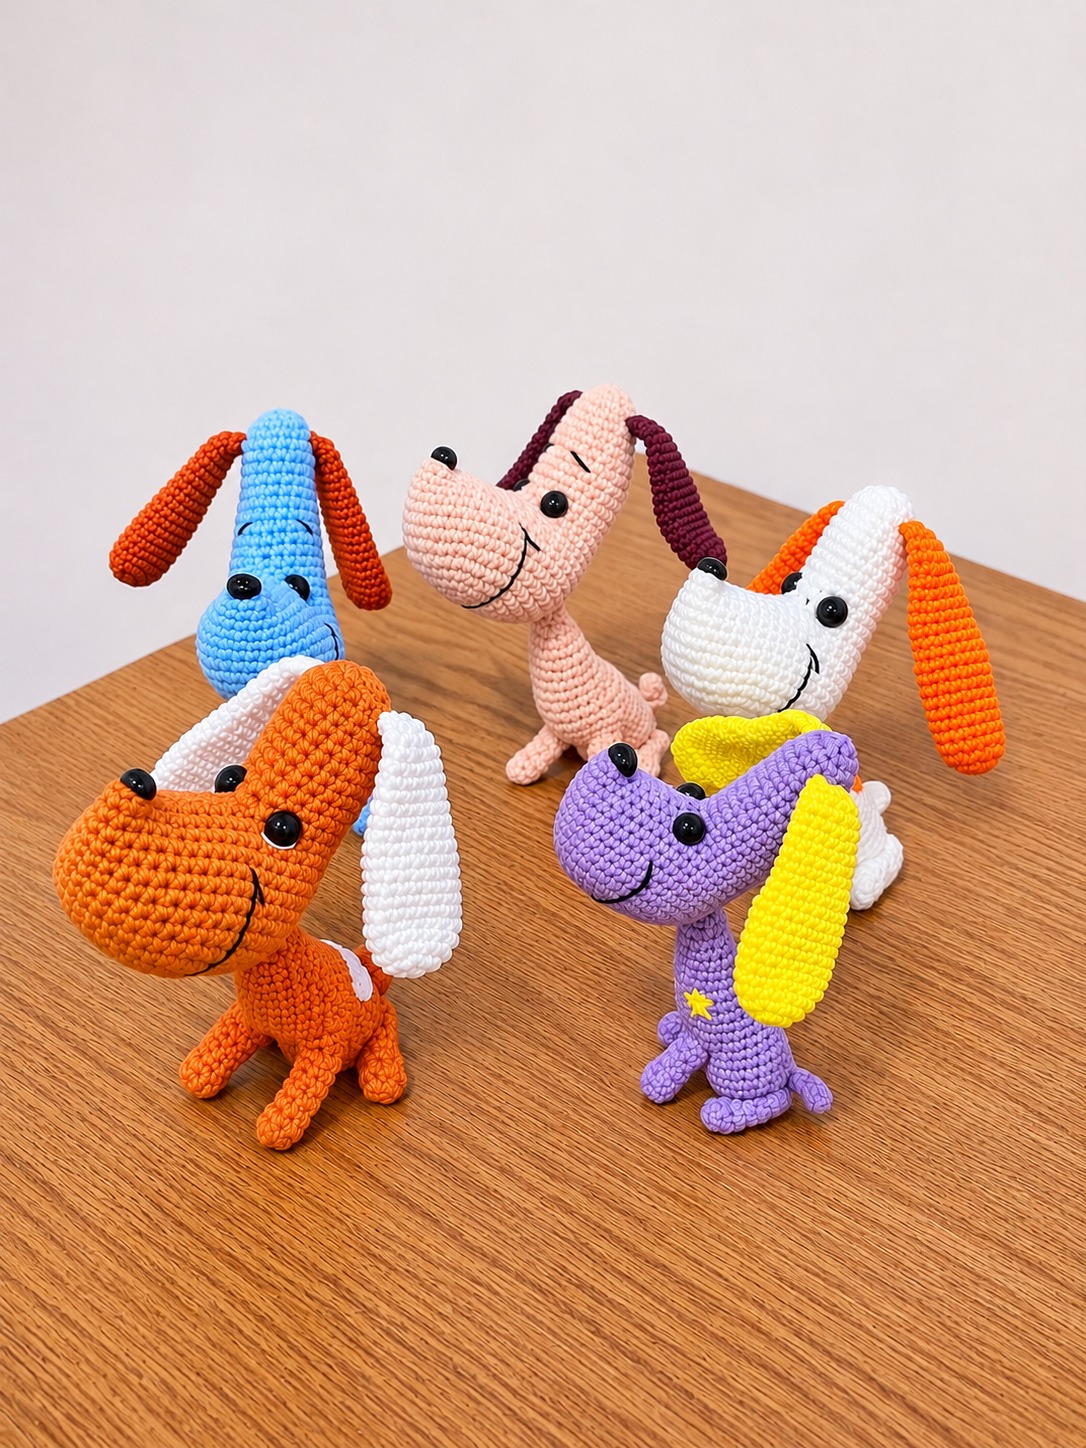
Overview & Design Inspiration
There is something undeniably magical about transforming a simple skein of yarn into a playful, handmade companion. This delightful crochet puppy amigurumi captures hearts with its long floppy ears, whimsical elongated head, and irresistibly sweet expression. Whether you are an experienced toy maker or diving into amigurumi for the first time, this sweet puppy brings instant joy to your crochet hook.
Designed with whimsical proportions—like an oversized snout, compact paws, and a sturdy sitting pose—this puppy stands out in any plushie collection. It makes a cherished addition to nursery decor, a thoughtful handmade gift, or a cheerful desk buddy. Best of all, the design invites endless color experimentation, allowing you to craft a whole pack of unique furry friends.
Materials & Recommended Supplies
- Yarn: Sport (Weight 2) or Light Worsted (Weight 3) cotton or cotton-blend yarn. Cotton delivers exceptional stitch definition and helps structural pieces hold their shape beautifully.
- Crochet Hook: 2.5 mm to 3.5 mm (US B-1 to E-4), selecting a size slightly smaller than your yarn label recommends to keep stitches tight.
- Stuffing: Premium polyester fiberfill for firm, even shaping.
- Notions: Locking stitch markers, a blunt tapestry needle, sharp scissors, and straight pins for assembly.
- Facial Details: Black embroidery floss for stitched eyes and nose, or safety eyes if the finished toy is not intended for infants.
Essential Techniques & Stitch Highlights
Creating this puppy relies on fundamental amigurumi building blocks, making it a fantastic confidence-builder for intermediate beginners. Working in continuous spiral rounds ensures a smooth, seamless fabric without visible join lines running up your puppy’s body.
The magic ring provides the perfect gap-free foundation for every rounded piece, ensuring your stuffing stays securely tucked inside. To maintain a crisp exterior, master the invisible decrease technique, which blends seamlessly with standard single crochet stitches and prevents fabric puckering.
Construction & Assembly Highlights
The construction begins with a wide, flat-bottomed body that allows your puppy to sit upright effortlessly. As you work upward, gradual decreases create a charming tapered torso that naturally supports the weight of the head.
The puppy’s stylized, elongated head and distinct muzzle are crafted as separate pieces before being stitched together. Attaching the full muzzle to the front of the head creates a wonderful three-dimensional snout. Long floppy ears and tiny paws are then pinned in place, allowing you to customize your puppy’s posture and playful personality before making final seams.
Customization & Styling Ideas
One of the best features of this design is its incredible versatility with color. Try vibrant pop palettes like bright orange with crisp white ears, or soft lavender paired with sunny yellow accents. For a classic look, timeless tones like caramel, warm cream, and rich chocolate brown create an authentic puppy feel.
You can also personalize your puppy with adorable accessories. Stitch a tiny crocheted collar with a shiny button, fashion a dainty bow tie, or embroider small patches over one eye for an extra touch of cheeky charm.
Pro Tips for Flawless Results
- Downsize Your Hook: Always use a hook size 1 to 2 sizes smaller than usual for your yarn to achieve dense fabric that completely hides the inner fiberfill.
- Stuff Gradually: Add small tufts of polyfill as you close each piece, smoothing out lumps with your fingers to build a firm, balanced structure.
- Pin Before Sewing: Use glass-head straight pins to position the muzzle, ears, and limbs before taking a single stitch. Adjust until the expression feels just right!
- Embroider with Care: For toys meant for babies or young toddlers, always embroider the eyes and facial features using black embroidery floss instead of plastic safety eyes.
Frequently Asked Questions
Is this amigurumi puppy pattern beginner-friendly?
Yes, absolutely! The project relies primarily on basic single crochet, standard increases, and simple decreases, making it very approachable if you understand working in the round.
What type of yarn gives the best stitch definition for amigurumi?
Mercerized or matte cotton yarn is ideal because it does not split easily, exhibits zero fuzziness, and holds intricate shapes extremely well over time.
How do I make sure the head stays upright and doesn’t flop over?
Ensure you stuff the upper body and neck area firmly, and sew the head to the body across a wide ring of stitches rather than a single point of attachment.
Watch the Full Step-by-Step Video Tutorial
Prefer visual guidance? Follow along with the complete video tutorial below at your own pace: