
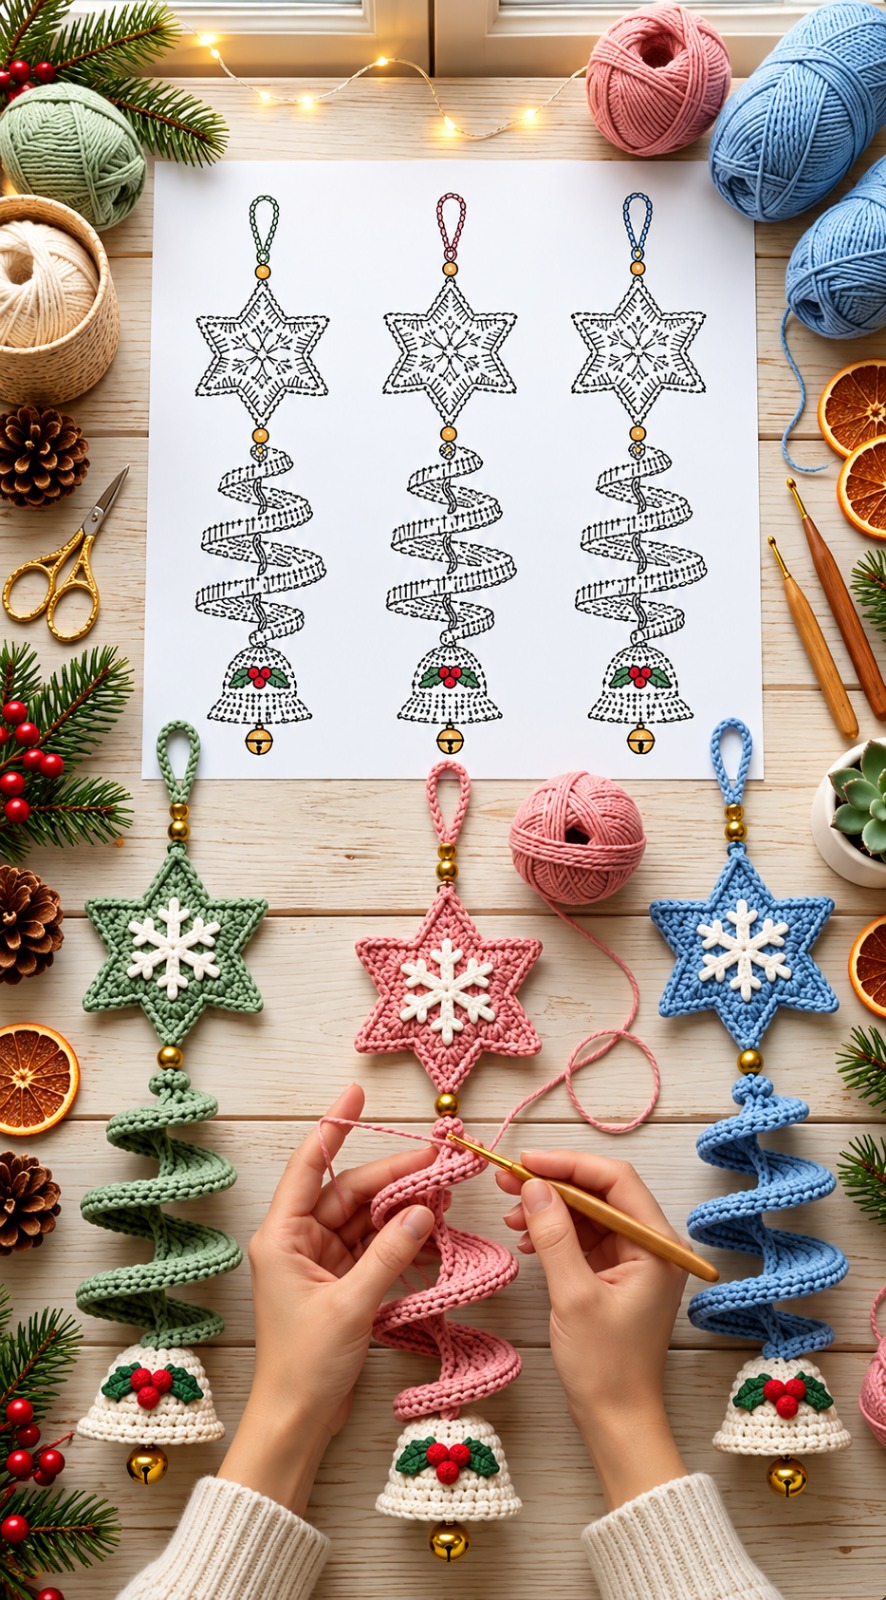
Overview & Design Inspiration
Hello, fellow yarn lovers! There is nothing quite like decorating your home with handmade pieces that catch the winter light and bring an extra touch of magic to the holiday season. The Crochet Christmas Star Wind Spinner Pattern is a cheerful, festive showstopper that combines our favorite seasonal elements—a dimensional star, a playful curly spiral, and a sweet little bell—into one gorgeous hanging decoration.
Inspired by heirloom-style ornaments, this project is wonderfully versatile and surprisingly approachable. Whether you decide to work it up in traditional holly reds and greens, or give it a modern twist with soft pinks, icy blues, or elegant creams, it adds instant charm and delightful movement to any window, porch, or holiday display.
Materials & Recommended Supplies
- Yarn: Smooth cotton or light worsted/DK weight cotton-blend yarn. You will need a main color for the star and spinner, white or cream for accents, and small scraps of red and green for the holly.
- Crochet Hook: 3.0 mm to 4.0 mm, depending on your personal tension and preferred fabric firmness.
- Notions: Yarn needle, sharp scissors, stitch markers, and a small amount of polyester fiberfill for light stuffing.
- Embellishments: A small jingle bell and optional decorative wooden or pearl beads to add extra vintage flair.
Essential Techniques & Stitch Highlights
This project relies on a comforting mix of basic US crochet stitches—such as single crochet, half double crochet, and double crochet—brought together in clever ways to create stunning 3D shapes. The magic ring gives you a seamless, professional start for both the star and the delicate centre snowflake.
The star points rely on a simple height-progression technique, building up and back down to create crisp, beautiful geometry without any complicated math. Meanwhile, the signature wind spinner relies on stitch density: packing multiple stitches into a single foundation chain naturally forces the crochet fabric to curl into a gorgeous, bouncy spiral all on its own!
Construction & Assembly Highlights
Building your wind spinner is a wonderfully satisfying journey of mini-projects! You begin by crafting two identical star motifs, lightly padding them with just a wisp of polyester stuffing so they hold a plush, dimensional shape before being sewed together around the edges.
Next comes the mesmerizing spiral, which magically twists right before your eyes as you work along the chain. Finally, you will assemble the entire mobile by anchoring the spiral beneath the star, adding a sweet crocheted snowflake to the face, and finishing the base with a charming bell.
Customization & Styling Ideas
One of the best parts about this pattern is how easily you can make it your own. Try working the spiral in winter white and icy blue for a “Frozen” themed window hanging, or stick to classic cream and sage green for an understated, Scandinavian holiday look.
You can also play with length! A shorter foundation chain creates a cute, compact ornament for a tabletop tree branch, while a longer chain makes a dramatic wind spinner that will dance gracefully in the breeze near a sunny living room window.
Pro Tips for Flawless Results
- Control Your Tension: Keep your stitches nice and even, especially when working the spiral, to ensure your curls twist uniformly.
- Don’t Over-Stuff: Use just a whisper of polyfill inside your star so it remains lightweight and hangs straight without pulling downward.
- Lightly Block the Spiral: If your curls need a little encouragement, mist the finished spiral lightly with water and arrange them gently to dry.
- Secure Your Ends: Weave in all loose yarn tails as you go; trying to hide ends after the bell and beads are attached can be quite tricky!
Frequently Asked Questions
Is this project suitable for adventurous beginners?
Absolutely! While it involves multiple pieces, each component is made using basic stitches. Because the step-by-step instructions and video tutorial guide you gently through every stage, even ambitious beginners can achieve gorgeous results.
Can I make the wind spinner longer or shorter?
Yes, changing the length is as simple as adjusting your starting foundation chain for the spiral. Keep in mind that the curls will draw up and shorten the piece considerably, so chain a bit longer than your desired final hanging length.
How do I make the ornament spin smoothly?
Adding an optional swivel clasp or metal jump ring between your hanging loop and the top star point allows the entire decoration to rotate freely in the air currents, enhancing that wonderful wind-spinner effect.
Watch the Full Step-by-Step Video Tutorial
Prefer visual guidance? Follow along with the complete video tutorial below at your own pace: