
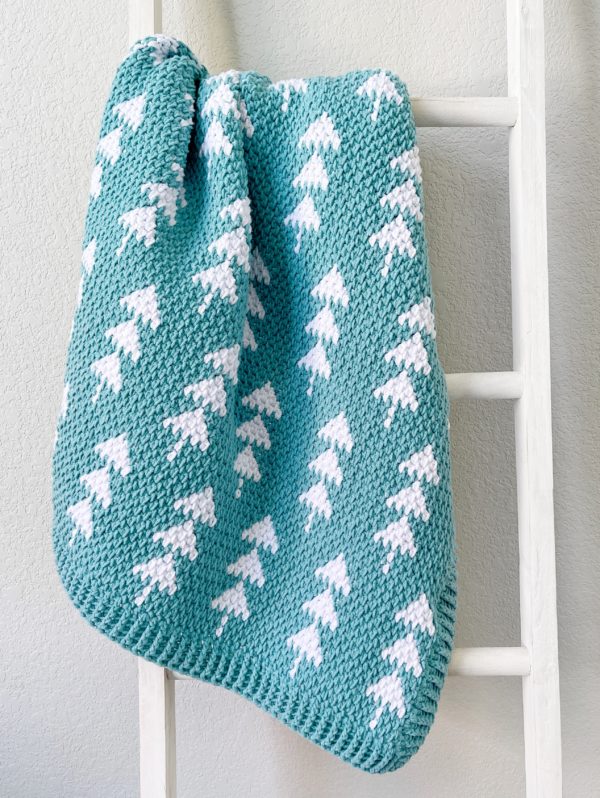
Welcome, fellow crafters, to a world of cozy creativity! Today, we’re diving into a truly special project: the *Trees Baby Blanket*. Imagine snuggling a little one in a blanket adorned with whimsical trees – it’s pure magic!
This pattern isn’t just stunning; it’s also incredibly rewarding to create. Whether you’re a seasoned hooker or just starting your crochet journey, our easy-to-follow guide will help you bring this adorable woodland scene to life.
Introduction & Project Overview
Get ready to crochet a beautiful, unique baby blanket that will be cherished for years to come. Our *Trees Baby Blanket* pattern combines basic stitches into an intricate design, making it perfect for both beginners and intermediate crocheters looking for a charming new challenge.
We’ll walk you through every step, from gathering your cozy materials to perfecting those sweet tree motifs. Let’s create something wonderful together!
Materials & Yarn Suggestions
Before we pick up our hooks, let’s gather everything we’ll need. Choosing the right supplies is key to making a blanket that’s soft, durable, and truly baby-friendly.
- Yarn: Approximately 1000-1200 yards of soft, medium-weight (Aran/Worsted, Weight 4) baby-friendly yarn. Look for fibers that are easy to wash and gentle on delicate skin.
- Crochet Hook: 5mm (H/8 US) crochet hook. Remember, your personal tension might require a slight adjustment to achieve the perfect drape.
- Notions: Stitch markers (so helpful for counting!), a yarn needle for weaving in ends, and a good pair of sharp scissors.
Having your tools ready makes the creative process so much smoother and more enjoyable!
Technique Breakdown & Step-by-Step Guide
This lovely blanket is built using just a few fundamental crochet stitches: the chain (ch), single crochet (sc), and double crochet (dc). Master these, and you’re ready to create a masterpiece!
Building Your Blanket Base
To begin your *Trees Baby Blanket*, start by chaining a foundation row of 120 stitches. This creates a blanket approximately 36 inches wide – a perfect size for a little bundle of joy. If you prefer a larger blanket, simply adjust your starting chain in multiples of 15 to keep the tree pattern symmetrical.
Once your foundation chain is complete, work a single crochet into the second chain from your hook, then single crochet across the entire row. This forms a sturdy and beautiful base for your woodland design.
For the next row, chain two (which counts as your first double crochet), turn your work, and then double crochet across the row. Continue to alternate between single crochet and double crochet rows for a few rows to build a solid, cozy foundation for your tree motifs.
Crafting the Enchanting Tree Design
Now for the most exciting part – bringing your trees to life! You’ll use a clever combination of double crochet and chain stitches to form the elegant trunks and leafy branches.
To create your first tree, begin by chaining 10 stitches to form the trunk. Then, skip five stitches in your working row and work double crochets into the next ten stitches. This forms the solid base of your tree.
You’ll then use chain stitches for spacing between your trees, followed by more double crochets to form the beautiful branch sections. Repeat this pattern across the row, spacing your trees evenly for a lovely, cohesive forest look.
After completing a row of trees, secure your design and add beautiful texture by working a row of single crochet across the entire blanket. This helps your trees truly “pop” and defines their intricate shapes.
Adding Whimsical Texture with Bobble Stitches (Optional!)
For an extra touch of charm, consider incorporating bobble stitches into your treetops! These delightful stitches create a raised, three-dimensional effect that makes your trees even more enchanting and leaf-like.
To add a bobble, work several incomplete double crochets into the same stitch, then pull through all loops on your hook at once. Simply replace a few double crochets in the branch section of your trees with bobble stitches to give them a wonderfully full and leafy appearance.
Finishing, Assembly & Styling Ideas
Your beautiful blanket is almost complete! Now for those all-important finishing touches that elevate your handmade creation.
Add a simple yet elegant border by working single crochets evenly around the entire edge of your blanket. Be sure to place two or three single crochets in each corner to keep your border smooth and flat. You can even experiment with a picot or scalloped edge for extra flair!
Finally, give your blanket a relaxing bath and block it! Wet blocking or steam blocking will ensure your tree designs are perfectly defined and the blanket lays beautifully flat. Weave in any remaining yarn ends like a pro, and voilà – your magnificent *Trees Baby Blanket* is ready!
Pro Crafter Tips
- Gauge Check: Always make a small swatch before starting! This ensures your tension matches the pattern, giving you the right blanket size and drape.
- Color Play: Don’t be afraid to experiment with yarn colors! A variegated yarn can add subtle depth, or try contrasting colors for trunks and leaves.
- Personalize It: Add a name or date with surface crochet for a truly bespoke gift.
Frequently Asked Questions
Q: Can I make this blanket larger for a toddler?
A: Absolutely! To increase the width, simply add stitches to your starting chain in multiples of 15. For extra length, repeat the tree motif rows until you reach your desired size.
Q: What if my stitches are too tight or too loose?
A: Your hook size might need adjusting! If your stitches are too tight, try a larger hook (e.g., 5.5mm). If they’re too loose, go down a size (e.g., 4.5mm) until your fabric feels just right.
Watch the Full Step-by-Step Video Tutorial
Prefer visual guidance? Follow along with the complete video tutorial below at your own pace: