
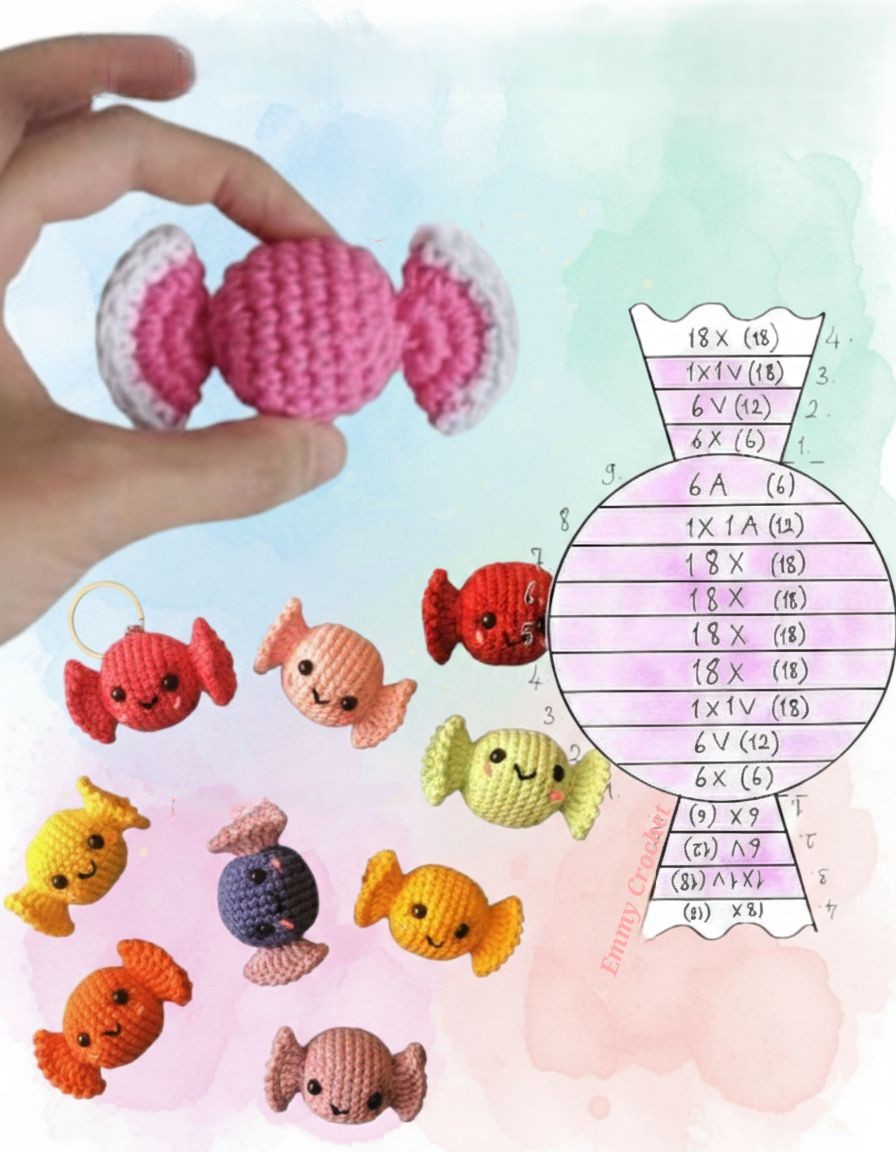
Overview & Design Inspiration
Welcome, fellow yarn lovers, to one of the most delightful and whimsical projects you will hook up all season! The Crochet Wrapped Candy Pattern combines effortless simplicity with an irresistibly adorable design that is guaranteed to bring a smile to your face.
From the very first stitch, this charming project invites you to play with colors and textures to create decorative pieces that look just like classic, sweet treats. Whether you are hunting for a quick stash-busting project or looking to add a playful touch to your handmade creations, this little candy design is pure joy in yarn form.
Materials & Recommended Supplies
Gathering your supplies is half the fun, and you will be thrilled to know this project uses only basic toolkit essentials. Here is what you will need to bring your crochet candies to life:
- Yarn: Medium-weight (Worsted/Aran) yarn is ideal for crisp structure, though lightweight yarns make delicate mini candies and bulky yarns make oversized plush treats.
- Crochet Hook: Match your yarn weight; a 4.0 mm (US G/6) or 4.5 mm (US 7) hook helps create the ideal snug tension.
- Scissors: A sharp pair of embroidery scissors for clean thread cuts and neat finishes.
- Yarn Needle: A tapestry needle with a blunt tip for weaving in loose ends and securing your candy shapes.
- Fiberfill Stuffing (Optional): A tiny pinch of stuffing gives your candy center a wonderfully plump, realistic silhouette.
- Stitch Markers: Helpful little tools for keeping track of your rows and stitches effortlessly.
Essential Techniques & Stitch Highlights
The beauty of this design lies in how it transforms simple, everyday stitches into a remarkably detailed decorative piece. Most versions begin with a straightforward rectangular foundation built using foundational favorites like chains and single crochets.
Working these basic stitches creates a smooth, uniform fabric that folds and shapes like a dream. It is also an absolute playground for practicing tension control, stitch consistency, and joyful color-blocking without any complicated shaping stress!
Construction & Assembly Highlights
Bringing your candy to life is a wonderfully satisfying, tactile experience from start to finish. You will begin by crocheting a simple, flat rectangular piece that serves as the main body or sweet center of your candy.
Once your rectangle is complete, the magic happens during the shaping phase where the fabric is gently rolled into a neat cylinder. Finally, gathering and securing the ends mimics the classic twisted cellophane wrapper, instantly transforming a simple crochet rectangle into an adorable sweet treat.
Customization & Styling Ideas
The versatility of these little crocheted candies is truly endless, making it easy to adapt them for any season or style. Try sewing a colorful row of them onto a children’s blanket for an extra splash of whimsy, or string them together to make a festive holiday garland.
They also make fantastic package toppers for handmade gifts, adorable keychains, or playful classroom rewards. Experiment with cotton yarns for crisp definition or soft acrylics for a cozy, huggable plush texture!
Pro Tips for Flawless Results
- Maintain Snug Tension: Keep your stitches nice and even so your rectangular base holds its shape cleanly once it is rolled and secured.
- Embrace Stash-Busting: Use up your leftover scrap yarn in bright, contrasting colors to create a vibrant, mixed-flavor bowl of sweet treats.
- Secure Your Ends Well: Take extra care when tying off the gathered ends to ensure your wrapped candy shape stays locked in place over time.
- Block if Necessary: A light steam or blocking session on your starting rectangle can help smooth out edges for an ultra-polished finish.
Frequently Asked Questions
What is a Crochet Wrapped Candy Pattern used for?
These charming candies are typically used as decorative elements. You can attach them to baby blankets, garments, or tote bags, or use them as gift toppers, seasonal ornaments, and playful appliqués.
Are these crochet candies beginner-friendly?
Absolutely! Because the project relies on basic stitches like chains and single crochets, it is wonderfully approachable and offers quick, satisfying results for crafters of all skill levels.
How do I make the candy look more realistic?
Using bright or pastel cotton yarn paired with a slightly smaller crochet hook creates tighter, cleaner stitches. Adding a tiny pinch of fiberfill stuffing inside the roll also gives it a wonderfully rounded, plump appearance.
Watch the Full Step-by-Step Video Tutorial
Prefer visual guidance? Follow along with the complete video tutorial below at your own pace: