
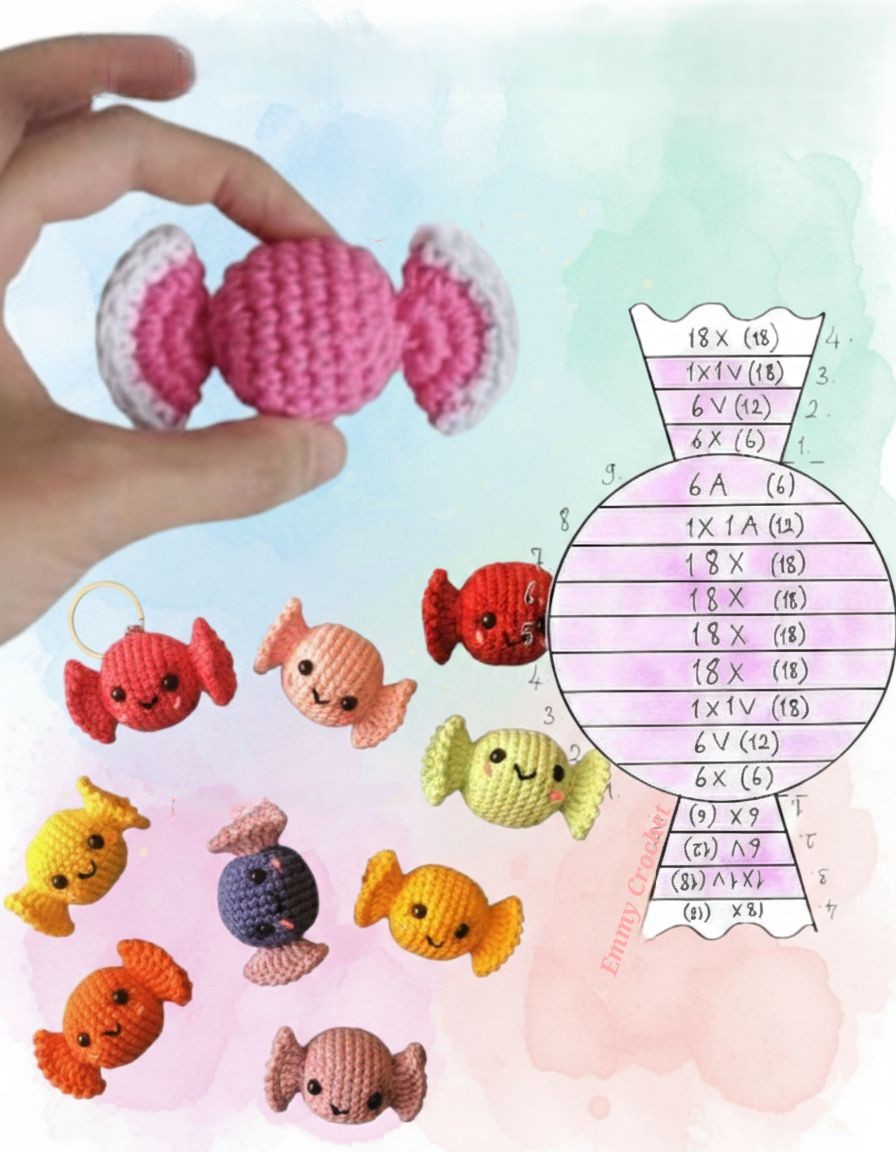
Overview & Inspiration
Welcome, fellow yarn lovers! If you are looking for a quick, joyful project that brings an instant smile to your face, you are going to fall completely in love with the Crochet Wrapped Candy Pattern. This charming design combines absolute simplicity with an adorable, playful shape that looks just like a classic, sweet-filled wrapper.
Whether you are hunting for a brilliant stash-busting project, wanting to whip up a festive garland, or looking to add a whimsical touch to a child’s blanket, these little candies check every single box. Best of all, they are fast to stitch up, incredibly versatile, and wonderful for practicing your tension control and color transitions!
Materials & Supplies Needed
- Medium-weight (Worsted / Aran) yarn in bright, cheerful colors and contrast wrapper colors (or use up your favorite yarn scraps!).
- Yarn fibers: Cotton yarn for crisp, defined stitches, or soft acrylic for a cozy, plush feel.
- Crochet hook: 4.0 mm (US G/6) hook.
- Tapestry needle / yarn needle for weaving in ends and gathering the wrapper ends.
- Stitch markers (optional, helpful for keeping track of your rows).
- Sharp scissors.
- A small amount of polyester fiberfill stuffing (optional, to give your candy center a plump, rounded shape).
Stitches & Abbreviations
- ch(s): chain(s)
- st(s): stitch(es)
- sl st: slip stitch
- sc: single crochet
- hdc: half double crochet
- dc: double crochet
- Rnd / Row: round or row
Step-by-Step Pattern Instructions
Let’s dive right into making your very own crochet wrapped candy! We will start by creating the main rectangular candy center, and then we will work the wrapper ends.
The Candy Center (Rectangle)
Using your main candy color, start with a foundation chain.
- Row 1: Ch 15, working into the 2nd ch from hook, sc in each ch across, turn. [14 sts]
- Row 2 to 6: Ch 1 (does not count as a st here and throughout), sc in each st across, turn. [14 sts]
- Fasten off your main candy color, leaving a long tail if you plan to use it for seaming, or weave it in and join your wrapper color.
The Wrapper Fluffs
To create the gathered ends that make it look like a wrapped sweet:
- Join your contrast wrapper yarn to the short end of your rectangle.
- Work a small cluster of stitches (such as a 3-dc shell or simple ch-loops) evenly across the short edge to add a frilly texture.
- Repeat on the opposite short edge of the rectangle.
- Fasten off all remaining yarn tails.
Assembly & Finishing Touches
Now it is time to bring your wrapped candy to life with a little bit of clever shaping!
Take your flat crocheted rectangle and gently roll it into a snug cylindrical shape. If you prefer a plump, realistic sweet, tuck a tiny pinch of polyester fiberfill stuffing right into the center before closing.
Take your long yarn tails (or a separate length of wrapper-colored yarn) and wrap them tightly around the outer edges of the cylinder—about a quarter of the way in from each end—to create that iconic “twisted wrapper” pinch. Securely tie off your knots, weave in any remaining loose ends using your tapestry needle, and fluff out your wrapper edges until your candy looks picture-perfect!
Pro Tips for Flawless Results
- Hook Sizing: Try dropping down half a hook size from what your yarn recommends; this creates tighter, firmer stitches so your candy holds its cylindrical shape beautifully without sagging.
- Scrap Yarn Wonderland: These candies are the ultimate stash-buster! Mix and match neon brights, pastels, or traditional holiday reds and whites for instant seasonal decor.
- Securing the Twists: Don’t skimp on cinching those ends tightly with your yarn needle; a firm wrap is the secret to getting that authentic candy-wrapper silhouette.
Frequently Asked Questions
What is a Crochet Wrapped Candy Pattern used for?
A Crochet Wrapped Candy Pattern is most commonly used as a delightful decorative element. You can sew them onto children’s blankets, string them together to make a festive holiday garland, attach them as gift package embellishments, or turn them into keychains and bag charms!
Are these crochet candies beginner-friendly?
Absolutely! Because the project relies entirely on basic stitches like chains and single crochets, and works up into a simple small rectangle, it is fantastic for beginners who want a quick, satisfying win while practicing their stitch consistency.
Do I need to use stuffing inside the candy?
Stuffing is entirely optional! If you roll your rectangle snugly, it will hold its shape quite well on its own. However, adding just a tiny pinch of fiberfill stuffing gives the candy a lovely, rounded, plush finish.
Watch the Full Step-by-Step Video Tutorial
Prefer visual guidance? Follow along with the complete video tutorial below at your own pace: