
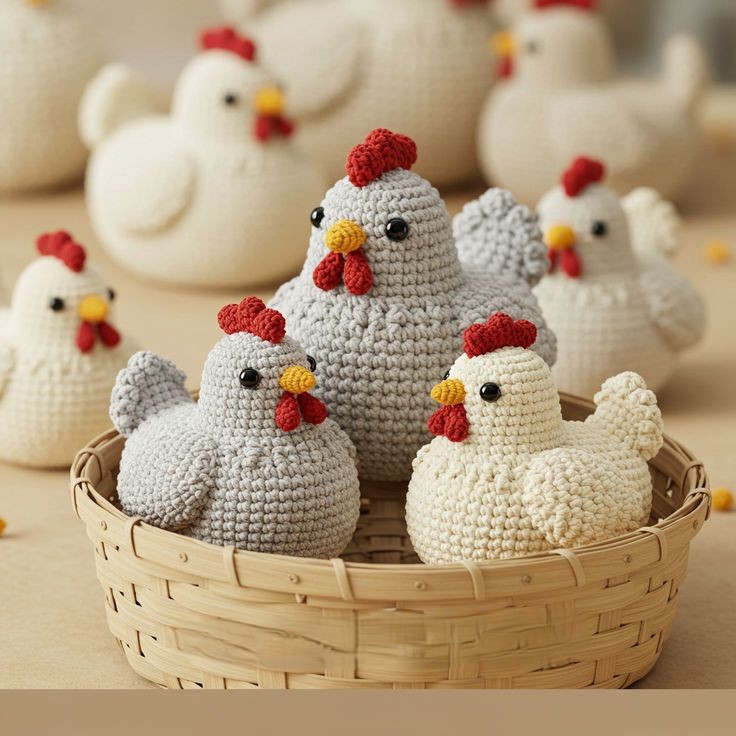
Overview & Design Inspiration
Hello, wonderful makers! There is a special kind of magic that happens when a simple strand of yarn transforms into a sweet, expressive little character under your hook. If you love crafting adorable plush figures that instantly bring a smile to your face, you are going to fall head over heels for the Crochet Amigurumi Chicken Pattern.
Whether you are a beginner looking to build your amigurumi confidence or an experienced artisan searching for a quick, joyful project, this charming little bird ticks all the boxes. Bursting with personality, versatility, and irresistible rustic charm, this project is a wonderful way to dive into the wonderful world of handmade toys.
Materials & Recommended Supplies
Gathering your supplies is half the fun of any new project! Having the right tools on hand ensures your crafting experience is smooth, relaxing, and yields professional results.
- Yarn: Medium-weight (DK or Worsted weight) cotton or premium acrylic yarn. Cotton offers incredible stitch definition, while acrylic adds a super-soft cuddle factor.
- Recommended Colors: Classic light yellow, crisp white, or soft pastels for the body, paired with bright orange for the beak and vibrant red for the comb.
- Crochet Hook: 2.5 mm to 3.5 mm (US C/2 to E/4). Using a hook slightly smaller than recommended on the yarn label ensures tight stitches that keep your stuffing securely hidden.
- Safety Eyes: 6 mm to 8 mm plastic safety eyes for that bright, lively expression (or use embroidery floss for an infant-safe alternative).
- Stuffing: Lightweight, washable polyester fiberfill for a plump, huggable structure.
- Notions: A yarn needle for seamless assembly, stitch markers to track your rounds, and small embroidery scissors.
Essential Techniques & Stitch Highlights
Amigurumi relies on a few fundamental techniques that give these little creatures their sturdy, polished shape. Mastering these basics will elevate all your future stuffed toy projects!
The foundation of this little bird begins with the magic ring (adjustable loop), which allows you to start crocheting in the round without leaving an unsightly hole at the crown of the head or base of the body. From there, you will work primarily in continuous spirals of single crochet stitches, creating a dense, firm fabric.
Shaping is achieved through strategic increases and invisible decreases, allowing you to sculpt the plump body and smooth curves seamlessly. Keeping a consistent, firm tension is your secret weapon here, ensuring your stitches stay uniform and your stuffing never peeks through the gaps.
Construction & Assembly Highlights
Bringing your amigurumi chicken to life is a wonderfully rewarding puzzle of separate, manageable pieces! The journey begins with the main body, where you work outward from the magic ring, transition into straight rounds for height, and gently taper as you add your fiberfill.
Once your main body is plump and firmly stuffed, you will crochet the petite wings, the cheeky little orange beak, and the classic red comb. The magic really happens during the assembly phase, where careful pinning and thoughtful stitching bring the personality right to the surface.
Using matching yarn tails and a sturdy yarn needle, attach the wings symmetrically to the sides, secure the beak right below the bright safety eyes, and top it all off with the comb. These little finishing details transform a simple crocheted sphere into a character brimming with charm!
Customization & Styling Ideas
One of the absolute best parts of making amigurumi is how easily you can make each creation entirely your own. Play around with different color palettes—from soft, vintage farmhouse tones to bright, whimsical rainbow hues!
Want to dress up your little chick? Try crocheting a tiny, removable scarf for chilly winter decor, or add a miniature flower tucked neatly beside the comb for a sweet springtime vibe. You can also experiment with yarn weights; chunky blanket yarn creates a giant, huggable plush toy, while thread crochet yields a precious miniature keepsake.
These cheerful chickens make fantastic gifts, delightful nursery decorations, or charming seasonal ornaments for Easter and spring. Gather your favorite leftover scraps and stitch up an entire colorful flock!
Pro Tips for Flawless Results
- Control Your Tension: Keep your stitches nice and snug to prevent the polyester stuffing from showing through the fabric.
- Stuff in Small Increments: Add your fiberfill gradually, pressing it into corners to shape the body smoothly without creating lumpy distortions.
- Pin Before You Sew: Always use locking stitch markers or sewing pins to position your wings, beak, and eyes before attaching them permanently. This lets you check symmetry and expression first!
- Mark Your Rounds: Always use a stitch marker at the start of your continuous rounds so you never lose your place.
Frequently Asked Questions
Is this crochet amigurumi chicken project suitable for absolute beginners?
Yes, absolutely! While it involves working in the round and basic shaping, the stitches used are primarily single crochets, making it a very approachable project for adventurous beginners who know the basics.
Can I make this toy safe for a baby or toddler?
You certainly can! To make the chicken completely safe for young children, simply omit the plastic safety eyes and embroider the facial features using scrap yarn and a tapestry needle instead.
What is the best way to clean my finished amigurumi chicken?
Because it is stuffed with polyester fiberfill and worked in durable yarn, gentle hand washing with mild soap and lukewarm water is recommended. Allow it to air dry completely on a flat surface to maintain its shape.
Watch the Full Step-by-Step Video Tutorial
Prefer visual guidance? Follow along with the complete video tutorial below at your own pace: