
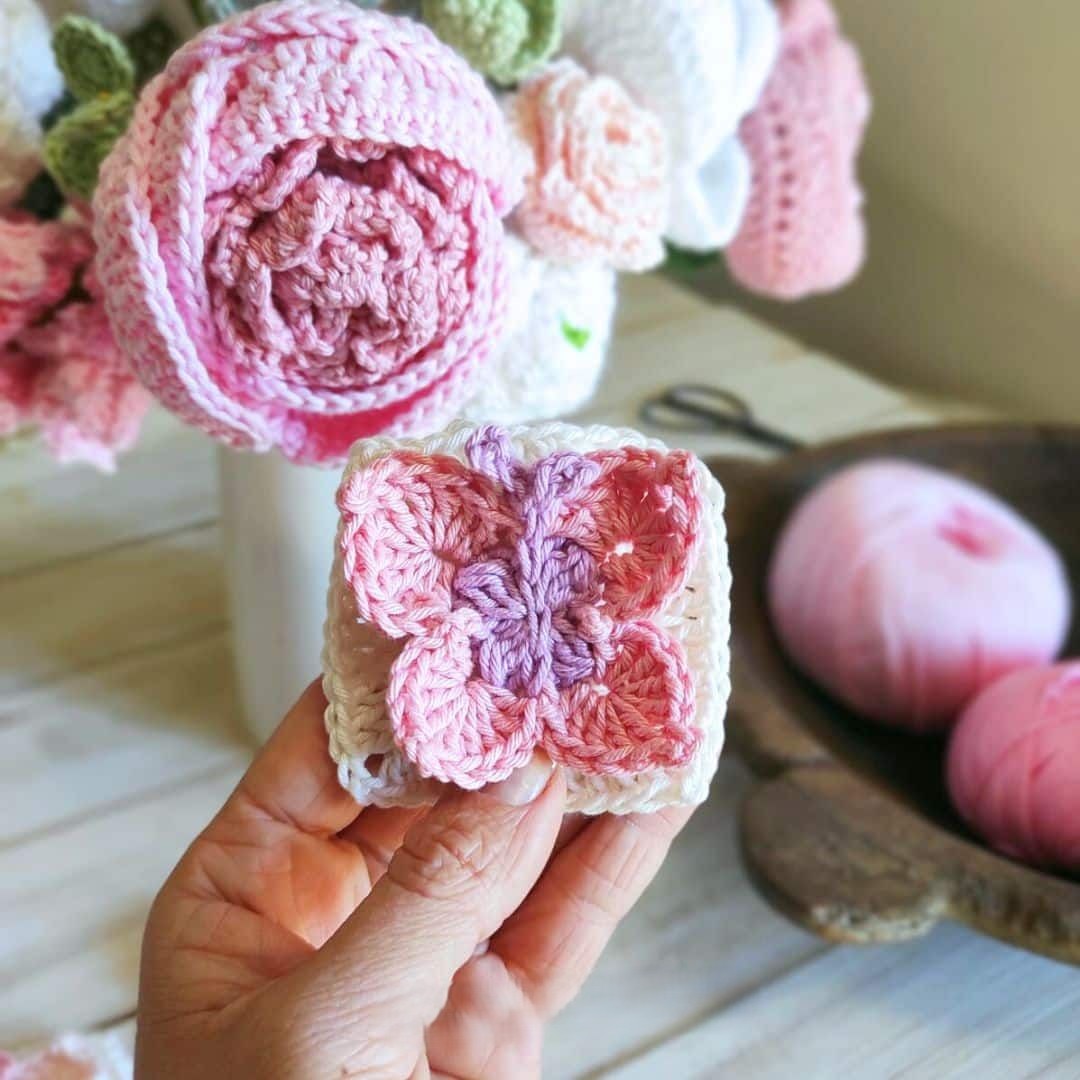
Overview & Inspiration
Welcome back to the studio, my fiber-loving friends! There is something truly magical about watching a delicate butterfly take shape right on your crochet hook, and this design captures that exact wonder.
Whether you are crafting a cozy heirloom blanket, a bright statement pillow, or a stylish tote bag, this square combines classic geometry with whimsical charm. Grab your favorite hooks, settle into your favorite crafting chair, and let’s create something beautiful together!
Materials & Supplies Needed
- Worsted weight or DK weight yarn in main color, contrast butterfly colors, and background color
- Fiber preference: Cotton for crisp stitch definition or acrylic for lightweight softness
- Crochet hook matching your yarn weight (typically 4.0mm to 5.0mm / US G/6 to H/8)
- Stitch markers (4 to 6 pieces)
- Tapestry needle for weaving in ends
- Sharp scissors
- Blocking board and rust-proof pins
Stitches & Abbreviations
- ch = chain
- sl st = slip stitch
- sc = single crochet
- hdc = half double crochet
- dc = double crochet
- tr = treble crochet
- st(s) = stitch(es)
- sp(s) = space(s)
- yo = yarn over
- MR = magic ring
Step-by-Step Pattern Instructions
Let’s dive into the core of the pattern! Work carefully through each round to keep your butterfly symmetric and your square corners crisp.
Round 1: The Butterfly Center
Begin with a magic ring using your butterfly body color. Work 8 sc into the ring, pull closed, and join with a sl st to the first sc. Fasten off body color. [8 sts]
Round 2: Shaping the Wings
Attach your wing color in any stitch. Ch 3 (counts as first dc here and throughout), work 1 dc in the same st. Work (2 dc, ch 2, 2 dc) in the next st for the first wing corner. Continue this pairing around the ring to establish all four wing sections, then join with a sl st to top of starting ch-3. [24 sts, 4 ch-2 sps]
Round 3: Layering and Color Pop
Join background color in any ch-2 corner space. Ch 3, (2 dc, ch 2, 3 dc) in the same corner sp. Work 1 dc in each st across to the next corner. Repeat around and join with a sl st. [40 sts, 4 ch-2 sps]
Round 4: Squaring the Motif
Ch 3, work 1 dc in each st along the side, working (2 dc, ch 2, 2 dc) in each corner ch-2 sp. This round officially transitions your circular butterfly motif into a square frame. Join with a sl st. [56 sts, 4 ch-2 sps]
Round 5: Final Border
Ch 1, work 1 sc in each st across all sides, placing (2 sc, ch 2, 2 sc) in each corner sp. Join with a sl st and fasten off. [72 sts]
Assembly & Finishing Touches
Once you have crocheted all your desired squares, lay them out on a flat surface to check your color arrangement. Weave in all loose yarn tails securely on the wrong side using your tapestry needle.
To achieve a professional look, pin your squares to exact measurements on a blocking board and mist them lightly with water. Allow them to dry completely before joining them together with your preferred seaming method.
Pro Tips for Flawless Results
- Maintain a consistent yarn tension, especially around the wing curves, to prevent the fabric from puckering.
- Use stitch markers in your corner spaces to easily identify where to place your increases on every single round.
- Always complete the final yarn-over of the previous stitch with your new color for clean, invisible yarn transitions.
- Do not skip the blocking step; it relaxes the fibers and ensures your squares snap together seamlessly during assembly.
Frequently Asked Questions
Can I use different yarn weights for this pattern?
Yes, absolutely! You can use DK, worsted, or even lightweight cotton. Just make sure to pair your chosen yarn with the appropriate hook size and adjust your tension to keep the square flat.
How do I prevent the magic ring from coming undone?
Make sure to work your first round of stitches firmly over the tail of the magic ring. Once finished, weave the starting tail securely back and forth through the base stitches a few times before trimming.
What is the best way to join multiple squares together?
You can use an invisible mattress stitch for a seamless flat look, or a continuous single crochet join from the wrong side if you prefer a textured, decorative ridge between your blocks.
Watch the Full Step-by-Step Video Tutorial
Prefer visual guidance? Follow along with the complete video tutorial below at your own pace: