
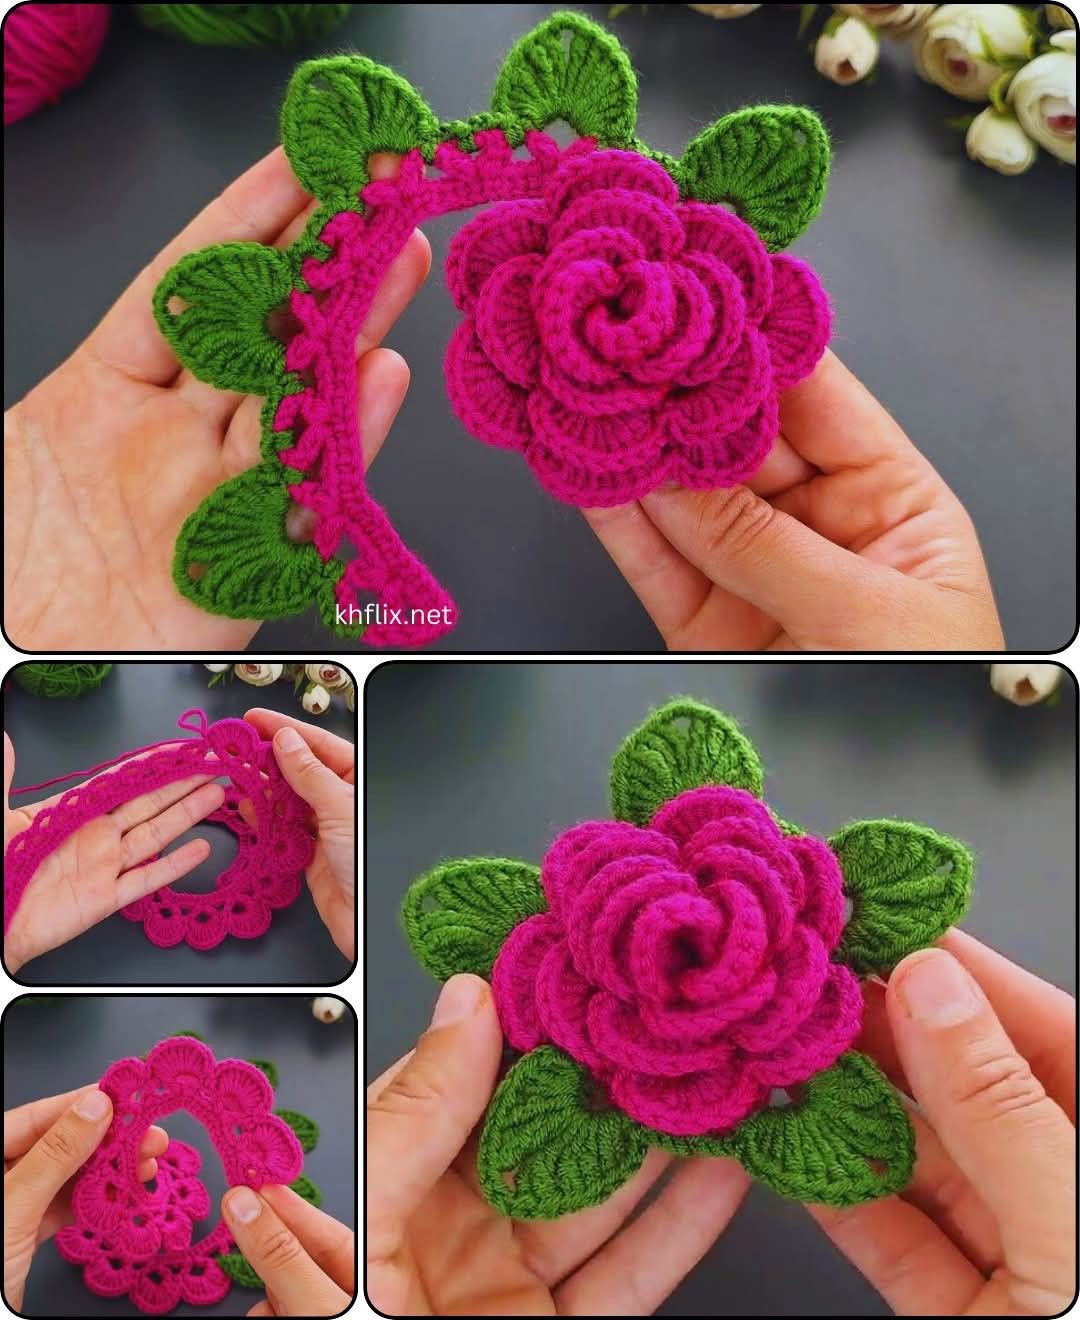
Introduction & Project Overview
Hello, crafty friends! Are you ready to add a touch of handmade elegance to your world? Crocheting a 3D rose flower is one of the most delightful and rewarding projects you can undertake.
These beautiful blooms are perfect for embellishing hats, scarves, bags, or even brightening up your home decor. Get ready to create some serious maker magic!
This tutorial will gently guide you through creating your very own breathtaking crochet rose, from choosing your supplies to shaping those exquisite petals. Let’s make something lovely together!
Materials & Yarn Suggestions
Gathering the right supplies is the first step to success in any creative endeavor. For your 3D crochet rose, you’ll need just a few basic items.
- Yarn: A medium-weight yarn (often called worsted weight) works beautifully for defining those lovely petals. Cotton or acrylic blends are fantastic choices, especially in classic rose hues like red, pink, or even a creamy white.
- Crochet Hook: A 4mm (G-6) crochet hook is generally ideal for this yarn weight, creating neat, consistent stitches. Feel free to adjust if your yarn is a bit thicker or thinner.
- Scissors & Yarn Needle: You’ll need sharp scissors for trimming and a yarn needle for securely weaving in those ends. These small tools make all the difference for a professional finish!
Technique Breakdown & Step-by-Step Guide
The magic of a 3D crochet rose begins with building its foundational spiral and then watching the petals unfold. Don’t worry, it’s simpler than it looks!
Building Your Rose’s Foundation
You’ll begin by creating a generous foundation chain, which acts as the crucial base for your rose’s elegant spiral. Maintaining even tension here is key to a beautifully shaped flower.
Next, you’ll work a repeating pattern of double crochets and chain spaces across this foundation. This establishes the initial framework and the gaps where your first delicate petals will form.
Crafting the Petals
Now, for the fun part: making those gorgeous, voluminous petals! You’ll turn your work and build a series of double crochets into each of the chain-2 spaces from the previous row.
As you continue through subsequent rows, you’ll increase the number of double crochets worked into those same chain spaces. This clever technique causes the fabric to naturally curl and expand, creating the signature lush, realistic petals of your rose.
For an extra full and intricate bloom, you can add another layer, increasing the stitch count even further. You’ll see your rose truly take on its beautiful 3D shape as you work!
Shaping Your Rose
Once your petal rows are complete, your crocheted piece will resemble a long, spiraling strip. Gently begin to fold and coil this strip into a beautiful circular rose shape, starting from the center.
Carefully sew the base of the coiled petals together using your yarn needle. This secures the rose’s shape and keeps all those lovely layers perfectly in place.
Finishing, Assembly & Styling Ideas
To truly complete your handmade masterpiece, consider adding a few charming details like leaves and a stem. These small touches elevate your rose to something truly special!
Adding Leaves
To craft a simple leaf, you’ll work a series of increasing and then decreasing stitches along a short foundation chain, creating that classic leaf shape. Fasten off, leaving a long tail.
Using your yarn needle, securely attach these handmade leaves to the base of your 3D crochet rose. They provide the perfect natural accent.
Creating a Stem
If you’re making a bouquet or a standalone decoration, a simple crocheted stem adds wonderful versatility. Chain about 40 stitches, then single crochet back across the chain for a sturdy green stem.
Styling Your 3D Rose
The versatility of these beautiful blooms is truly endless! Adorn a simple throw pillow or blanket for a touch of handmade charm in your home decor.
Attach them to headbands, hats, or scarves for unique fashion accessories. They also make incredibly thoughtful embellishments for gift boxes or charming bouquets for special occasions.
Pro Crafter Tips
A few expert tips can help you achieve a truly flawless finish on your crochet rose.
Tension Control: Consistency is key! Pay close attention to your yarn tension; it ensures your petals are evenly formed and curl beautifully.
Blocking Your Flower: After assembling, a light blocking can work wonders. Pin your finished rose into shape, spritz with water or steam, and let it dry to help those petals hold their form.
Experiment with Yarn: Don’t be afraid to play with different yarn types! A fuzzy yarn can add a soft, romantic texture, while variegated yarn creates stunning color shifts. Even a metallic thread can add a subtle sparkle!
Frequently Asked Questions
Got a quick question? We’ve got answers!
What kind of yarn is best for a beginner?
A smooth, worsted-weight acrylic or cotton yarn is ideal for beginners. It’s easy to work with and clearly shows your stitches!
Can I make my rose bigger or smaller?
Absolutely! To adjust the size, you can use a thicker or thinner yarn with a corresponding hook size. You can also simply add or subtract rows of petals for a fuller or more petite bloom.
Watch the Full Step-by-Step Video Tutorial
Prefer visual guidance? Follow along with the complete video tutorial below at your own pace: