
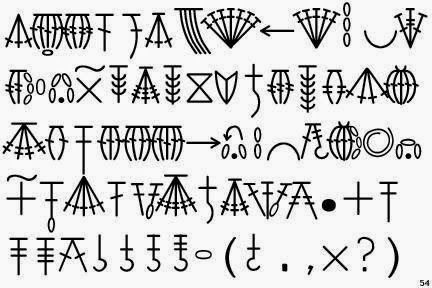
Oh, fellow yarn lovers! Isn’t there something truly magical about turning a simple strand of yarn into a beautiful creation? From cozy blankets to intricate wearable art, crochet opens up a world of possibilities.
While written patterns are wonderful, many of us find a special kind of joy and clarity in visual guides. Enter crochet charts! These clever maps are like a secret language for stitches, making even the most complex designs feel approachable and fun.
Introduction & Your Design Journey
Today, we’re diving deep into the art of creating your very own crochet patterns using charts. Imagine the thrill of seeing your unique vision come to life, stitch by stitch!
This isn’t just about following instructions; it’s about becoming the architect of your own crochet dreams. We’ll explore why charts are so empowering and how you can start designing personalized projects that truly reflect your style.
Tools for Design & Practice
To embark on your chart-designing adventure, you’ll need a few essentials. Think of these as your creative toolkit!
- Graph Paper & Pencils: Your trusty canvas for sketching out ideas. Use different colored pencils for clarity.
- Crochet Chart App: Many digital tools can help you map out designs with ease.
- Hook & Yarn: For practicing your basic stitches and, most importantly, testing your newly designed chart! Any medium-weight yarn (like worsted/aran) and a corresponding hook (e.g., H/5.0mm) will do.
- Stitch Marker: Always handy for keeping track of your progress when testing.
- Scissors & Tapestry Needle: For finishing off your swatch once testing is complete.
Remember, the goal here is to design the chart, then practice the stitches it represents. So grab your favorite scrap yarn for swatching!
Technique Breakdown: Designing Your Chart
Creating your own crochet chart might sound advanced, but it’s incredibly rewarding. Let’s break down the process into simple steps.
Understanding Universal Symbols
The beauty of crochet charts lies in their standardized symbols. Each stitch, from a humble slip stitch to a majestic double crochet, has its own unique representation.
You’ll often find a key or legend accompanying patterns. Familiarize yourself with these symbols – they’re your design alphabet!
For instance, a small “x” or plus sign often represents a single crochet. A vertical line with a horizontal dash typically denotes a double crochet. A tiny dot usually marks a slip stitch.
Your Step-by-Step Chart Creation Guide
Ready to sketch your masterpiece?
First, pick a simple design to start, like a basic granny square or a striped scarf. This helps build confidence.
- Sketch Your Vision: Grab your graph paper or open your chart app. Lightly outline the shape and general flow of your design. Each square on your graph paper will represent one stitch.
- Fill with Symbols: Now, translate your sketch into symbols! Use the standardized symbols for each stitch you plan to use. Be consistent to keep your chart clear and readable.
- Test Your Creation: This is a crucial step! Follow your own chart, stitch by stitch, to crochet a swatch. Does it look exactly as you intended? Adjust any symbols or layout as needed until it’s perfect. Don’t be afraid to refine!
Once you’re comfortable, you can start combining stitches to add texture or mark sections for color changes directly onto your chart. Even incorporate special stitches like bobbles for extra dimension!
Bringing Your Chart to Life & Sharing Ideas
Once your chart is designed and tested, the real magic begins! You’ve just created a blueprint for endless crochet possibilities.
Your custom charts can lead to one-of-a-kind projects, whether it’s a personalized blanket, a unique scarf, or an intricate doily.
Imagine the joy of gifting an item made from your very own design! Styling possibilities are boundless, as your chart can be adapted with different yarn weights, colors, and embellishments.
Pro Crafter Tips for Chart Designers
Here are a few nuggets of wisdom to help you on your charting journey:
- Start Simple: Begin with basic stitch combinations before tackling super complex designs.
- Keep a Symbol Key Handy: Print out or bookmark a reliable guide to crochet symbols.
- Test, Test, Test: Always crochet a swatch from your chart. It’s the best way to catch errors early.
- Embrace Resources: Pinterest, other craft blogs, and online forums are goldmines for learning more about chart design and symbol variations.
- Don’t Fear Mistakes: Every “oops” is a learning opportunity. It’s all part of the creative process!
Frequently Asked Questions
Why should I use crochet charts instead of written patterns?
Charts offer a fantastic visual roadmap, especially for intricate designs. They eliminate much of the guesswork, make it easier to spot mistakes, and are universally understood across language barriers.
Where can I find reliable guides for crochet symbols?
Most crochet patterns include a symbol key, but you can also find extensive free resources online. Websites like Pinterest and dedicated crochet blogs often provide printable symbol charts and detailed explanations.
Watch the Full Step-by-Step Video Tutorial
Prefer visual guidance? Follow along with the complete video tutorial below at your own pace: