
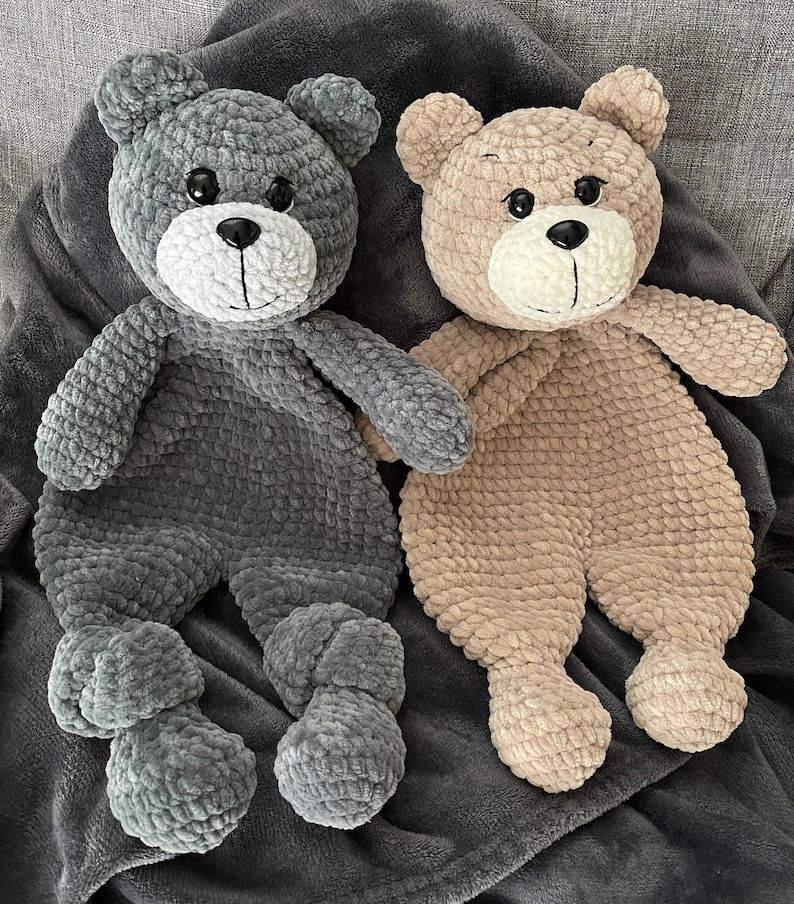
Overview & Design Inspiration
There is nothing quite like the magic of handmade baby gifts, and our latest project is an absolute favorite in the crafting community. Combining the cozy comfort of a security blanket with the irresistible charm of a cuddly teddy bear, this adorable design quickly becomes a treasured keepsake for any newborn.
Whether you are welcoming a new little one into your family, preparing for an upcoming baby shower, or simply expanding your amigurumi collection, this project offers a deeply rewarding creative experience. You will love watching a few simple balls of yarn transform into an heirloom-quality companion that brings endless smiles.
Materials & Recommended Supplies
Choosing the right materials sets the foundation for a gorgeous, durable finished piece that can withstand plenty of love and cuddles. Here is everything you need to gather before you dive in:
- Plush chenille or velvet yarn in two complementary colors (approx. 1–2 skeins for the main body, plus a small amount for the muzzle).
- Crochet hook: 5.5 mm or 6 mm (depending on your personal tension and yarn choice).
- Polyester fiberfill for gentle stuffing of the head, muzzle, and limbs.
- Stitch markers to keep your continuous rounds perfectly organized.
- Yarn needle and sharp scissors for seamless weaving.
- Embroidery thread for facial details and safe, embroidered sleepy eyes for infant use.
Essential Techniques & Stitch Highlights
This delightful project blends basic amigurumi toy-making with simple blanket construction. Working primarily in single crochet creates a dense, sturdy fabric that securely holds its shape and prevents fiberfill from peeking through.
Mastering the magic ring gives your pieces a seamless start, while invisible decreases ensure your bear’s head and limbs look smooth and professional. Alternating standard stitches with textured rows on the blanket portion adds wonderful tactile interest that tiny fingers love to explore.
Construction & Assembly Highlights
Bringing your bear lovey to life is a fun, modular process where each piece is crafted independently before the final assembly. You will start by shaping the charming bear head and sweet little snout, followed by the soft blanket body and the dangling arms and legs.
Once all individual components are crocheted and lightly stuffed, the real magic happens at the joining stage. Securely stitching the head to the center of the blanket and carefully positioning the limbs guarantees a balanced, huggable layout that is ready for lots of playtime adventures.
Customization & Styling Ideas
One of the best things about this pattern is how easily you can customize it to match any nursery theme or personal style. Try experimenting with trendy neutral palettes like soft sage green, warm beige, dusty blue, or classic cream.
You can also personalize your lovey by adding a delicate crocheted bow, a tiny stitched scarf, or even embroidering the baby’s initials right onto the corner of the blanket. The possibilities are truly endless!
Pro Tips for Flawless Results
- Maintain consistent tension throughout your blanket rows to ensure the edges stay neat and the shape remains even.
- Use a stitch marker at the start of every amigurumi round so you never lose your place while working in continuous spirals.
- Stuff your amigurumi pieces gradually rather than all at once to avoid lumpy textures and preserve smooth, rounded shaping.
- Reinforce every single seam with multiple passes of your yarn needle to guarantee maximum durability for everyday use.
Frequently Asked Questions
Is this project suitable for confident beginners?
Yes, absolutely! Anyone familiar with basic stitches like single crochet, double crochet, and simple increases and decreases can easily tackle this project with confidence.
What is the best type of yarn to use for a baby lovey?
Plush chenille, velvet yarns, or baby-safe acrylics are top choices because they offer a luxurious, gentle texture against delicate skin while remaining wonderfully easy to wash.
Are safety eyes safe for newborns?
For babies under three years old, we always recommend embroidering the facial features and sleepy eyes with yarn or embroidery floss rather than using plastic safety eyes to ensure total safety.
Watch the Full Step-by-Step Video Tutorial
Prefer visual guidance? Follow along with the complete video tutorial below at your own pace: