
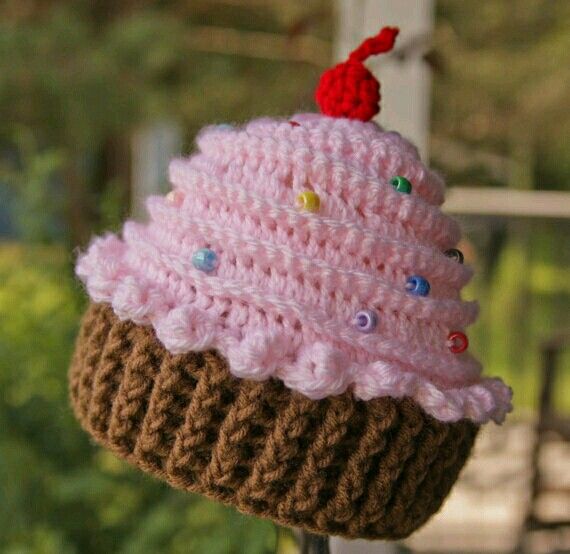
Overview & Design Inspiration
There is pure magic in creating handmade pieces that instantly bring a smile to someone’s face, and this charming cupcake-inspired hat does just that! Combining the cozy warmth of a classic beanie with the whimsical, mouth-watering look of frosted cake, it is a delightful conversation starter for babies, children, and the young-at-heart.
Whether you are crafting for a milestone photo session, a birthday party, or a thoughtful holiday gift, this design offers endless joy on the hook. It is a fantastic way to stretch your creativity while stitching up a fun, colorful, and utterly sweet accessory.
Materials & Recommended Supplies
- Yarn: Worsted weight (Medium #4) yarn in frosting, liner, and cherry colors. Acrylic and cotton blends offer great stitch definition and durability.
- Crochet Hook: 5.0 mm (H-8) crochet hook (or size needed to obtain proper gauge).
- Notions: Stitch markers, sharp scissors, measuring tape, and a yarn needle for weaving in tails.
- Extras: Small amount of polyester fiberfill to give the decorative cherry a lovely, plump shape.
Essential Techniques & Stitch Highlights
Bringing this sweet treat to life involves a playful mix of classic stitches and clever textural techniques. Working in the round from the top down allows you to seamlessly transition from the fluffy, swirled frosting to the crisp ridges of the cupcake liner.
You will explore techniques like front post stitches and working into specific loops to mimic the folded paper wrapper and the rich, piped layers of icing. Mastering these foundational methods not only builds your crochet confidence but also adds incredible visual depth and elasticity to the finished hat.
Construction & Assembly Highlights
The journey begins right at the top with a magic ring, blooming outward into the crowned center of your fluffy frosting. As you work your way down, strategic increases and alternating loop rows form the signature swirls of piped icing without any overly complicated fuss.
Next, a clean color change brings you to the cupcake base, where textured posts create the look of a pleated paper wrapper before finishing with a stretchy ribbed brim. Finally, a little stuffed cherry with an embroidered stem is crocheted separately and securely attached to crown your masterpiece in style.
Customization & Styling Ideas
One of the best parts of this project is how easily you can adapt it to fit any season, celebration, or personality! Try soft pastels for a spring baby shower, vibrant rainbow hues for a birthday bash, or rich red and green shades for a festive Christmas photo shoot.
You can further personalize your creation by embroidering tiny sprinkles onto the frosting, adding miniature crocheted flowers, or sewing on textured bobbles to mimic colorful candy toppings. Adjusting the sizing is as simple as monitoring your crown diameter and head circumference measurements.
Pro Tips for Flawless Results
- Maintain Even Tension: Consistent yarn tension is the secret to smooth, beautiful frosting spirals and a balanced, professional-looking shape.
- Measure As You Go: Regularly check your work against head circumference charts or favorite hats to guarantee a snug, comfortable fit.
- Secure Your Color Changes: When transitioning from the frosting to the cupcake liner, work your final yarn-over with the new color for a pristine, invisible seam.
- Block for Perfection: A light steam block on acrylic fibers or wet blocking for cotton will relax the stitches and give your finished hat a crisp, polished finish.
Frequently Asked Questions
Is this project beginner-friendly?
Yes! Crafters who are comfortable with basic stitches like single crochet, double crochet, and working in the round will find this project wonderfully approachable and rewarding.
Can I make different sizes?
Absolutely. You can easily adjust the sizing by continuing your crown increase rounds for larger heads or stopping earlier for a snug newborn fit.
How long does it typically take to finish?
Most crocheters can easily complete this fun accessory within an afternoon or a single cozy weekend, depending on experience and added embellishments.
Watch the Full Step-by-Step Video Tutorial
Prefer visual guidance? Follow along with the complete video tutorial below at your own pace: