
Overview & Design Inspiration
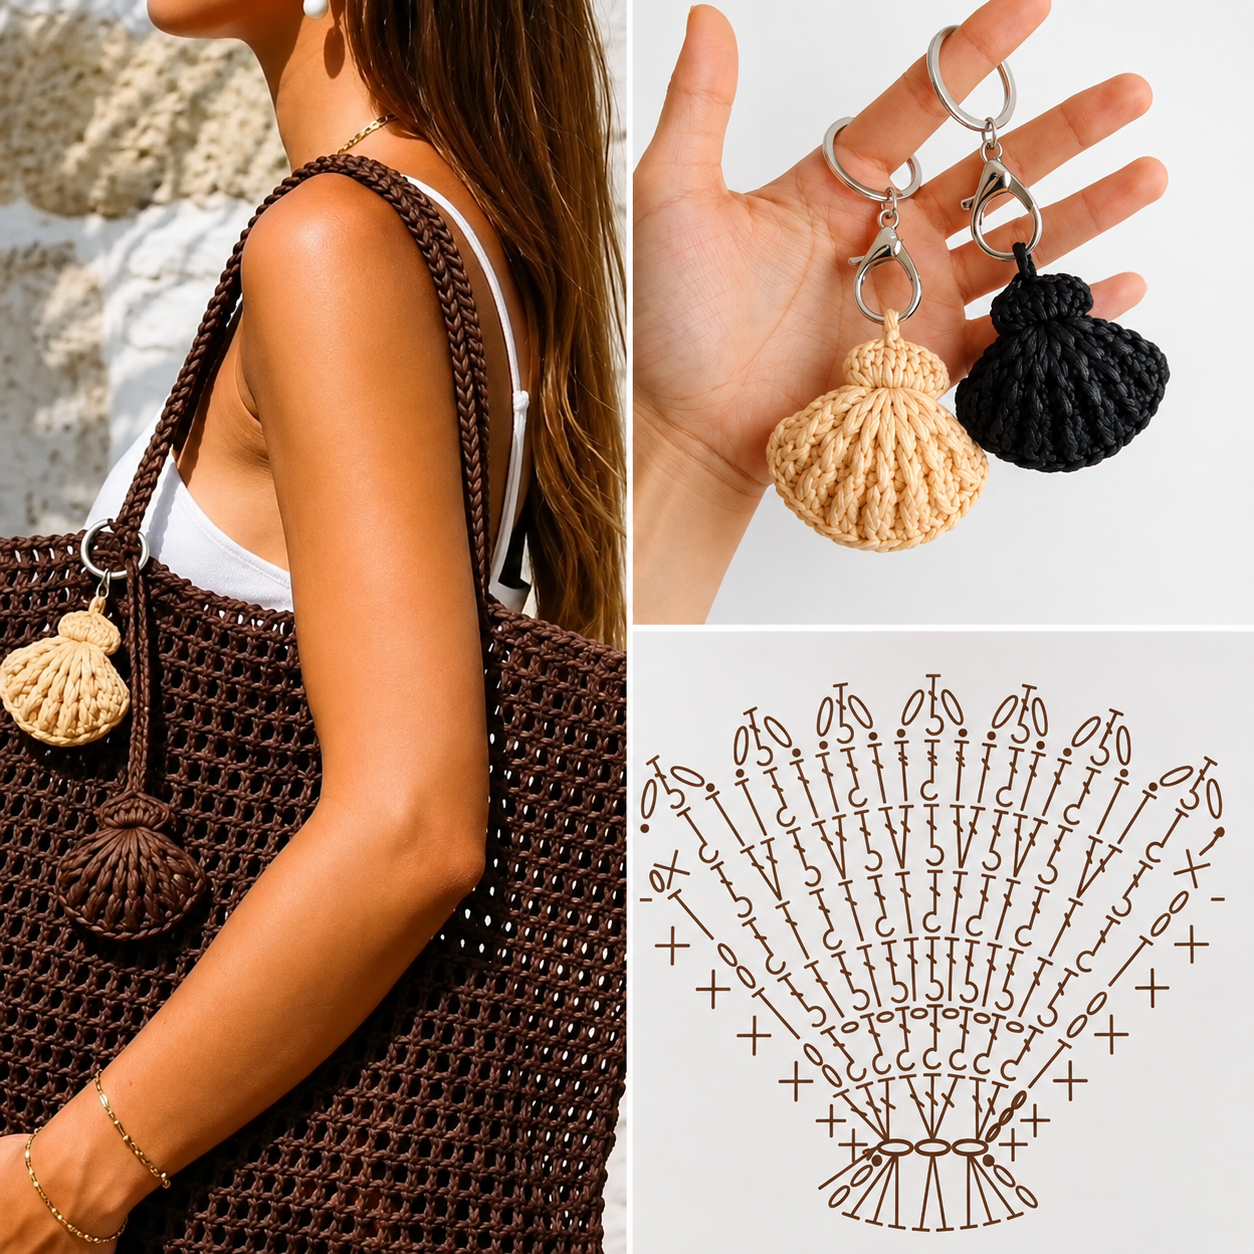
Hello, fellow yarn lovers! There is something truly magical about bringing a little piece of the ocean into our everyday lives through handmade crafts. The Crochet Seashell Keychain Pattern is a charming and practical project that combines creative expression with everyday functionality, making it an absolute joy to stitch.
Whether you are searching for a quick weekend accessory, a thoughtful handmade gift, or a decorative charm for your favorite bag, this beautiful design is an incredible choice. Portable, affordable, and deeply satisfying to complete, it transforms a simple scrap of yarn into a stunning coastal keepsake.
Materials & Recommended Supplies
Gathering your supplies before you begin makes the crafting process so much smoother. Here is everything you need to bring your seashell keychain to life:
- Yarn: 100% cotton yarn (mercerized cotton is fantastic for crisp stitch definition and a subtle, elegant sheen).
- Crochet Hook: 3.25 mm (US size D/3) or 3.5 mm (US size E/4) to keep stitches tight and structured.
- Notions: Yarn needle for weaving in ends, sharp scissors, and optional stitch markers.
- Hardware: Swivel keychain clasp or a standard split key ring with a jump ring.
- Optional Stuffing: A tiny pinch of fiberfill for a beautifully rounded, three-dimensional look.
Essential Techniques & Stitch Highlights
This delightful project is built upon simple yet effective crochet foundations. Working outward from a classic magic ring, the design uses a harmonious blend of single crochets, half double crochets, and tall double or treble stitches.
Strategic increases allow the fabric to gently fan outward into a natural shape. By varying the height of the stitches across different sections, you naturally form those gorgeous, tactile vertical ridges that mimic a real seashell.
Construction & Assembly Highlights
The magic begins with a tightly secured magic ring that establishes the narrow top of the shell. As you work your way through the rows, evenly spaced increases guide the fabric into its signature fan-like silhouette.
Once your crochet piece reaches its desired size, you can lightly tuck a wisp of fiberfill inside to give it a lovely puffed dimension. A simple fold, a few neat whip stitches along the edge, and the creation of a sturdy top loop securely anchor your hardware for daily adventures.
Customization & Styling Ideas
One of the best parts of this pattern is how endlessly adaptable it is. While classic neutrals offer a serene coastal aesthetic, soft pastels, vibrant corals, or sparkling metallic yarns completely transform its personality.
Gradient yarns work wonders by creating natural color transitions across the textured ridges. Attach your finished seashell to beach totes, handbags, backpacks, or zipper pulls to carry a little handmade sunshine wherever you go.
Pro Tips for Flawless Results
- Maintain Consistent Tension: Uniform stitches are the secret to achieving symmetrical curves and a well-defined seashell shape.
- Don’t Over-Stuff: If using fiberfill, add just enough to create a gentle puff without stretching your stitches or distorting the ridges.
- Secure Your Hardware: Ensure your jump rings and keychain clasps are squeezed completely shut with pliers so they won’t pull open during everyday use.
- Hide Your Ends: Weave your yarn tails securely through the inner folds before trimming to keep your finished piece looking professional and tidy.
Frequently Asked Questions
Is this project suitable for absolute beginners?
Yes, absolutely! While it incorporates varied stitch heights and shaping, the project is small, works up quickly, and uses basic stitches that confident beginners can easily master.
Can I use acrylic yarn instead of cotton?
While cotton is highly recommended for its crisp stitch definition and durability, you can certainly use a smooth acrylic yarn. Just keep in mind that the shell may feel softer and slightly less rigid.
How do I access the printable pattern and video tutorial?
You can easily grab the complete printable PDF pattern and follow along with our step-by-step video tutorial by checking the links provided at the bottom of this page!
Watch the Full Step-by-Step Video Tutorial
Prefer visual guidance? Follow along with the complete video tutorial below at your own pace: