
Overview & Inspiration
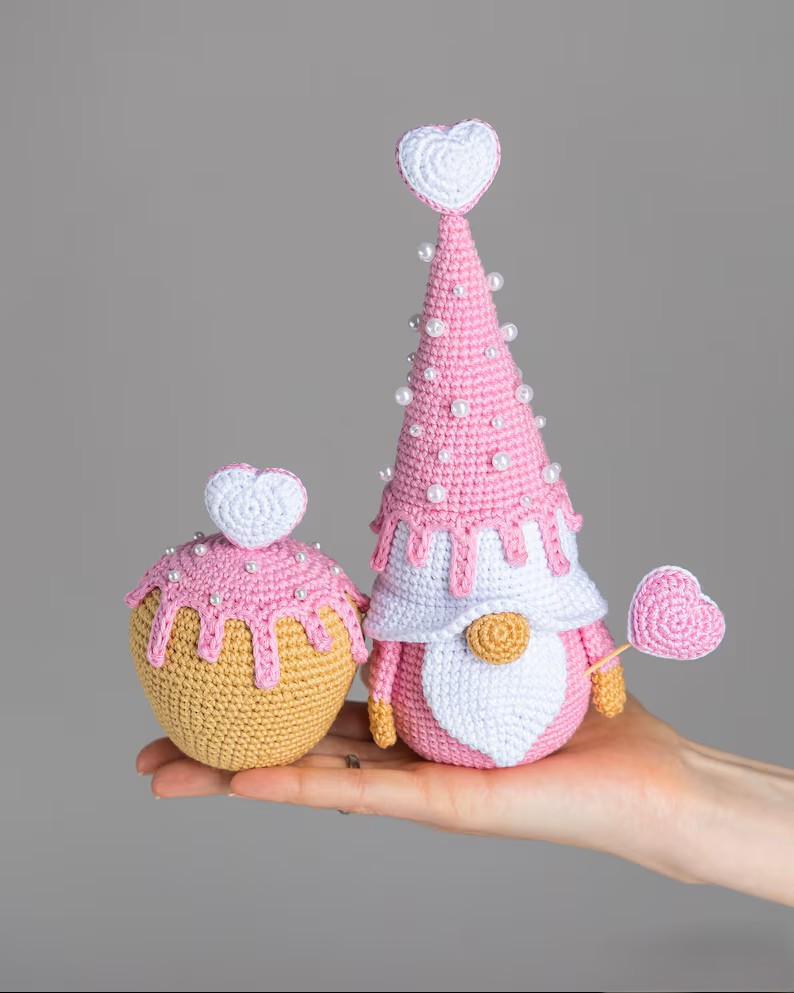
Welcome, fellow yarn enthusiasts! There is nothing quite like the joy of bringing a whimsical little character to life stitch by stitch, and today we are diving into an absolute community favorite: the Crochet Gnome With Heart and Cupcake Pattern. Whether you are looking to spruce up your seasonal shelf decor or craft a deeply meaningful, handmade token for someone special, this charming little fellow brings an explosion of warmth and personality straight to your crochet hook.
What makes this pattern so wonderfully addictive is the delightful blend of classic shaping techniques with playful, expressive details. From his cozy, oversized hat and signature round nose to the sweet little heart he holds and the festive cupcake accessory, every single component is designed to be as enjoyable to make as it is stunning to display. Grab a warm cup of coffee, settle into your favorite crafting chair, and let us create some cozy magic together!
Materials & Supplies Needed
- Medium-weight (Worsted Weight / Category 4) acrylic or cotton yarn in gnome body color, hat color, beard/hair color, heart color (red/pink), and cupcake colors (tan, white, and a bright cherry red)
- Crochet hook sized to match your yarn (typically a 3.5 mm / US E-4 or 4.0 mm / US G-6 to ensure tight stitches without gaps)
- Polyfill fiber stuffing for shaping
- Tapestry needle (for weaving in ends and assembling pieces)
- Stitch markers (to track your rounds easily)
- Sharp scissors
Stitches & Abbreviations
- Rnd(s): Round(s)
- St(s): Stitch(es)
- Ch: Chain
- Sl st: Slip stitch
- Sc: Single crochet
- Inc: Increase (work 2 sc in the same st)
- Dec: Decrease (invisible single crochet decrease: insert hook in front loops of next 2 sts, yarn over, pull through both, yarn over, pull through remaining loops)
- BLO: Back loop only
- FO: Fasten off
Step-by-Step Pattern Instructions
The Body
Working in continuous rounds from the bottom up using your body-color yarn.
- Rnd 1: Start with a magic ring and work 6 sc into the ring [6 sts].
- Rnd 2: Work [inc] in each st around [12 sts].
- Rnd 3: [1 sc, inc] 6 times [18 sts].
- Rnd 4: [2 sc, inc] 6 times [24 sts].
- Rnd 5: [3 sc, inc] 6 times [30 sts].
- Rnds 6–12: Sc in each st around [30 sts]. Begin stuffing the body firmly with polyfill.
- Rnd 13: [3 sc, dec] 6 times [24 sts].
- Rnd 14: [2 sc, dec] 6 times [18 sts]. FO, leaving a long tail for assembly. Finish stuffing the body completely.
The Hat
Using your hat-color yarn.
- Rnd 1: Make a magic ring, work 4 sc into the ring [4 sts].
- Rnd 2: Sc in each st around [4 sts].
- Rnd 3: [1 sc, inc] twice [6 sts].
- Rnd 4: Sc in each st around [6 sts].
- Rnd 5: [2 sc, inc] twice [8 sts].
- Rnd 6: [3 sc, inc] twice [10 sts].
- Rnd 7: [4 sc, inc] twice [12 sts].
- Rnd 8: [1 sc, inc] 6 times [18 sts].
- Rnd 9: [2 sc, inc] 6 times [24 sts].
- Rnd 10: [3 sc, inc] 6 times [30 sts].
- Rnd 11: Sc in each st around [30 sts]. FO, leaving a long tail to sew the hat onto the body.
The Nose
Using peach or skin-tone yarn.
- Rnd 1: Magic ring, 6 sc into ring [6 sts].
- Rnd 2: [Inc] 6 times [12 sts].
- Rnds 3–4: Sc in each st around [12 sts].
- Rnd 5: [Dec] 6 times [6 sts]. FO, stuff lightly, and cinch the remaining stitches closed.
The Heart Accessory
Using red or pink yarn.
- Part 1: Magic ring, work 6 sc into ring [6 sts]. Sl st to join, FO. Make a second identical piece, but do not fasten off the second piece.
- Joining Rnd: Crochet across both pieces to join them together into the heart shape, working 12 sc around the combined top lobes.
- Shaping: Decrease evenly over the next few rounds until the heart narrows down to a point. Stuff lightly before closing, then FO and weave in tails.
The Cupcake Accessory
Starting with tan yarn for the base.
- Rnd 1: Magic ring, 6 sc [6 sts].
- Rnd 2: [Inc] 6 times [12 sts].
- Rnd 3: Working in BLO, sc in each st around [12 sts].
- Rnd 4: Sc in each st around [12 sts]. FO tan. Switch to white yarn for the frosting.
- Rnd 5: Work texture stitches or alternating sc and puff stitches to mimic frosting swirls, then decrease down and top with a tiny red cherry dot. FO.
Assembly & Finishing Touches
Now comes the most magical part of your project: bringing your gnome to life with assembly! Position the hat so that it slightly overlaps the top of the body, tilting it playfully to one side, and securely whip-stitch it into place.
Next, attach the round nose right below the brim of the hat in the center front. Secure the heart accessory and the festive cupcake onto either side of the gnome’s body, sewing or gluing them firmly so they rest balanced in his tiny hands.
Pro Tips for Flawless Results
- Maintain Firm Tension: Keep your stitches tight and even to ensure the polyfill stuffing never peeks through the gaps in your fabric.
- Use Stitch Markers: Always place a marker in the first stitch of every round to keep your spiral counts perfectly accurate.
- Stuff as You Go: Fill your body components incrementally to achieve a firm, beautifully sculpted shape without over-stretching the stitches.
- Secure All Tails: Knot and weave your yarn tails neatly inside the hollow sections of the gnome before final closure to ensure lifelong durability.
Frequently Asked Questions
What skill level is required for this pattern?
This pattern is fantastic for ambitious beginners with basic crochet knowledge, as well as intermediate makers who love quick, satisfying character projects.
Can I customize the colors in the pattern?
Absolutely! The design is wonderfully adaptable, allowing you to easily swap color palettes to match seasonal holidays, home decor themes, or your favorite sports team.
How long does it take to complete the project?
Most crocheters can easily finish this entire gnome within a couple of relaxed, cozy crafting sessions from start to finish.