
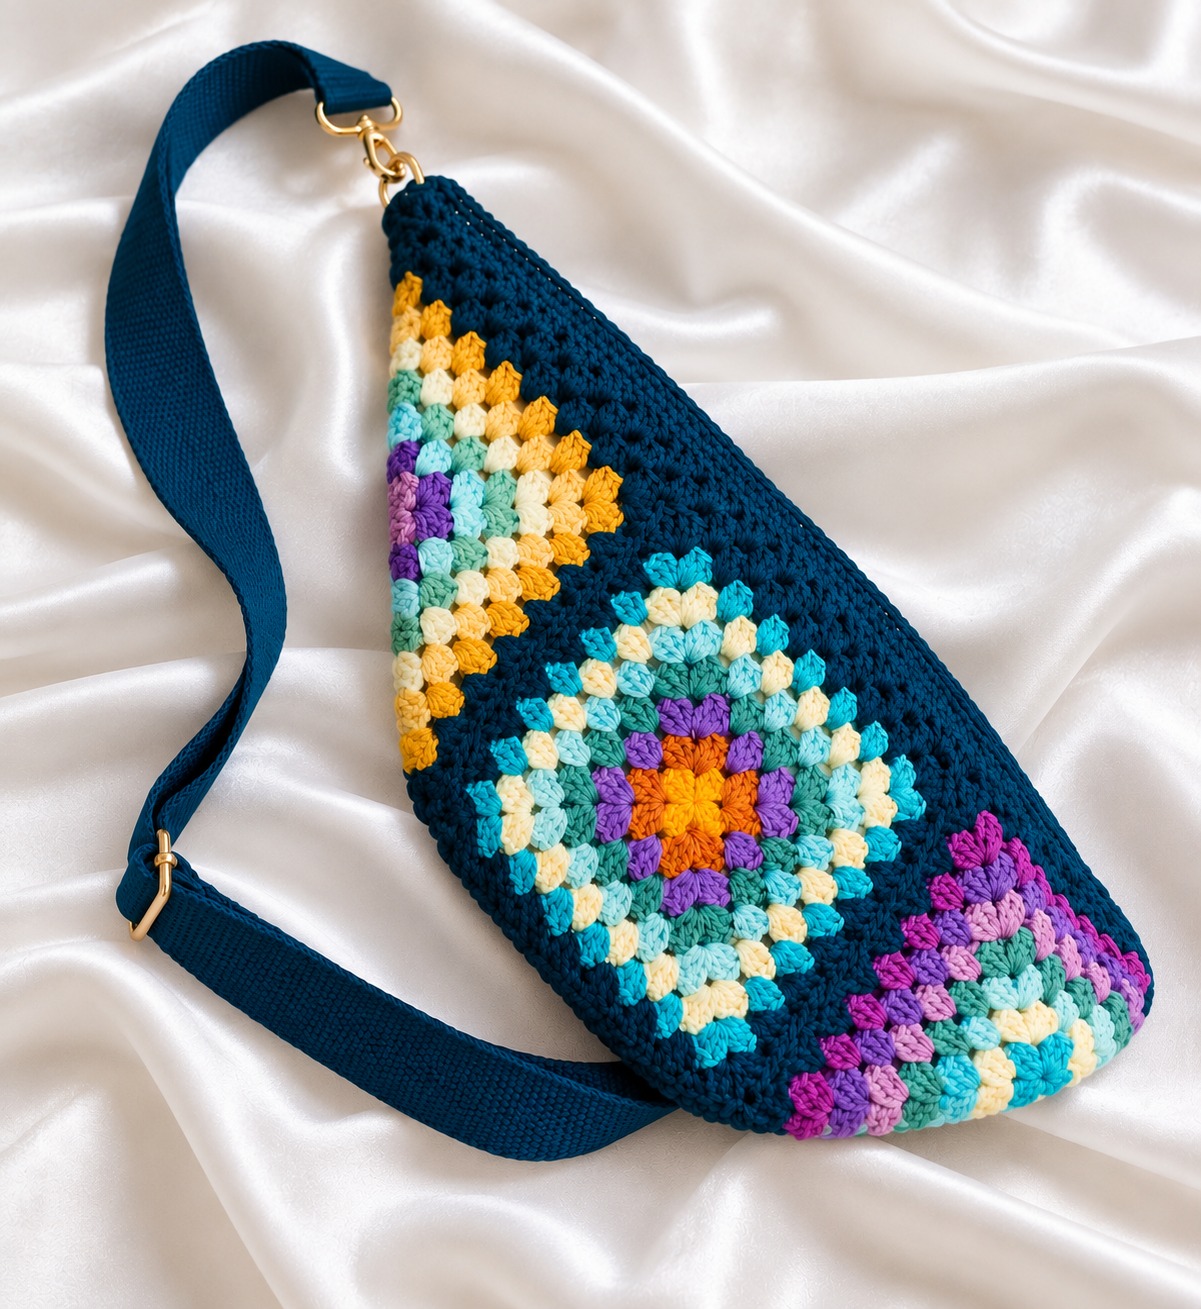
Overview & Design Inspiration
Welcome, fellow yarn lovers! There is something utterly magical about turning traditional granny squares into a modern, functional wardrobe staple, and our latest project does just that.
The Crochet Granny Square Crossbody Bag Pattern combines nostalgic charm with a sleek, contemporary silhouette. It is the ultimate everyday accessory for anyone who loves showing off their handmade style.
Materials & Recommended Supplies
- Yarn: 250–350 grams of medium-weight (Category 4 / worsted) cotton or cotton-blend yarn. Cotton provides fantastic stitch definition and helps the bag maintain its structure over time.
- Primary Color: A rich, dark shade like deep navy blue (ideal for making vibrant motifs pop).
- Accent Colors: A playful mix of bright yellow, turquoise, mint green, cream, purple, and orange.
- Crochet Hook: 3.5 mm to 4.5 mm hook, chosen to create a firm, sturdy fabric that won’t sag.
- Notions: Yarn needle, sharp scissors, stitch markers, and a flexible measuring tape.
- Hardware & Closure: Two attachment rings, two swivel clasps, an adjustable strap slider, a sturdy woven or handmade strap, and an optional zipper or magnetic closure.
Essential Techniques & Stitch Highlights
This design celebrates the timeless beauty of the classic granny cluster. By grouping double crochets into neat little trios separated by cheerful chain spaces, you build gorgeous texture effortlessly.
Mastering color changes is another wonderful highlight of this pattern. Transitioning smoothly between brilliant accent shades and a deep background yarn brings the geometric motifs to life with striking contrast.
Working in the round from a center magic ring helps build your confidence with foundational stitches like single crochets, half double crochets, and double crochets. It is a fantastic practice ground for developing fluid, rhythmic tension.
Construction & Assembly Highlights
Bringing this crossbody bag together is like solving a delightful, colorful puzzle. You begin by crocheting individual geometric motifs—typically three for the front and three for the matching back panel.
Next, these vibrant squares are artfully framed and joined together with a contrasting background yarn. The body of the bag is then shaped into a softly tapered, stylish silhouette that sits comfortably against your hip.
Finally, sturdy hardware and a comfortable strap are securely attached to reinforce the edges. Adding a lining and a simple closure gives your handmade bag a gorgeous, professional finish.
Customization & Styling Ideas
Make this bag uniquely yours by experimenting with entirely different color palettes. Try soft beige, dusty pink, sage green, and ivory for a serene, vintage-inspired aesthetic.
You can easily scale the finished dimensions by adding or removing rounds from your granny squares. Adjusting the strap length also lets you wear it as a classic crossbody or a chic shoulder bag.
Pair your finished masterpiece with a casual denim jacket and a simple white tee for an instant outfit upgrade. It also makes a breathtaking, deeply personal gift for a fellow craft enthusiast.
Pro Tips for Flawless Results
- Maintain Consistent Tension: Bags need structure! Keep your stitches slightly firm so your finished accessory holds its shape when loaded with your daily essentials.
- Organize Your Yarn Colors: Since this project uses multiple shades, keep each ball in a separate container or yarn bowl to prevent frustrating tangles.
- Block Your Motifs: Lightly steam or wet-block your finished granny squares before assembling them to ensure crisp corners and effortless, neat joins.
Frequently Asked Questions
Is this crochet pattern suitable for beginners?
Absolutely! While it involves multiple colors and assembly steps, the individual squares use classic, beginner-friendly stitches and standard US terminology.
Can I use acrylic yarn instead of cotton?
Cotton yarn is recommended because it resists stretching, but a high-quality, tightly spun acrylic yarn will also work wonderfully if you prefer a softer feel.
How do I access the step-by-step instructions?
You can easily download the complete printable PDF and follow along with our comprehensive video tutorial to guide you through every single phase of the project!
Watch the Full Step-by-Step Video Tutorial
Prefer visual guidance? Follow along with the complete video tutorial below at your own pace: