
Overview & Design Inspiration
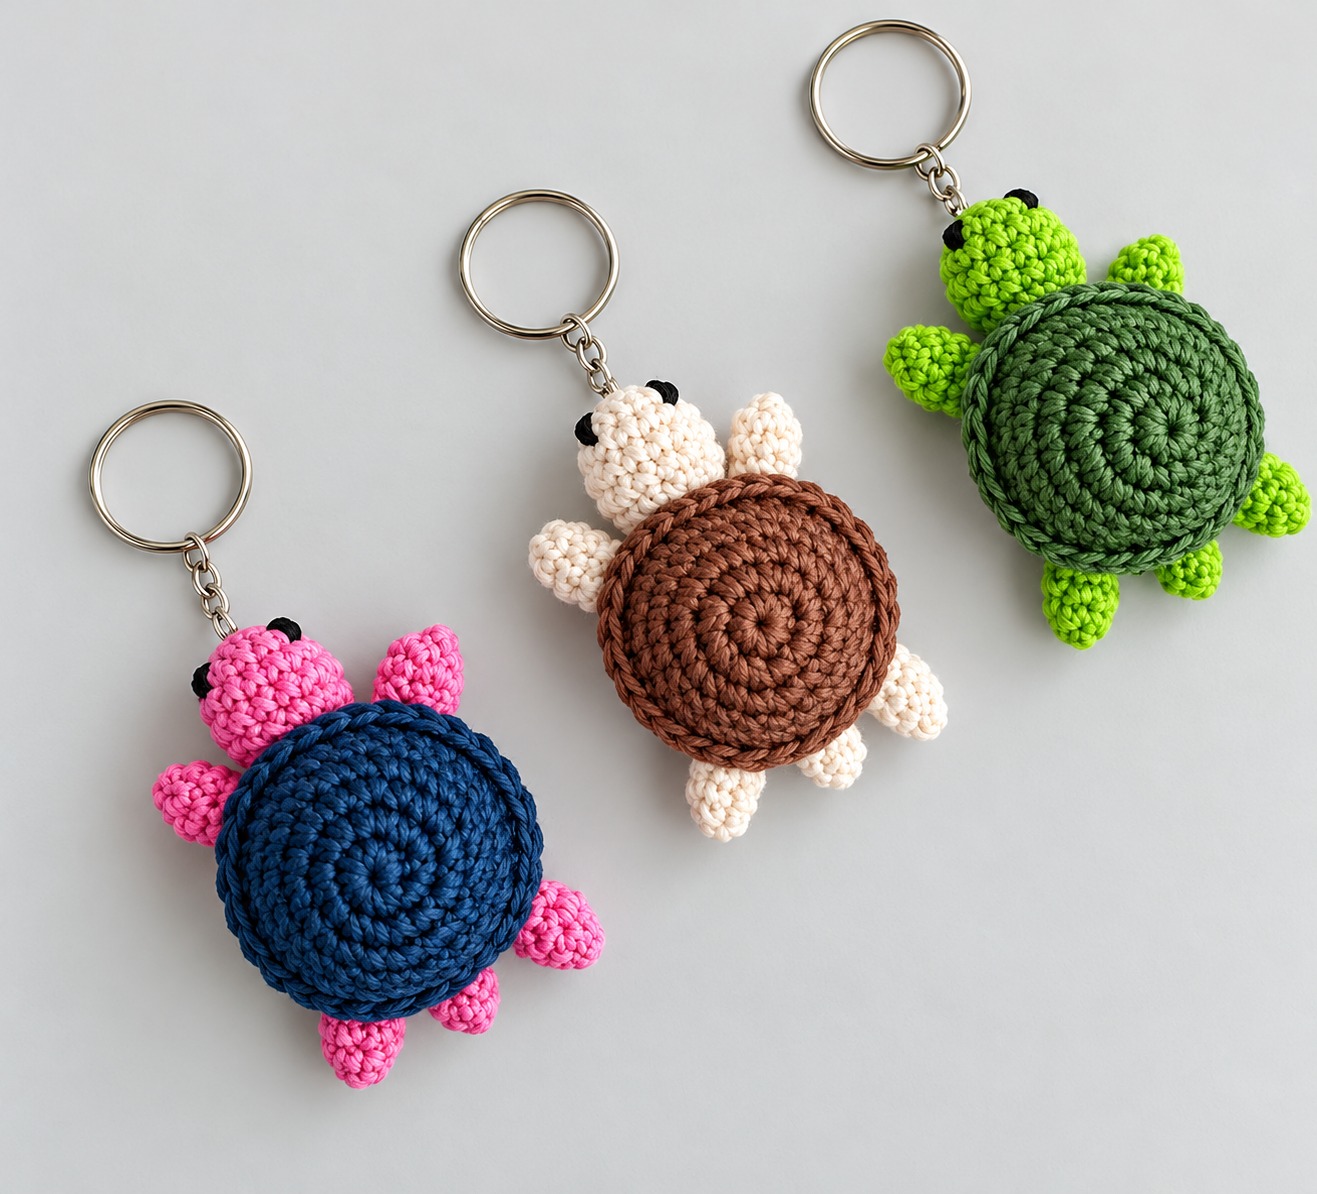
Few things bring as much pure delight to a crocheter’s hook as quick, pocket-sized amigurumi projects. This miniature crochet turtle keychain captures the sweet, gentle nature of sea turtles with a beautifully domed shell, paddling flippers, and an expressive little face that brightens up everyday routines.
Whether clipped onto a backpack, dangling from your car keys, or gifted to a friend, these palm-sized ocean wanderers are an absolute joy to craft. Best of all, they serve as fantastic stash-busters, allowing you to turn leftover skeins of premium yarn into meaningful, handmade keepsakes in just an hour or two.
Materials & Recommended Supplies
- Yarn: Sport or DK weight 100% mercerized cotton yarn in two contrasting shades (one for the upper shell, one for the head, belly, and flippers).
- Crochet Hook: 2.0 mm to 2.5 mm (US B/1 to C/2), selected to keep stitches dense and tight.
- Notions: Locking stitch markers, sharp embroidery scissors, and a blunt yarn needle for neat seaming.
- Stuffing: High-loft polyester fiberfill (you will only need a small handful).
- Hardware: 25 mm split key ring with a short chain and jump ring, plus pliers for assembly.
- Facial Details: Black embroidery floss or 4 mm safety eyes (if not gifting to babies or toddlers).
Essential Techniques & Stitch Highlights
The foundation of this miniature cutie relies on working tightly controlled single crochet stitches in continuous spiral rounds. Starting with an adjustable magic ring is crucial here, as it eliminates any central gaps where stuffing might otherwise peek through the top of the shell.
To transition the shell from a flat circular disc into a dimensional, cupped carapace, the pattern utilizes the back-loop-only (BLO) technique for a single round. This deliberate structural line creates a crisp edge that causes the fabric to fold naturally downward, giving your turtle its authentic domed silhouette.
Working in miniature also highlights the importance of the invisible decrease. By catching only the front loops of two adjacent stitches before completing your single crochet, you preserve a smooth, uniform texture without unsightly bumps or yarn gaps.
Construction & Assembly Highlights
This turtle comes together through a series of small, manageable pieces that are joined like a tiny plush puzzle. You will first craft the domed carapace (the upper shell) and a flat coordinating plastron (the bottom belly plate) that matches its diameter.
The head and flippers are worked quickly in matching body yarn, with the tiny limbs remaining mostly flat to mimic real sea flippers. Before securing everything together, the facial features are embroidered and the limbs are pinned symmetrically along the rim of the belly plate.
Assembly is achieved by sandwiching the appendages between the top and bottom shell sections, stitching along the outer circumference while adding a gentle cloud of fiberfill. The final touch involves firmly stitching your metal keychain hardware directly into the reinforced top center of the shell for long-lasting durability.
Customization & Styling Ideas
While classic forest greens and soft sage tones feel traditional and organic, these turtles look stunning in playful, unexpected palettes. Try pairing a deep navy blue shell with bubblegum pink flippers, or an earthy espresso brown shell with rich cream accents for a modern look.
Beyond standard keychains, these little turtles make charming zipper pulls for project bags, stroller toys, or whimsical rearview mirror pendants. You can even personalize the shell by embroidering tiny star stitches, French knots, or surface crochet accents across the back to mimic turtle scutes.
If you are preparing inventory for spring craft fairs or holiday stocking stuffers, assemble an entire rainbow “clutch” of turtles. Their tiny footprint and quick completion time make them high-reward projects that draw shoppers straight to your display.
Pro Tips for Flawless Results
- Downsize Your Hook: Always choose a hook size at least 0.5 mm to 1.0 mm smaller than the yarn band recommends to guarantee your stitches are firm enough to hold stuffing securely.
- Stuff With Moderation: Overfilling will stretch your stitches and warp the circular base, while underfilling leads to a dimpled shell; aim for a firm, smooth dome that bounces back when squeezed.
- Anchor Hardware Deeply: Do not simply sew the keychain ring onto a single strand of yarn; anchor your sewing tail through multiple structural stitches inside the shell before weaving in your ends.
- Choose Cotton Over Acrylic: Mercerized cotton provides crisp stitch definition, resists pilling from friction in pockets or purses, and keeps its shape far better over time.
Frequently Asked Questions
Why is cotton yarn preferred over acrylic for this keychain?
Keychains endure continuous friction, pocket friction, and handling. Mercerized cotton holds its structure, displays immaculate stitch definition, and does not pill or fuzz up the way acrylic or wool blends tend to do over time.
How can I ensure the head stays upright and doesn’t flop?
The secret lies in both firm stuffing and wide-base attachment. Be sure to lightly pack the neck cavity and sew the head across at least three to four connecting stitches along both the top and bottom shell edges to anchor it firmly in place.
Can I make this project safe for small children?
Absolutely! Simply skip the metal keychain hardware and substitute safety eyes with hand-embroidered French knots or sleepy sleeping-eye stitches using black embroidery floss to eliminate any potential choking hazards.
Watch the Full Step-by-Step Video Tutorial
Prefer visual guidance? Follow along with the complete video tutorial below at your own pace: