
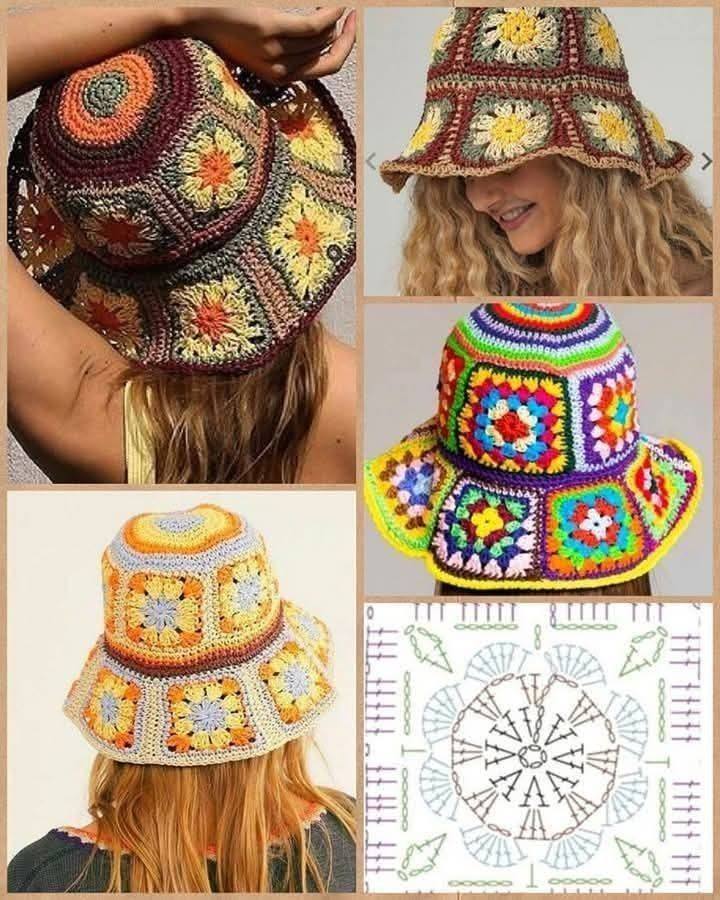
Overview & Inspiration
Welcome, fellow yarn lovers! If you are looking for a project that blends timeless style with a fresh, modern twist, the Crochet Square Bucket Hat Pattern is going to be your new favorite obsession. Instead of working in endless monotonous rounds, this design transforms simple crochet squares into a stunning, three-dimensional wearable masterpiece.
Whether you want to bust through your scrap yarn stash or craft a chic, custom statement piece for your next sunny outdoor adventure, this pattern delivers. It is playful, highly customizable, and deeply satisfying to watch come together stitch by stitch!
Materials & Supplies Needed
- Medium-weight (Worsted / #4) yarn in your choice of colors (cotton or cotton-blend recommended for structure and breathability)
- Crochet hook in size 5.0 mm (US H/8)
- Tapestry needle for weaving in ends and seaming
- Stitch markers to keep your layout organized
- Scissors
Stitches & Abbreviations
- ch = chain
- sl st = slip stitch
- sc = single crochet
- hdc = half double crochet
- dc = double crochet
- st(s) = stitch(es)
- rep = repeat
Step-by-Step Pattern Instructions
Round 1: The Center Motif
Begin by making a magic ring (or ch 4 and join with a sl st to form a ring). Chain 3 (counts as 1 dc here and throughout), work 2 dc into the ring, ch 2. Work [3 dc, ch 2] 3 more times into the ring. Join with a sl st to the top of the beginning ch-3. [12 dc, four ch-2 corners]
Round 2: Expanding the Square
Slip stitch into the next 2 sts and into the ch-2 corner space. Chain 3, work (2 dc, ch 2, 3 dc) in the same corner space. *Chain 1, skip 3 dc, work (3 dc, ch 2, 3 dc) in the next ch-2 corner space; rep from * twice more, ch 1, join with a sl st to the top of the beginning ch-3. Fasten off if changing colors. [24 dc]
Round 3: The Crown and Side Panels
Make a total of 5 identical squares for the side band of your hat, and 1 square for the top crown (or customize the number depending on your target head circumference). Take your time to ensure each square matches in gauge and dimensions before moving on to assembly.
Assembly & Finishing Touches
Lay your finished squares flat in a ring formation for the sides, with the top crown square placed right in the center. Use a whip stitch or flat slip stitch join from the wrong side to seam the squares together securely.
Once your main body is securely joined into a dimensional bucket shape, attach your yarn to the bottom edge and work the brim directly in continuous rounds. Work 1 round of hdc evenly around, then increase evenly on subsequent rounds to create that iconic, gently flared bucket hat brim [72 sts]. Fasten off and weave in all remaining yarn tails.
Pro Tips for Flawless Results
- Block your individual squares before joining them to ensure crisp edges and effortless, professional-looking seams.
- Maintain a consistent yarn tension across all squares so your hat holds its structural shape beautifully over time.
- Play with color contrasts by using a neutral base and vibrant accent squares, or dive into your scrap basket for a fun, eclectic boho vibe.
Frequently Asked Questions
What skill level is required for a Crochet Square Bucket Hat Pattern?
This pattern is suitable for confident beginners with basic crochet knowledge, but it also offers enough creative flexibility to deeply engage intermediate and advanced crocheters.
How long does it take to complete a Crochet Square Bucket Hat Pattern?
The time required depends on your experience and how fast you whip up your squares, but most makers can comfortably complete the entire project over a few relaxed crafting sessions.
Can I resize the Crochet Square Bucket Hat Pattern easily?
Yes, resizing is one of the greatest advantages of this pattern! Adjusting your square dimensions or adding an extra side square allows you to customize the fit for any head size without complicated math.
Watch the Full Step-by-Step Video Tutorial
Prefer visual guidance? Follow along with the complete video tutorial below at your own pace: