
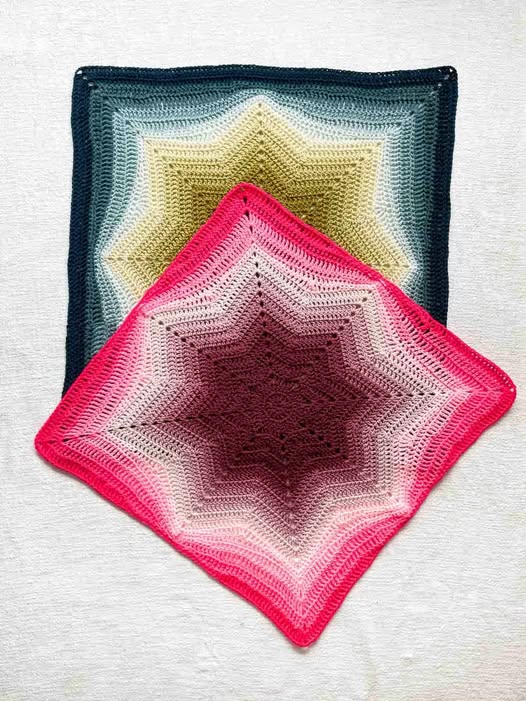
Overview & Inspiration
Welcome, fellow yarn lovers! There is nothing quite like the magic of working up a handmade project that grows into something truly breathtaking, and our beloved Crochet Star Blanket Pattern is an absolute shining star in the world of fiber arts.
Whether you are a beginner looking to expand your skills or an experienced crocheter craving a stunning, rhythmic project, this pattern strikes the absolute sweet spot between simplicity and visual impact. Let’s dive in together and create a celestial masterpiece!
Materials & Supplies Needed
- Medium-weight (Worsted weight / #4) yarn in your choice of colors (soft acrylic or cotton blends recommended)
- Crochet hook in size 5.5 mm (US I/9) or size corresponding to your yarn choice
- Tapestry needle for weaving in ends
- Stitch markers (essential for marking star points and the start of rounds)
- Sharp embroidery scissors
Stitches & Abbreviations
- ch: Chain
- sl st: Slip stitch
- sc: Single crochet
- hdc: Half double crochet
- dc: Double crochet
- st(s): Stitch(es)
- sp(s): Space(s)
- rep: Repeat
- rnd(s): Round(s)
Step-by-Step Pattern Instructions
Note: This classic pattern is built on a radial construction featuring five main star points. Keep a close eye on your stitch counts to ensure crisp, clean edges!
Round 1
Start with a magic ring. Ch 3 (counts as first dc here and throughout). Work 14 dc into the magic ring. Join with a sl st to the top of the starting ch-3 [15 dc].
Round 2
Ch 3, dc in same st. [dc in next 2 sts, work 3 dc in next st (star point tip)] rep around 4 more times, ending with dc in last 2 sts. Join with a sl st to top of starting ch-3 [25 sts].
Round 3
Ch 3, dc in same st, dc in next 4 sts. *3 dc in next st (point), dc in next 4 sts, work (dc, ch 2, dc) or standard increase depending on your point structure.* Rep from * to * around, join with a sl st [35 sts].
Continuing Rounds
Continue repeating the established increase formula at each of the 5 star points while increasing the number of regular stitches between points on each successive round. Always check that your blanket lies completely flat.
Assembly & Finishing Touches
Once you have reached your desired blanket size, finish off your final yarn strand, leaving a 6-inch tail. Use your tapestry needle to neatly weave in all loose ends along the back of the stitches.
To give your star blanket a professional, polished finish, block the piece by gently pinning it out on blocking mats, misting it with water, and allowing it to dry completely to define those gorgeous sharp points.
Pro Tips for Flawless Results
- Maintain a consistent yarn tension from round to round to prevent your star points from curling or ruffling.
- Always use stitch markers in the center stitch of every star point to make identifying your increase locations effortless.
- Complete the final yarn-over of your last stitch with your new color to achieve seamless, clean color changes between rounds.
Frequently Asked Questions
How do I fix my blanket if it starts to ruffle or curl?
If your star blanket starts to ruffle, you are likely working too many increases and should check your round counts. If it curls inward and refuses to lie flat, you may need to add extra increase stitches at the star tips.
Can I use chunky yarn for this crochet star blanket pattern?
Absolutely! Bulky or chunky weight yarn works up wonderfully for a cozy, thick throw, just be sure to use the larger hook size recommended on your yarn label.
How do I adjust the finished size of the blanket?
Because this pattern grows outward in continuous rounds, you can easily customize the size by stopping whenever your blanket reaches your desired dimensions, whether making a tiny lovey or a large bed throw.
Watch the Full Step-by-Step Video Tutorial
Prefer visual guidance? Follow along with the complete video tutorial below at your own pace: