
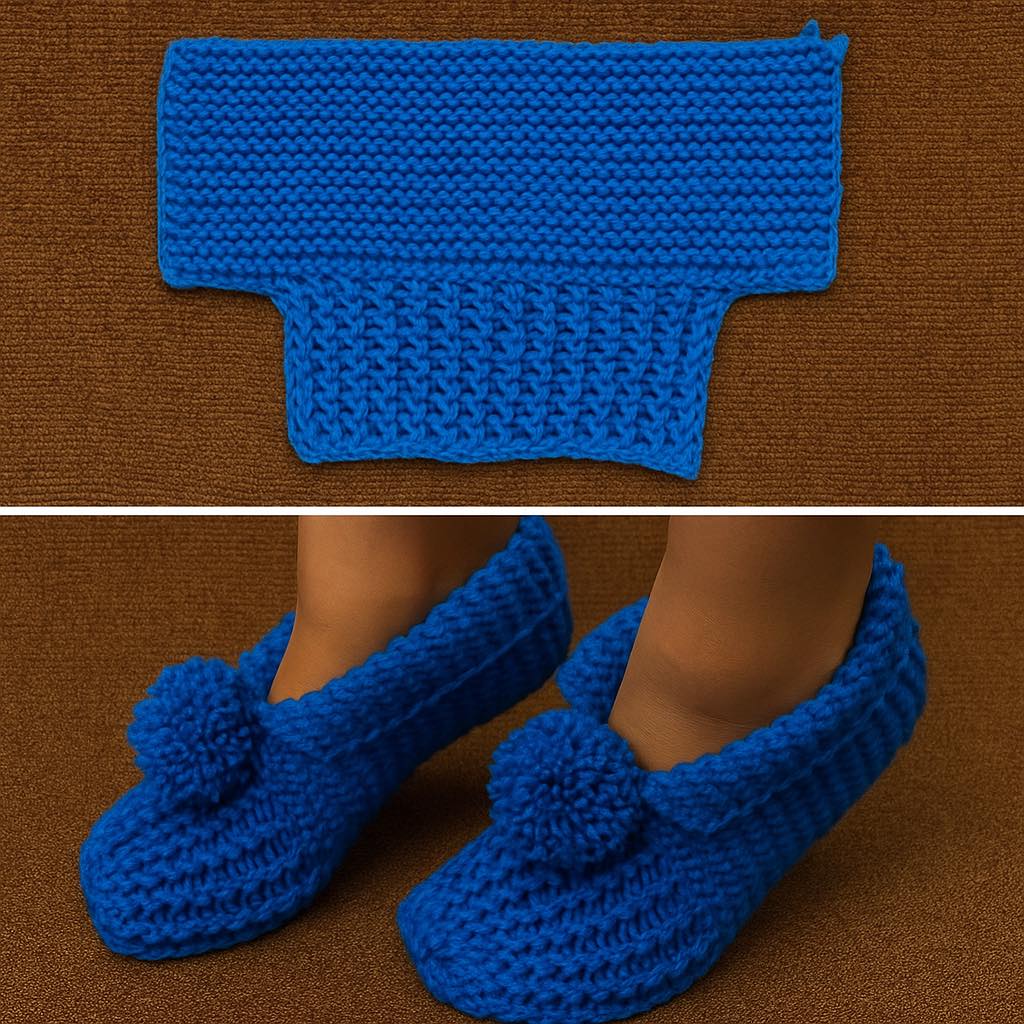
Overview & Inspiration
Welcome back, my crafty friends! If you are anything like me, your heart simply sings when you slip your tired feet into a pair of warm, handmade slippers at the end of a long day.
That is why I am so thrilled to share this Easy and Beautiful Crochet Slipper Pattern with you today. It combines cozy comfort with beginner-friendly simplicity, giving you a gorgeously rewarding project from start to finish.
Materials & Supplies Needed
- Medium-weight (Worsted / Category 4) yarn – acrylic or cotton blends recommended
- Crochet hook: 5.0 mm (US Size H/8)
- Tapestry needle for weaving in ends
- Stitch markers
- Sharp scissors
- Optional: Non-slip soles, rubber dots, or felt for the bottom
Stitches & Abbreviations
- ch = chain
- st = stitch
- sts = stitches
- sl st = slip stitch
- sc = single crochet
- hdc = half-double crochet
- dc = double crochet
- dec = decrease (sc2tog or standard decrease)
Step-by-Step Pattern Instructions
Let us dive right in and start crafting your brand new slippers! We will build the sole first, shape the toe, and then create a snug heel.
Step 1: The Foundation Sole
Begin by making a foundation chain that matches the length of the foot you are creating the slipper for. [22 ch]
Working along the chain, make single crochet stitches to form the sturdy base of your slipper sole, continuing rows until you reach the desired width. [18 sts]
Step 2: Shaping the Toe
Next, we will shape the toe area by gradually decreasing stitches at both ends of the row to form a neat, rounded front. [14 sts]
Keep your tension even and consistent throughout this process to maintain a gorgeous, professional appearance.
Step 3: Crafting the Heel
The heel is created by folding the back section of your work and joining the sides together. Use slip stitches or a tapestry needle to seam it securely. [12 sts]
This essential step ensures that your finished slippers fit snugly and comfortably around the foot without slipping off.
Step 4: The Upper Cuff and Edging
Once the base and heel are complete, crochet around the top opening using double crochet or half-double crochet stitches for a clean edge. [24 sts]
Feel free to add a decorative trim here, such as a lovely scalloped border or a fun contrasting color.
Assembly & Finishing Touches
Securely weave in all of your loose yarn ends using a tapestry needle to prevent any accidental unraveling.
Take a moment to lightly block your finished slippers by dampening them and letting them dry flat to relax the stitches.
Finally, attach non-slip pads or rubber dots to the soles if you plan on wearing them safely around hardwood or tile floors.
Pro Tips for Flawless Results
- Always check your gauge swatch before starting to ensure your slipper sizing turns out spot-on.
- Keep your tension relaxed and consistent so your slippers remain soft and flexible.
- Take clear notes on any size adjustments you make so you can easily replicate them later.
Frequently Asked Questions
What is the best yarn for this Easy and Beautiful Crochet Slipper Pattern?
A soft, medium-weight yarn like an acrylic or cotton blend works best because it is durable, comfortable, and wonderfully easy to care for.
Can beginners follow this pattern easily?
Yes, absolutely! This pattern uses basic stitches like single crochet, double crochet, and slip stitch, making it completely approachable for enthusiastic beginners.
How long does it take to make a pair of crochet slippers?
It usually takes between 3 to 5 hours, depending entirely on your crochet speed and the specific foot size you are making.
Watch the Full Step-by-Step Video Tutorial
Prefer visual guidance? Follow along with the complete video tutorial below at your own pace: