
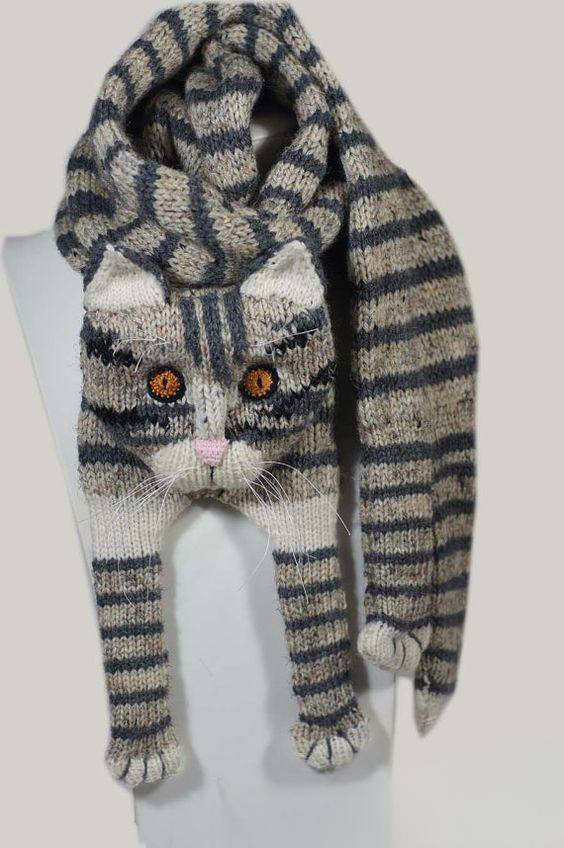
Overview & Inspiration
Hello, fellow yarn lovers! Welcome back to the studio. If you are looking for a project that combines absolute cozy warmth with a generous dose of feline charm, you are in the right place.
Knitting a cat-inspired scarf is a delightful way to practice your stitching while crafting a wearable piece of art that always turns heads. Whether you are a beginner exploring your very first novelty project or an experienced crafter seeking a relaxing weekend make, this design offers the purr-fect balance of fun and function.
Materials & Supplies Needed
- Yarn: Medium-weight worsted yarn (approx. 4 mm to 6 mm gauge friendly), roughly 300–400 yards total.
- Fiber Content: Soft acrylic or wool blend for durability, warmth, and easy care.
- Colors: Neutral tones (beige, gray, black, cream) for realistic cat styling, or fun pastels for a playful look.
- Knitting Needles: US 6 to US 10 (4.0 mm to 6.0 mm) depending on your desired drape.
- Tapestry Needle: For weaving in ends and embroidering cat faces or details.
- Stitch Markers: To keep track of your stitch counts and pattern repeats.
- Scissors: Sharp crafting scissors for clean snips.
- Measuring Tape: To check your scarf length as you grow the rows.
Stitches & Abbreviations
- K: Knit stitch
- P: Purl stitch
- St(s): Stitch or stitches
- BO: Bind off
- CO: Cast on
Step-by-Step Pattern Instructions
Let’s cast on and get this cozy feline adventure started!
- Row 1 (Foundation): CO 24 sts using your chosen medium-weight yarn and needles [24 sts].
- Row 2 to Row 10: Work in Garter Stitch (K every row) to establish a clean, stretchy foundation border [24 sts].
- Row 11 (Pattern Body): Begin your main body pattern by alternating K and P rows (Stockinette stitch) or continuing in Garter stitch based on your preferred texture, maintaining your stitch count [24 sts].
- Rows 12 through 150: Continue repeating your chosen body texture rows, measuring periodically until your scarf reaches a comfortable length of approximately 140 cm to 180 cm [24 sts].
- Final Rows: Work 10 final rows in Garter stitch to match the starting edge [24 sts].
- Bind Off: BO all stitches loosely to maintain wonderful elasticity at both ends of the scarf [0 sts].
Assembly & Finishing Touches
Once your main scarf length is complete, it is time to bring your feline friend to life! Using a contrasting yarn color and your tapestry needle, embroider sweet sleeping cat eyes, whiskers, and a tiny nose onto the ends of the scarf.
If you prefer a 3D accent, you can knit tiny triangular cat ears separately and securely seam them onto the top corners of the scarf. Weave in all loose yarn tails neatly on the wrong side of the work.
Finally, gently block your finished scarf to smooth out the stitches, relax the fiber, and ensure crisp, beautiful edges.
Pro Tips for Flawless Results
- Maintain Even Tension: Take your time with each stitch so your scarf maintains a uniform width from end to end.
- Keep Yarn Organized: Use a yarn bowl or project bag to prevent tangles while working through long color stretches.
- Embrace the Magic of Blocking: Never skip blocking! It completely transforms your knitted fabric, giving your cat details a polished, professional finish.
Frequently Asked Questions
Is the knitting cat scarf pattern suitable for beginners?
Yes, absolutely! The main body relies on basic knit and purl stitches, and you can easily add the decorative cat facial features later using simple embroidery.
What type of yarn works best for this project?
A medium-weight worsted yarn is ideal because it provides wonderful warmth, great durability, and clear stitch definition so your cat theme stands out.
How long will it take to finish the scarf?
Depending on your knitting speed and how intricate you make your cat details, beginners can finish this project in a few days, while experienced knitters can wrap it up in just a few hours.
Watch the Full Step-by-Step Video Tutorial
Prefer visual guidance? Follow along with the complete video tutorial below at your own pace: