
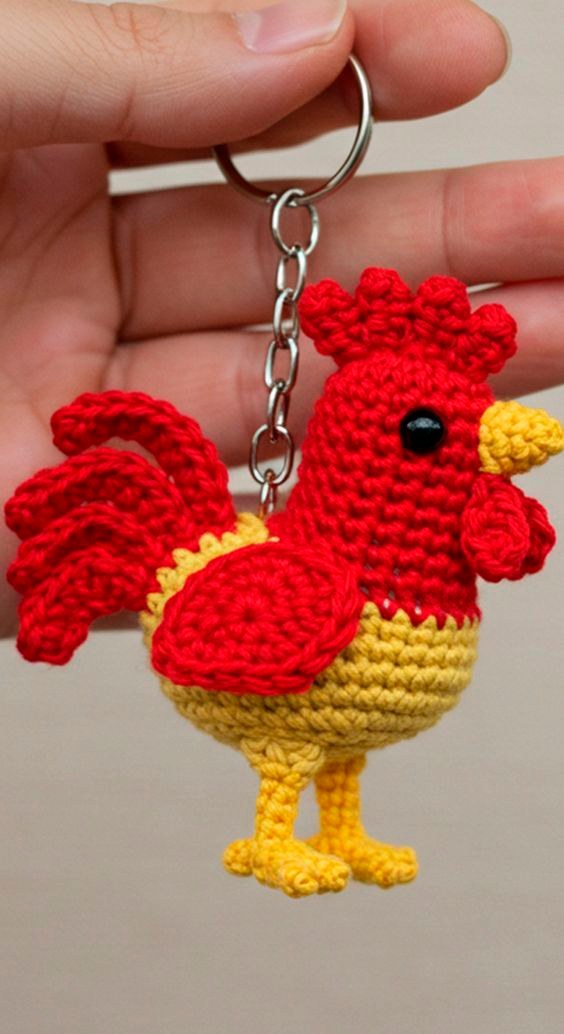
Overview & Design Inspiration
Welcome back, fiber friends! If you are looking for a quick, joyful project that instantly brings a smile to your face, you are going to fall completely in love with the Crochet Rooster Keychain Pattern. There is something endlessly charming about turning a few yards of leftover yarn into a vibrant, pocket-sized farmyard friend.
Crocheters everywhere adore this delightful handmade accessory because it effortlessly combines traditional amigurumi techniques with playful design. Whether you want to brighten up your daily commute keys, add a quirky touch to your favorite tote bag, or gift a heartfelt token to a friend, this speedy little rooster checks every single box.
Materials & Recommended Supplies
Gathering your supplies is the exciting first step toward bringing your little rooster to life. The materials required for this project are wonderfully simple and budget-friendly, making it the ultimate stash-busting endeavor.
- Yarn: Cotton yarn is highly recommended for its durability and crisp stitch definition, though acrylic yarn works brilliantly if you prefer a wider palette of vibrant shades.
- Crochet Hook: A small hook ranging between 2.0 mm (US B/1) and 3.0 mm (US D/3) ensures tight stitches that securely lock in your stuffing.
- Stuffing: A small amount of polyester fiberfill or toy stuffing gives your rooster its wonderfully soft yet structured amigurumi shape.
- Notions: A yarn needle for seamless weaving, sharp scissors, and a sturdy metal keyring or lobster clasp to complete your functional accessory.
Essential Techniques & Stitch Highlights
The magic of this pattern lies in accessible amigurumi construction, making it an absolute joy to stitch. You will primarily work in continuous, small rounds that begin with a classic magic ring.
This approach builds a sturdy, seamless circular base for the body while keeping your stitches delightfully dense. Simple increases and decreases shape the charming silhouette, allowing you to experiment effortlessly with classic single crochets, tactile surface details, and bright color accents for the comb and tail feathers.
Construction & Assembly Highlights
Bringing your rooster together is a wonderfully satisfying journey of sculpture and assembly. The process begins at the heart of the body, where you work outward in rounds before adding just the right amount of firm, supportive stuffing.
Next comes the fun part: fashioning and attaching the signature details! Separate pieces like the bright red crest, the dainty little beak, and the textured wings are crocheted independently and sewn securely into place, giving your rooster its unmistakable character.
Customization & Styling Ideas
One of the greatest joys of amigurumi is making each creation entirely your own. You can easily play with color palettes, from traditional farmyard reds and whites to whimsical rainbow pastels for spring.
Try swapping in variegated yarn for the body to achieve an artistic, feathered color shift without changing threads. Add playful micro-accessories like tiny bows or embroider cheeky winking eyes to give your feathered companion a truly distinct personality.
Pro Tips for Flawless Results
- Maintain Firm Tension: Keep your stitches nice and snug to prevent the polyester stuffing from peeking through the fabric.
- Secure Your Hardware: Double-check that your keyring or lobster clasp is tightly anchored to the top of the head so it withstands daily wear and tear.
- Embrace Stash-Busting: Use up your colorful scrap yarns for the tail feathers to create a stunning, zero-waste mosaic effect!
Frequently Asked Questions
Is the Crochet Rooster Keychain Pattern suitable for beginners?
Yes, absolutely! The project relies primarily on basic amigurumi stitches like single crochet, increases, and simple shaping, making it a wonderful confidence-booster for adventurous beginners.
How long does it take to make one?
Most crafters can easily complete a rooster keychain in just one to two hours, making it an ideal quick-fix project for craft fairs, last-minute gifts, or instant gratification.
Can I sell keychains made from this pattern?
Many makers love creating handmade items to sell at local markets or online shops. Just be sure to check any specific designer guidelines regarding commercial sales for your finished pieces!
Watch the Full Step-by-Step Video Tutorial
Prefer visual guidance? Follow along with the complete video tutorial below at your own pace: