
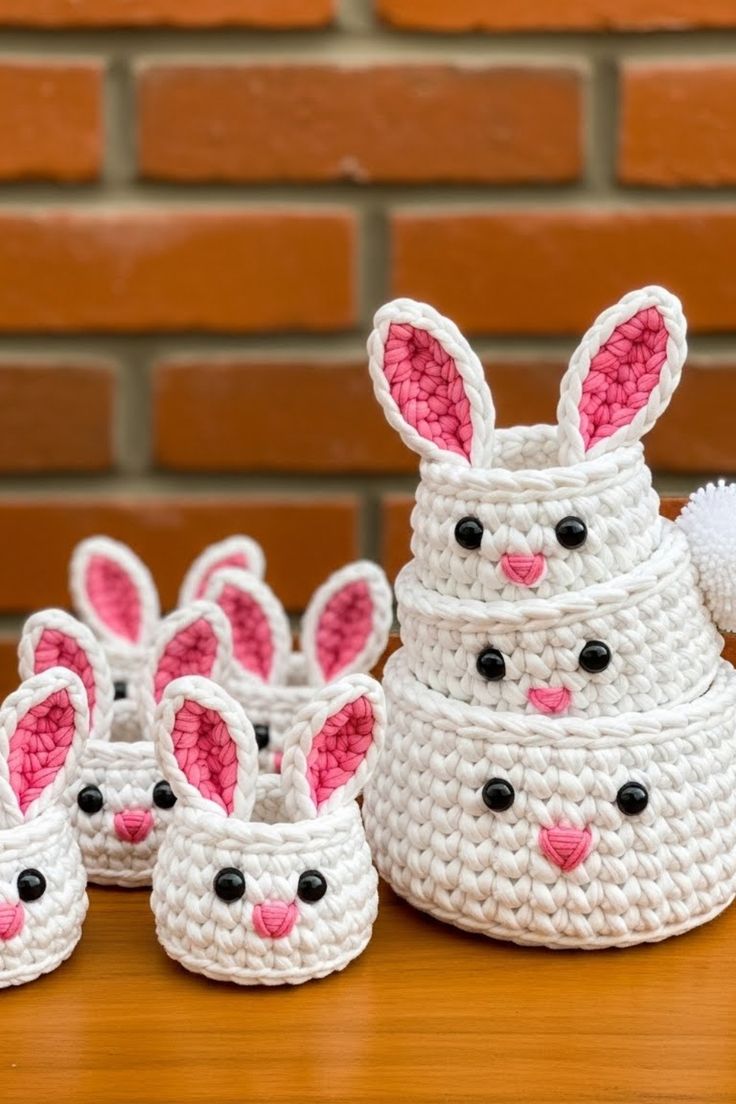
Overview & Inspiration
Welcome, fellow makers! Spring is just around the corner, and nothing captures the joyful spirit of the season quite like making your very own handmade Easter decor.
The Easter Bunny Basket is a delightful project that combines charming design, everyday functionality, and irresistible softness into one wonderful seasonal make. Whether you are prepping for a magical Easter egg hunt, stitching up a heartfelt gift for a little one, or simply adding a festive touch to your home, this pattern is an absolute joy to bring to life.
Materials & Supplies Needed
- Medium-weight cotton yarn (Worsted weight / Yarn Weight 4) in desired base color and pink for accents
- Crochet hook: 4.0 mm (US G/6) to 5.0 mm (US H/8) depending on your tension
- Stitch markers (to track continuous rounds)
- Tapestry needle (for weaving in ends and embroidering details)
- Sharp scissors
- Small amount of polyester fiberfill stuffing (for the bunny ears)
- Optional: Safety eyes or black yarn for embroidered facial features
Stitches & Abbreviations
- ch: Chain
- sl st: Slip stitch
- sc: Single crochet
- hdc: Half double crochet
- inc: Increase (2 sc or hdc in the same stitch)
- st(s): Stitch(es)
- Rnd(s): Round(s)
Step-by-Step Pattern Instructions
We will begin the basket base using a magic ring and work in continuous spirals to ensure a seamless, professional finish.
Basket Base
- Rnd 1: Start with a magic ring, work 6 sc into the ring. [6 sts]
- Rnd 2: Work 2 sc in each st around. [12 sts]
- Rnd 3: (1 sc, inc) 6 times around. [18 sts]
- Rnd 4: (2 sc, inc) 6 times around. [24 sts]
- Continue increasing in this established pattern until your circular base reaches the desired diameter.
Basket Walls
- Stop increasing and work 1 sc or hdc in each st around in continuous rounds.
- Maintain consistent tension to help the basket walls stay firm and stand upright on their own.
- Continue working even rounds until the basket walls reach your desired height. Fasten off and weave in ends.
Bunny Ears (Make 2 Outer, 2 Inner)
- Chain a foundation row for the elongated ear shape, then work rows back and forth using sc or hdc.
- Make two larger outer layers in the main basket color and two smaller pink layers for the inner ear details.
- Lightly stuff the ears with fiberfill for added dimension, then sew the inner pink layer to the outer ear layer.
Assembly & Finishing Touches
Position the completed bunny ears evenly on opposite sides near the back edge of the basket opening.
Use your tapestry needle and strong matching yarn to securely stitch the ears in place, weaving in all ends tightly to prevent loosening.
Embroider a small triangle nose in pink yarn on the front of the basket, and add simple curved lines for the mouth and whiskers.
Pro Tips for Flawless Results
- Maintain Tight Tension: Keeping your stitches firm and even ensures the basket walls remain sturdy and upright without collapsing.
- Count Your Stitches: Always check your stitch counts at the end of each round to prevent uneven shaping and accidental ripples.
- Use Cotton Yarn: Choosing a medium-weight cotton yarn provides natural structure and durability that acrylic simply cannot match.
- Blocking for Definition: Lightly steam your finished basket to smooth out the stitches and crisp up the overall shape.
Frequently Asked Questions
What skill level is required for the Easter Bunny Basket?
This pattern is beginner-friendly! While it features shaping and simple embroidery, the basic stitches make it easy to adjust to your personal skill level.
Can I wash the finished basket?
Yes, if you use cotton yarn, you can gently hand wash the basket in cool water and lay it flat or stuff it with tissue paper to air dry.
How do I make the basket walls sturdier?
Aside from maintaining tight tension, you can insert a removable plastic canvas lining inside the basket to give it extra heavy-duty support.
Watch the Full Step-by-Step Video Tutorial
Prefer visual guidance? Follow along with the complete video tutorial below at your own pace: