
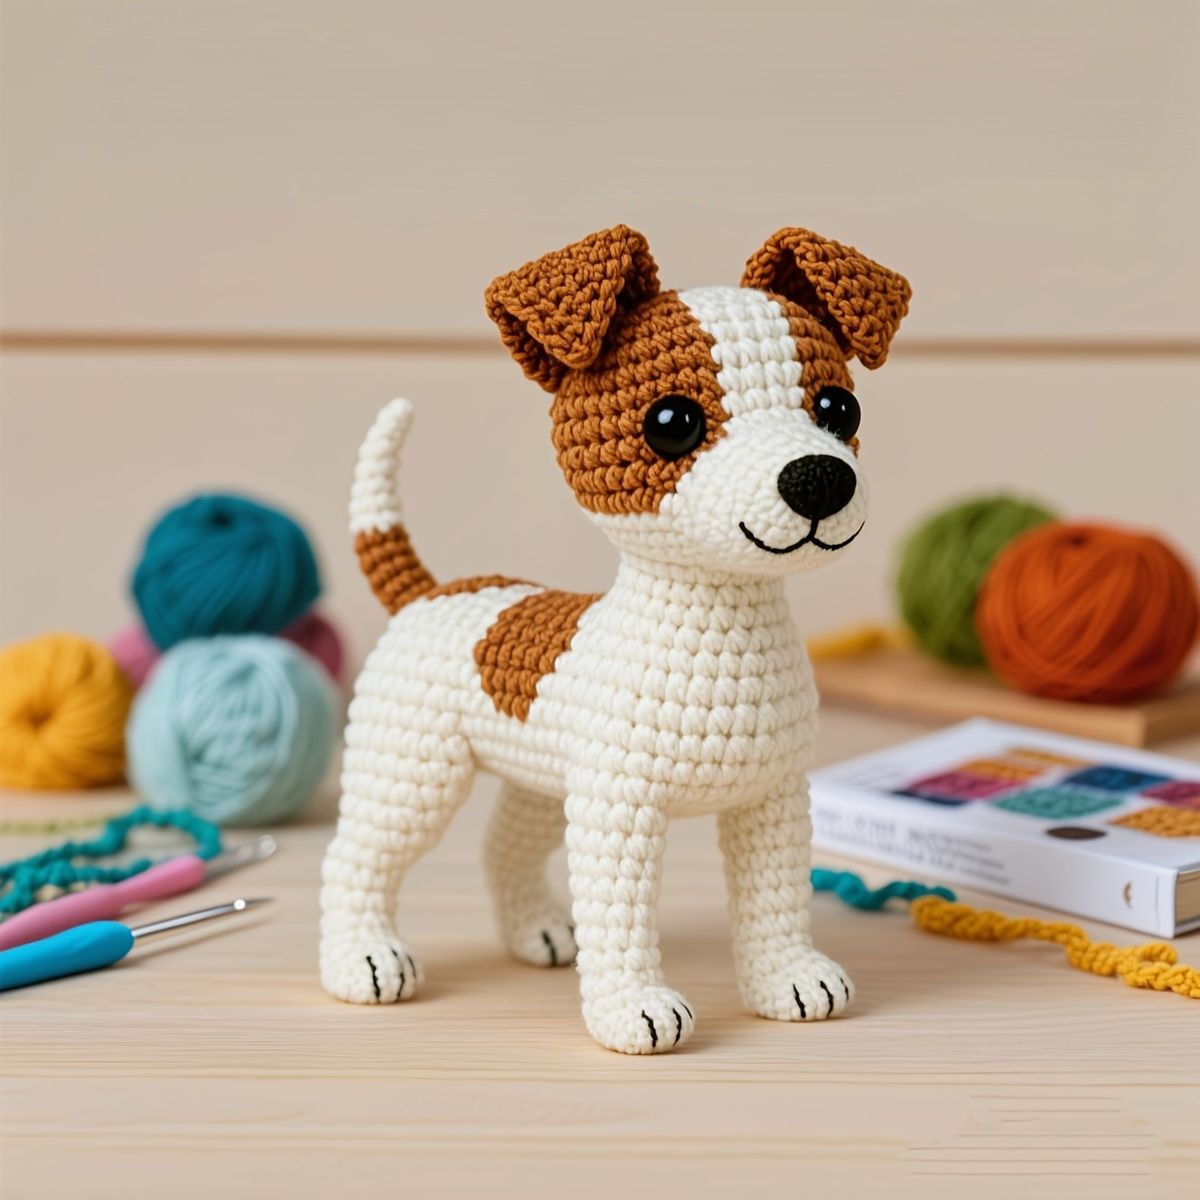
Overview & Inspiration
Welcome, fellow yarn enthusiasts! If you are looking for a creative, heartwarming handmade project that combines your love for dogs with the art of amigurumi, you are in the right place.
This Jack Russell Terrier amigurumi captures all the energetic spirit, intelligent expression, and iconic coat markings of the beloved breed. Whether you want to honor a pet of your own or gift a charming toy, this step-by-step guide will walk you through every loop and stitch!
Materials & Supplies Needed
- Medium-weight (Worsted / Aran) cotton or acrylic yarn in White, Brown (or Black), and a small amount of Black for embroidery.
- Crochet hook: 3.0 mm (US size C/2 or D/3), or a size smaller than recommended on your yarn label to keep stitches tight.
- High-quality polyester fiberfill stuffing.
- Safety eyes: 8 mm to 10 mm.
- Yarn needle (tapestry needle) for sewing parts together.
- Stitch markers for tracking continuous rounds.
- Scissors and sewing pins.
Stitches & Abbreviations
- mr: Magic Ring
- ch: Chain
- sc: Single Crochet
- inc: Single Crochet Increase (2 sc in the same stitch)
- dec: Invisible Decrease (sc 2 stitches together)
- sl st: Slip Stitch
- st(s): Stitch(es)
- Rnd / Row: Round or Row
Step-by-Step Pattern Instructions
Head
Working in continuous spirals with White yarn (switch to Brown for patches as desired):
- Rnd 1: Start 6 sc in a mr [6 sts]
- Rnd 2: [inc] around [12 sts]
- Rnd 3: [sc 1, inc] around [18 sts]
- Rnd 4: [sc 2, inc] around [24 sts]
- Rnd 5 – 9: sc in each st around [24 sts]
- Rnd 10: [sc 2, dec] around [18 sts]. Insert safety eyes between Rnds 7 and 8, about 6 sts apart. Begin stuffing firmly.
- Rnd 11: [sc 1, dec] around [12 sts]
- Rnd 12: [dec] around [6 sts]. Fasten off and weave closed.
Body
Starting from the bottom up with White yarn:
- Rnd 1: Start 6 sc in a mr [6 sts]
- Rnd 2: [inc] around [12 sts]
- Rnd 3: [sc 1, inc] around [18 sts]
- Rnd 4 – 8: sc in each st around [18 sts]
- Rnd 9: [sc 1, dec] around [12 sts]. Stuff the body firmly.
- Rnd 10: [dec] around [6 sts]. Fasten off, leaving a long tail for sewing to the head.
Legs (Make 4)
Using White yarn:
- Rnd 1: Start 5 sc in a mr [5 sts]
- Rnd 2: [inc] around [10 sts]
- Rnd 3 – 5: sc in each st around [10 sts]
- Fasten off, leave a tail for sewing, and stuff lightly. Make two slightly thinner front legs and two sturdier back legs if desired.
Ears (Make 2)
Working in rows with Brown yarn to create a flat, foldable triangle:
- Row 1: Ch 5, starting in 2nd ch from hook, sc 4 [4 sts], ch 1, turn.
- Row 2: Dec, sc 2 [3 sts], ch 1, turn.
- Row 3: Dec, sc 1 [2 sts], ch 1, turn.
- Row 4: Dec [1 st]. Fasten off, leaving a long tail for attaching to the head.
Assembly & Finishing Touches
Take your time pinning all your crocheted components together before sewing to ensure a balanced, professional silhouette.
Securely stitch the head to the top of the body, making sure the neck supports the head weight. Attach the four legs evenly to the lower body so your terrier stands proudly.
Position the triangular ears slightly forward on the upper sides of the head to capture that alert, playful expression. Finally, use black yarn to embroider a small nose and mouth, and attach a tiny cylindrical tail to the back.
Pro Tips for Flawless Results
- Maintain consistent, firm tension to prevent the stuffing from showing through your stitches.
- Use a crochet hook size slightly smaller than recommended on your yarn label for tight, polished fabric.
- Always use stitch markers when working in continuous spirals to keep your round counts accurate.
- Pin all parts in place before stitching to test different head angles and ear folds.
Frequently Asked Questions
What skill level is required for this pattern?
This pattern is ideal for advanced beginners to intermediate crocheters. As long as you are comfortable with basic stitches like single crochet, increases, and decreases, you will do wonderfully!
Can I customize the color patches?
Absolutely! Feel free to swap out the brown yarn for black, tan, or gray patches to match a beloved real-life pet.
How do I wash my finished amigurumi?
We recommend gentle spot cleaning with a damp cloth and mild soap to keep your handmade dog looking fresh and clean.
Watch the Full Step-by-Step Video Tutorial
Prefer visual guidance? Follow along with the complete video tutorial below at your own pace: